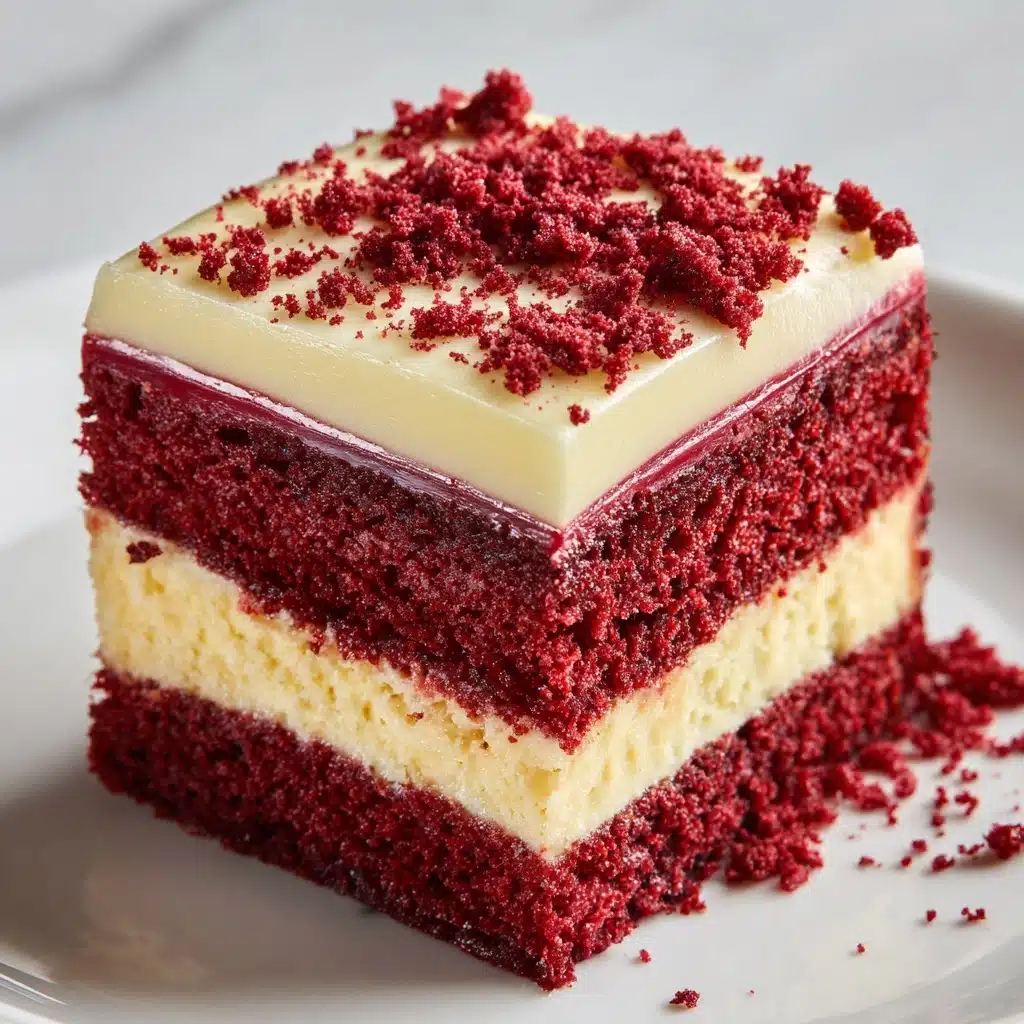
Homemade Red Velvet Brownie Dippers Recipe
Delightfully tender, lushly colored, and just the right amount of chocolatey, these Homemade Red Velvet Brownie Dippers are about to become your new go-to treat for parties, potlucks, or whenever you want to bring a little extra joy to dessert time. With their signature red velvet flavor, a playful dip in creamy white chocolate, and a crowd-pleasing shape that invites plenty of dipping and dunking, this recipe delivers on taste and presentation. Each batch is gorgeous and festive straight from the oven—perfect for sharing with friends or gifting to someone special. Trust me, after one bite of these Homemade Red Velvet Brownie Dippers, you’ll wonder why you ever made brownies any other way!
Ingredients You’ll Need
Ingredients You’ll Need
You’ll be amazed at how simple and familiar the ingredients are for these Homemade Red Velvet Brownie Dippers. Each one brings something important to the table—the buttery richness, vibrant red color, and signature tangy chocolate flavor all depend on this easy but perfectly balanced mix.
- Unsalted butter, melted: Rich and creamy, the melted butter is the starting point for fudgy, tender brownies.
- Granulated sugar: This brings the sweetness and helps create that irresistible crinkly brownie crust.
- Large eggs: Two eggs provide structure, chew, and just the right fudgy texture.
- Red food coloring: The must-have ingredient for the deep red velvet hue—gel or liquid both work well!
- Vanilla extract: Adds warmth and layers of flavor to balance the chocolate notes.
- Unsweetened cocoa powder: Not too much—just enough for that subtle cocoa taste that’s classic for red velvet.
- All-purpose flour: Gives structure without making the brownies tough.
- Salt: That little pinch brings out all the best flavors—the brownies won’t taste flat!
- White vinegar: A tip from Southern red velvet cakes, this subtle addition brightens the flavor and keeps the texture tender.
- White chocolate chips or melting wafers (for dipping): The sweet finish that makes these brownies extra-special and ready for dipping.
How to Make Homemade Red Velvet Brownie Dippers
Step 1: Prep Your Pan and Oven
Before you even crack the eggs, get your oven heating to 350°F (175°C). Line an 8×8-inch baking pan with parchment paper—leaving a little overhang so you can easily lift out the brownies later. This small touch makes cleanup a breeze and ensures you can slice your dippers cleanly.
Step 2: Mix the Buttery Base
In a mixing bowl, whisk together your melted butter and sugar until the mix looks beautifully glossy and smooth. This step helps dissolve the sugar for a shiny, crinkly top. Take a moment to appreciate the lush aroma!
Step 3: Add Wet Ingredients and Color
Add the eggs, red food coloring, vanilla extract, and vinegar to your butter-sugar mixture. Whisk until everything is completely combined and vibrant—the batter should be a stunning, rich red at this stage. The vinegar is key for that genuine red velvet tang!
Step 4: Fold in Dry Ingredients
Sift in the cocoa powder, flour, and salt directly over the bowl to avoid lumps. Gently stir the batter just until you don’t see any streaks of flour—don’t over-mix, or your brownies might turn out cakey.
Step 5: Bake to Perfection
Pour the batter into your prepared pan and smooth the top with a spatula. Slide it into the oven and bake for 20 to 24 minutes. You’re looking for a toothpick in the center to come out with a few moist crumbs—overbaking leads to dry, sad brownies, so keep a close eye in the last few minutes.
Step 6: Cool Completely and Slice Into Dippers
Once out of the oven, let the brownies cool fully in the pan. Patience is everything here; the texture gets fudgier as they rest. When they’re ready, use the parchment to lift the brownies out and, with a sharp knife, slice into long, elegant strips perfect for dipping.
Step 7: Dip in White Chocolate
Melt your white chocolate chips or wafers according to the package directions. Dip one end of each brownie dipper into the chocolate, letting any excess drip off. Lay the dippers on a parchment-lined tray to set. This not only looks beautiful—it adds a sweet, creamy finish to every bite.
How to Serve Homemade Red Velvet Brownie Dippers
Garnishes
Dress up your tray of Homemade Red Velvet Brownie Dippers with a playful drizzle of extra white chocolate or a few festive sprinkles on top before the chocolate sets. For a showstopping holiday platter, try a dusting of edible glitter or a handful of tiny nonpareils to really make the colors pop!
Side Dishes
Pair these brownie dippers with a scoop of vanilla bean ice cream, a generous swirl of whipped cream, or a bowl of tangy cream cheese frosting for even more dipping fun. Hosting a party? They’re perfect alongside fresh berries or as part of a dessert board with other bite-sized treats.
Creative Ways to Present
Try serving these treats in mason jars or tall glasses, brownie-dipper side up, for a whimsical finger-food display that guests love. Arrange on a platter with extra white chocolate for dipping, or stack in a gift box for a heartfelt homemade present.
Make Ahead and Storage
Storing Leftovers
Keep your Homemade Red Velvet Brownie Dippers fresh by storing them in an airtight container at room temperature. They’ll stay tender and delicious for up to 3 days—making them ideal for prepping ahead of time or sharing over several days.
Freezing
To freeze, lay the brownie dippers (chocolate side up!) on a lined tray and freeze until solid, then transfer to a resealable freezer bag. They’ll keep beautifully for up to two months. Thaw at room temperature for that fresh-baked texture.
Reheating
Brownie dippers are best enjoyed at room temperature, but if you want to revive that just-baked magic, try microwaving them for 5-10 seconds before serving. This brings back the fudgy center and makes the chocolate extra dreamy.
FAQs
Can I use gel food coloring instead of liquid?
Absolutely! Gel food coloring works just as well and often gives an even more vibrant red color to your Homemade Red Velvet Brownie Dippers. Just adjust the amount—start with a small squeeze and add more as needed for your perfect shade.
Can I double the recipe for a bigger crowd?
Yes! Simply double all the ingredients and bake in a 9×13-inch pan. You might need to add a couple extra minutes to the bake time; keep an eye on that toothpick for the perfect fudge factor.
What’s the best way to dip the brownies in white chocolate?
Hold each brownie dipper by one end and dip the opposite end into the melted white chocolate, letting the excess drip off. You can use a spoon to help coat or create an extra-drizzly effect for more texture and flavor.
Can I make these gluten free?
Yes! Swap the all-purpose flour with your favorite 1:1 gluten-free baking blend. The results are just as delicious—no one will even notice the swap in your Homemade Red Velvet Brownie Dippers.
Is there a substitute for white chocolate?
For a twist, try dipping the brownies in milk or dark chocolate, or use a cream cheese glaze for a more traditional red velvet combination. Each version is fantastic and brings a different flavor note to the party!
Final Thoughts
If you’re looking for a festive, fun, and downright delicious treat, these Homemade Red Velvet Brownie Dippers are the answer. Their perfect balance of fudgy, chocolatey crumb and a hint of tangy red velvet richness is irresistible. Give them a try soon—you’ll never look at brownies the same way again!
Print
Homemade Red Velvet Brownie Dippers Recipe
- Total Time: 39 minutes
- Yield: 16 brownie dippers 1x
- Diet: Vegetarian
Description
Indulge in these delightful Homemade Red Velvet Brownie Dippers – a perfect combination of rich red velvet flavor and creamy white chocolate. These brownie strips are easy to make and even more fun to eat!
Ingredients
Brownie Dippers:
- 1/2 cup unsalted butter, melted
- 1 cup granulated sugar
- 2 large eggs
- 1 tablespoon red food coloring
- 1 teaspoon vanilla extract
- 1/4 cup unsweetened cocoa powder
- 3/4 cup all-purpose flour
- 1/4 teaspoon salt
- 1/2 teaspoon white vinegar
For Dipping:
- 1/2 cup white chocolate chips or melting wafers
Instructions
- Preheat the oven and prepare the pan: Preheat the oven to 350°F (175°C) and line an 8×8-inch baking pan with parchment paper, leaving an overhang for easy removal.
- Mix wet ingredients: In a mixing bowl, whisk together melted butter and sugar until smooth. Add eggs, red food coloring, vanilla extract, and vinegar, mixing until well combined.
- Add dry ingredients: Sift in cocoa powder, flour, and salt, stirring just until no dry streaks remain.
- Bake: Pour the batter into the prepared pan and bake for 20–24 minutes. Cool completely.
- Cut into strips: Lift out the brownies using the parchment and slice into long, thin strips.
- Dip in chocolate: Melt white chocolate and dip one end of each brownie strip. Let set before serving.
Notes
- For a fun twist, drizzle extra white chocolate over the dippers or use cream cheese frosting for dipping.
- Store in an airtight container at room temperature for up to 3 days.
- Prep Time: 15 minutes
- Cook Time: 24 minutes
- Category: Dessert
- Method: Baking
- Cuisine: American
Nutrition
- Serving Size: 1 dipper
- Calories: 160
- Sugar: 14g
- Sodium: 75mg
- Fat: 8g
- Saturated Fat: 5g
- Unsaturated Fat: 2g
- Trans Fat: 0g
- Carbohydrates: 21g
- Fiber: 1g
- Protein: 2g
- Cholesterol: 35mg