Stenciled Halloween Sprinkle Cake Recipe
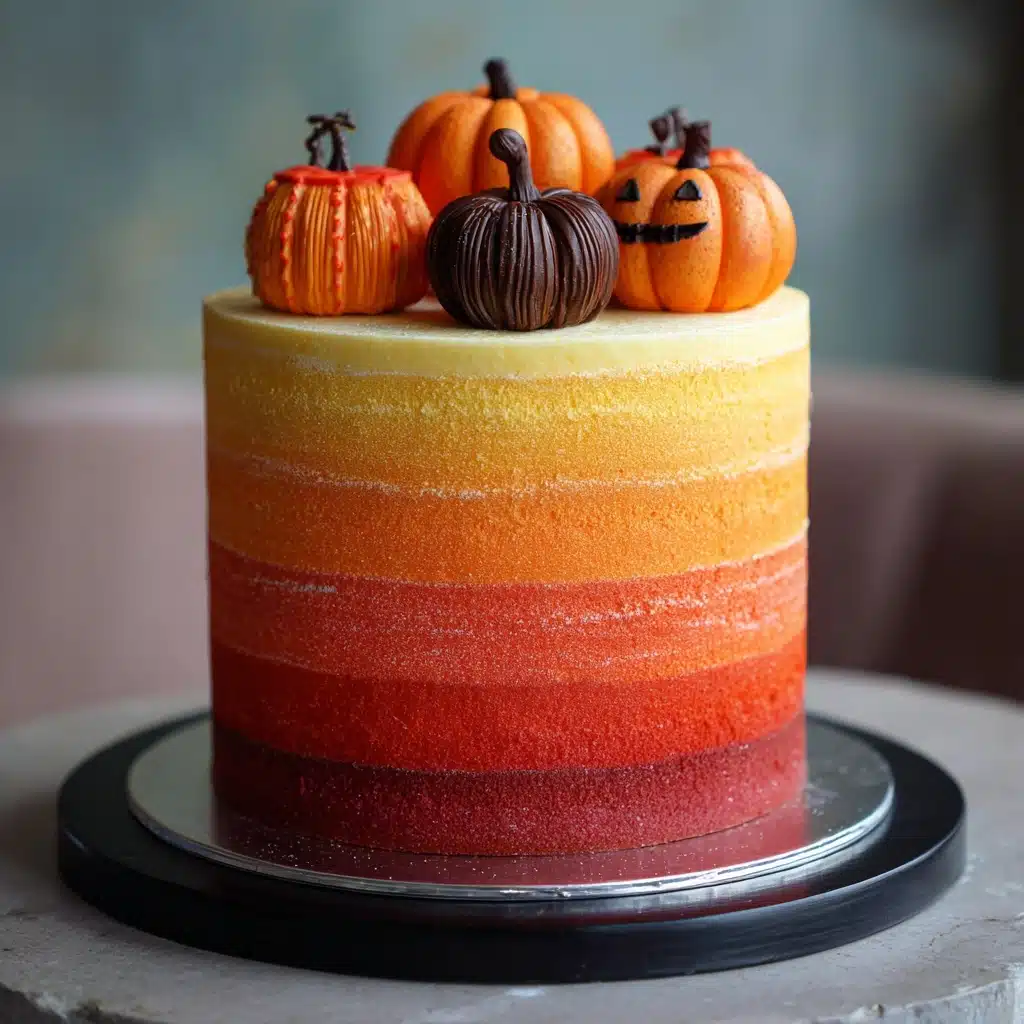
If you’re searching for a show-stopping centerpiece for your spooky season spread, the Stenciled Halloween Sprinkle Cake is the ultimate treat. This festive dessert is as fun to make as it is to serve, featuring soft, sprinkle-speckled layers, creamy buttercream in hauntingly bright hues, and a stenciled top that’s pure Halloween magic. Whether you’re hosting a costume bash or just want to bring a little enchantment to your family table, this cake delivers unforgettable style, flavor, and a flourish of creativity with every slice.
Ingredients You’ll Need
Gathering the ingredients for this Stenciled Halloween Sprinkle Cake is refreshingly simple—yet each element plays an essential role in building flavor, texture, and show-stopping Halloween color. From pantry staples to festive sprinkles, every item helps turn your usual cake into a seasonal masterpiece.
- All-purpose flour: Gives the cake its tender, sturdy crumb—be sure to measure for best results.
- Baking powder: Lifts the cake layers for that perfect, fluffy texture.
- Salt: Enhances all the sweet and buttery notes without making the cake taste salty.
- Unsalted butter (softened): Adds rich flavor and ensures a soft, moist bite—plus, it’s key for creamy frosting.
- Granulated sugar: Sweetens the cake just right and helps create that light, airy crumb.
- Large eggs: Bring structure and a luscious richness to the batter.
- Vanilla extract: A warm, comforting background note that makes the cake taste homemade.
- Whole milk: Keeps the crumb moist and tender, making every forkful melt in your mouth.
- Halloween-themed sprinkles: The star of the show! These add pops of color and festive crunch throughout the cake.
- Powdered sugar: Essential for silky-smooth buttercream and for dusting on that stenciled design.
- Milk or heavy cream: Helps achieve the perfect frosting consistency—extra creamy and easy to spread.
- Gel food coloring (orange, purple, or black): Gives your frosting those vivid Halloween colors you can’t resist.
- Stencils (bat, spiderweb, ghost, etc.): These create crisp, spooky shapes on your cake—choose bold, food-safe designs.
- Cocoa powder (optional): For dusting over stencils if you want a chocolatey contrast on top.
How to Make Stenciled Halloween Sprinkle Cake
Step 1: Prep Your Pans and Ingredients
Preheat your oven to 350°F. Grease and flour two 8-inch round cake pans, then line the bottoms with parchment paper—this ensures your Stenciled Halloween Sprinkle Cake layers pop out perfectly. Measure out all your ingredients so you’re ready to go, and let your butter and eggs come to room temperature for the smoothest batter.
Step 2: Mix the Dry and Wet Ingredients
In a medium bowl, whisk together the flour, baking powder, and salt. In a separate large mixing bowl, beat the softened butter with granulated sugar until it’s pale and fluffy—this takes about 3 to 4 minutes and is key to a light cake. Add the eggs one at a time, mixing well after each, then stir in the vanilla extract for that irresistible, sweet aroma.
Step 3: Combine Everything and Add Sprinkles
Alternate adding the dry ingredients and milk to the butter mixture, beginning and ending with the dry ingredients. This method keeps your batter silky and lump-free. Once everything is just combined, gently fold in the Halloween-themed sprinkles. This is the moment your cake transforms into a confetti-filled party!
Step 4: Bake the Cake Layers
Divide the batter evenly between the prepared pans, smoothing the tops. Slide them into the oven and bake for 30 to 35 minutes, until a toothpick inserted in the center comes out clean. Let the cakes cool in the pans for about 10 minutes, then turn them out onto wire racks to cool completely—this helps lock in moisture without making the cakes soggy.
Step 5: Make the Buttercream Frosting
While your cake layers cool, beat the softened butter until smooth and creamy. Gradually add powdered sugar, pausing to scrape down the bowl, then mix in milk or heavy cream and vanilla. Whip until your frosting is airy and spreadable. Tint the buttercream with your chosen gel food coloring for that Halloween wow-factor—think vivid orange, deep purple, or spooky black.
Step 6: Assemble and Frost
Place one cake layer on your serving plate and spread a generous layer of colored buttercream on top. Add the second layer, then frost the entire cake, smoothing the sides and top for a polished look. Don’t worry if it’s not perfect—the fun is in the decorating!
Step 7: Stencil and Decorate
Now for the magic! Gently place your chosen stencil on top of the frosted cake. Using a fine mesh sieve, dust powdered sugar or cocoa powder over the stencil, then carefully lift it away to reveal your festive design. Finish off your Stenciled Halloween Sprinkle Cake with a ring of Halloween sprinkles around the base or edges for extra flair.
How to Serve Stenciled Halloween Sprinkle Cake

Garnishes
The stenciled top is a showpiece on its own, but a handful of extra Halloween-themed sprinkles around the top edge or base adds irresistible color and crunch. Edible glitter or shimmering sugar crystals can make your cake look like it’s straight from a haunted bakery!
Side Dishes
Pair your Stenciled Halloween Sprinkle Cake with cold glasses of milk for the kids, or spiced apple cider for the adults. If you want to round out the dessert table, serve alongside classic Halloween treats like caramel apples, peanut butter cups, or even a scoop of vanilla ice cream to balance the sweetness.
Creative Ways to Present
For a truly memorable presentation, set the cake on a black cake stand surrounded by mini pumpkins, plastic spiders, or faux cobwebs. Slice at the table to reveal the sprinkle-studded interior, and serve big wedges so everyone gets plenty of frosting and decoration with every bite. You can even let guests dust their own stenciled design on individual slices for interactive fun!
Make Ahead and Storage
Storing Leftovers
Cover leftover Stenciled Halloween Sprinkle Cake tightly with plastic wrap or store in an airtight cake container. It will stay moist and delicious at room temperature for up to two days, or in the refrigerator for up to five days—just let it come to room temperature before serving for the best texture.
Freezing
The cake layers freeze beautifully! Wrap unfrosted layers tightly in plastic and then foil, and freeze for up to three months. Thaw overnight in the refrigerator before frosting and decorating. If you have frosted cake leftovers, freeze individual slices on a parchment-lined tray, then wrap and store for grab-and-go treats.
Reheating
You don’t actually need to reheat this cake, but if you love a slightly warm slice, pop it in the microwave for 10 seconds to soften the buttercream and bring out that fresh-baked aroma. Just be careful not to melt the frosting or decorations!
FAQs
Can I use box cake mix instead of making the cake from scratch?
Absolutely! If you’re short on time, a vanilla box cake mix works well—just fold in the Halloween sprinkles as you would with the homemade batter. The real magic is in the stenciled decoration and colorful buttercream, so feel free to take this shortcut.
What’s the best way to get sharp stencil designs on the cake?
Make sure your buttercream is well chilled and smooth before stenciling, and use a food-safe stencil with bold, simple shapes. Hold the stencil very flat and dust lightly with powdered sugar or cocoa powder for crisp edges. Practice on a plate first if you’re nervous!
Can I make the Stenciled Halloween Sprinkle Cake gluten-free?
Yes, just use a high-quality gluten-free all-purpose flour blend in place of regular flour. Check your other ingredients (like sprinkles and baking powder) to be sure they’re gluten-free as well. Your cake will turn out just as festive and delicious.
How do I prevent sprinkles from bleeding their color into the cake?
Use “jimmies” style sprinkles rather than nonpareils, as they tend to hold their color better when baked. Gently fold them in at the very end and bake your layers right away for the brightest sprinkle pattern.
Can I make this as cupcakes instead of a layer cake?
Definitely! Divide the batter among cupcake liners and bake at 350°F for 18–22 minutes. Frost and stencil each cupcake individually for adorable, personalized Halloween treats.
Final Thoughts
If you’re ready to wow your friends, family, or party guests, there’s no better treat than a homemade Stenciled Halloween Sprinkle Cake. It’s a celebration of color, creativity, and flavor that brings everyone together for a little spooky-season fun. Give it a try this Halloween—you might find yourself making it a new tradition!
Print
Stenciled Halloween Sprinkle Cake Recipe
- Total Time: 1 hour 5 minutes (plus cooling time)
- Yield: 12 servings 1x
- Diet: Vegetarian
Description
This delightful Stenciled Halloween Sprinkle Cake combines a moist, tender vanilla cake dotted with festive Halloween-themed sprinkles, layered and frosted with rich, colorful buttercream. Finished with creative Halloween stencil designs dusted with powdered sugar or cocoa powder, it makes a perfect spooky centerpiece for parties and celebrations.
Ingredients
For the Cake:
- 2 1/2 cups all-purpose flour
- 2 1/2 teaspoons baking powder
- 1/2 teaspoon salt
- 1 cup unsalted butter, softened
- 1 3/4 cups granulated sugar
- 4 large eggs
- 1 tablespoon vanilla extract
- 1 cup whole milk
- 1/2 cup Halloween-themed sprinkles
For the Buttercream Frosting:
- 1 cup unsalted butter, softened
- 4 cups powdered sugar
- 2–3 tablespoons milk or heavy cream
- 1 teaspoon vanilla extract
- Gel food coloring (orange, purple, or black)
- Halloween sprinkles for decorating
For the Stencil Decoration:
- Stencils (bat, spiderweb, ghost, etc.)
- Powdered sugar or cocoa powder for dusting
Instructions
- Prepare the pans and dry ingredients: Preheat the oven to 350°F. Grease and flour two 8-inch round cake pans and line the bottoms with parchment paper. In a medium bowl, whisk together the flour, baking powder, and salt until fully combined.
- Cream butter and sugar: In a large mixing bowl, beat the softened butter and granulated sugar together with a hand or stand mixer on medium speed until light and fluffy, about 3–4 minutes.
- Add eggs and vanilla: Add the eggs one at a time, mixing thoroughly after each addition. Then mix in the vanilla extract to combine evenly.
- Combine wet and dry ingredients: Add the dry ingredients to the butter mixture in three parts, alternating with the milk. Begin and end with the flour mixture, mixing gently to combine after each addition.
- Fold in sprinkles and divide batter: Gently fold the Halloween-themed sprinkles into the batter to distribute evenly. Divide the batter evenly between the prepared pans and smooth the tops with a spatula.
- Bake the cakes: Place the pans in the oven and bake for 30–35 minutes, or until a toothpick inserted into the center comes out clean. Let the cakes cool in the pans for 10 minutes before transferring them to wire racks to cool completely.
- Make the buttercream frosting: Beat the softened butter until smooth using a mixer on medium speed. Gradually add powdered sugar until fully incorporated. Add milk or cream and vanilla extract, then beat until fluffy. Tint the frosting using gel food coloring to desired Halloween colors like orange, purple, or black.
- Assemble and frost the cake: Place one cake layer on a serving plate. Spread a layer of frosting evenly on top, then place the second cake layer on top. Cover the entire cake with a smooth layer of frosting using a spatula.
- Stencil decoration: Gently place a Halloween-themed stencil (bat, ghost, spiderweb, etc.) on top of the frosted cake. Dust lightly with powdered sugar or cocoa powder through a fine mesh sieve. Carefully lift the stencil to reveal the design.
- Final touches: Decorate the base or edges of the cake with additional Halloween sprinkles as desired. Refrigerate briefly if needed to set the frosting before serving.
Notes
- Make the cake layers a day ahead and chill them before frosting for easier decorating and cleaner layers.
- Choose bold-shaped food-safe plastic or paper stencils to ensure clear, crisp designs on the cake.
- Gel food coloring provides vibrant colors without thinning the frosting texture.
- Use a fine mesh sieve to evenly dust powdered sugar or cocoa powder for stencil decoration.
- Prep Time: 30 minutes
- Cook Time: 35 minutes
- Category: Dessert
- Method: Baking
- Cuisine: American
Nutrition
- Serving Size: 1 slice
- Calories: 470
- Sugar: 45g
- Sodium: 160mg
- Fat: 25g
- Saturated Fat: 15g
- Unsaturated Fat: 9g
- Trans Fat: 0g
- Carbohydrates: 58g
- Fiber: 1g
- Protein: 4g
- Cholesterol: 105mg