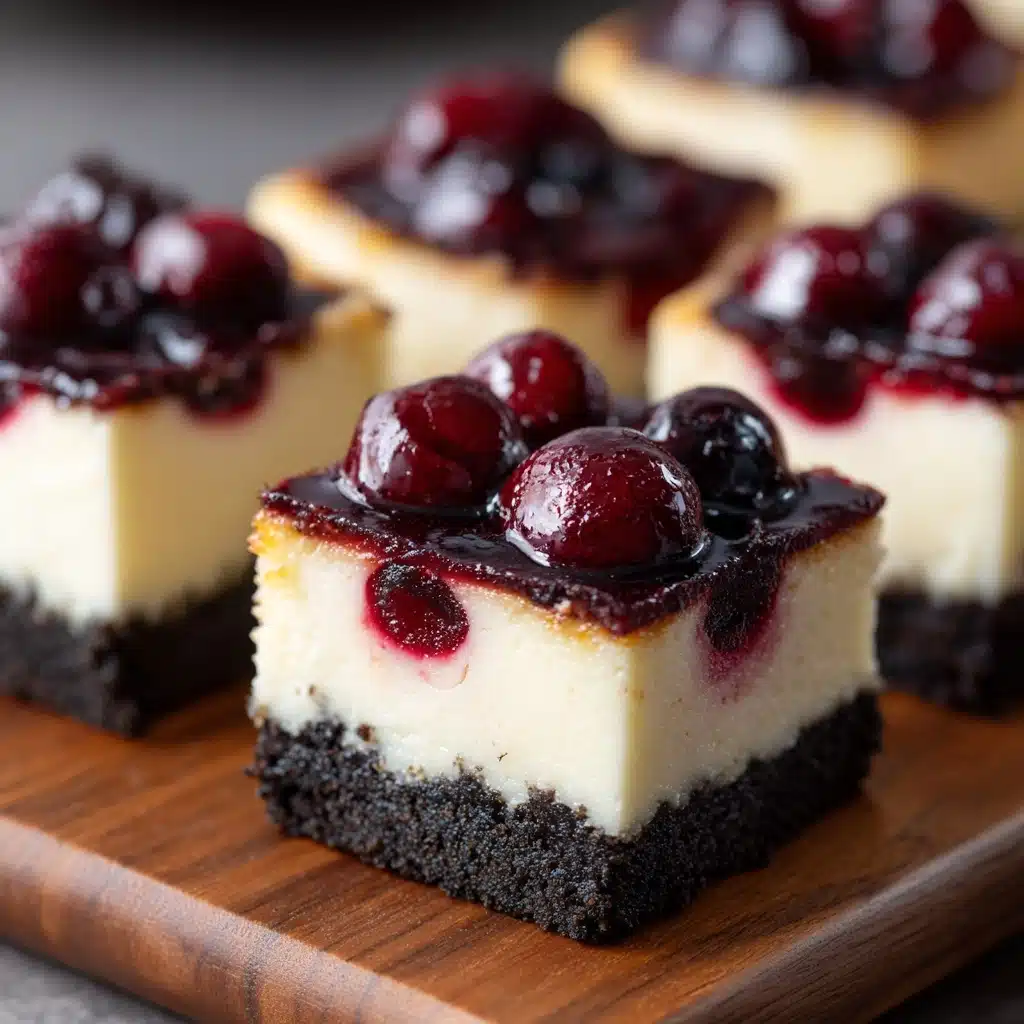
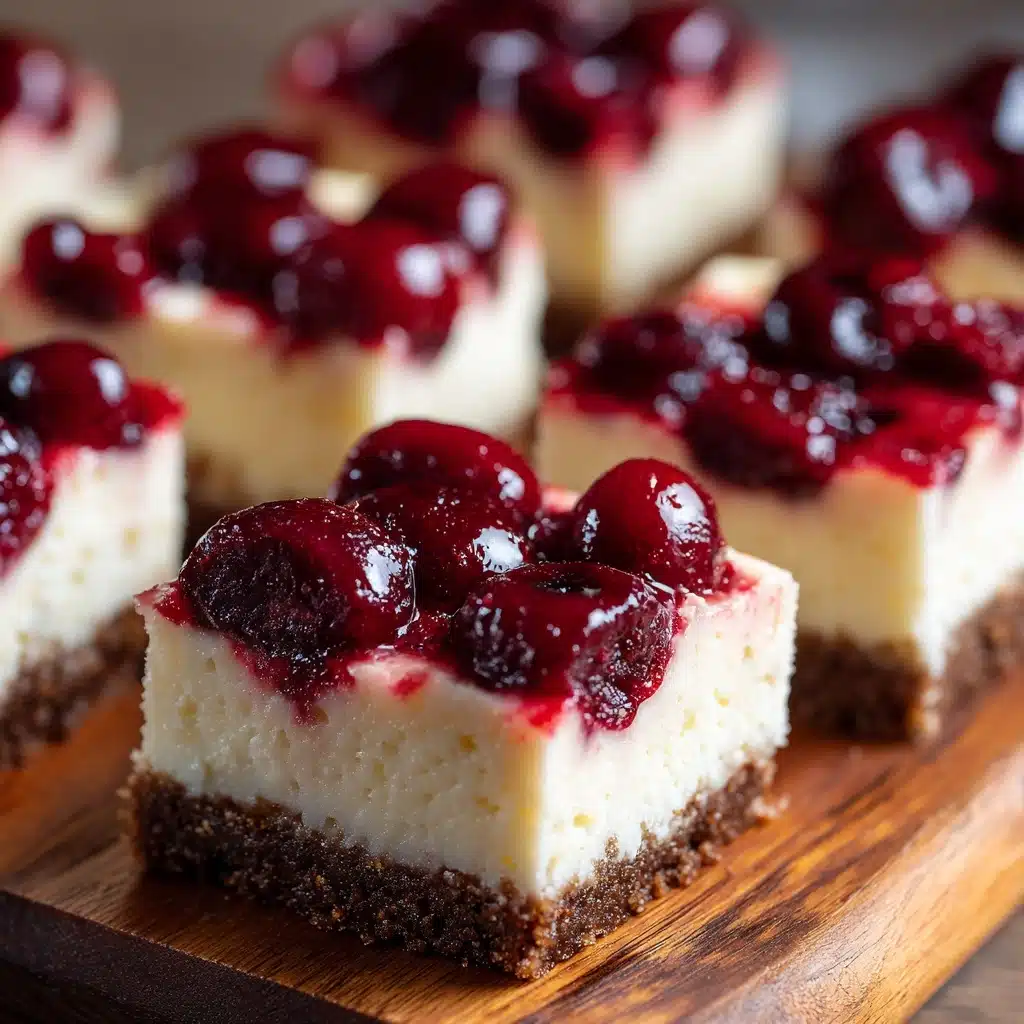
Cherry Cheesecake Bars Recipe
Cherry Cheesecake Bars are the kind of dessert that brightens up any table and instantly puts smiles on faces. These bars feature a buttery graham cracker crust, a rich and creamy cheesecake layer, and a crown of glossy cherry pie filling. They’re easy enough for a weekday treat, but beautiful enough to steal the show at gatherings. Whether you’re an experienced baker or new to cheesecake, you’ll love how these bars combine irresistible flavors and textures in every bite.
Ingredients You’ll Need
You’ll be amazed at how a handful of everyday ingredients come together to create something truly special. Each one plays a starring role—whether it’s building the base, making the filling velvety, or adding that iconic cherry topping.
- Graham cracker crumbs: The classic foundation for cheesecake bars, offering a sweet, crunchy texture and that familiar buttery flavor.
- Granulated sugar: Used in both the crust and filling to balance tanginess and sweetness throughout every layer.
- Unsalted butter (melted): Binds the crumbs together and gives the crust its irresistible richness.
- Cream cheese (softened): The heart of any cheesecake, providing luscious, creamy texture and a subtle tang.
- Large eggs: Essential for structure, they help the cheesecake set up perfectly while staying smooth.
- Vanilla extract: Adds warmth and depth, enhancing all the other flavors in the bars.
- All-purpose flour: Just a touch thickens the filling a bit, giving each bar a neat, easy-to-slice finish.
- Cherry pie filling: The vibrant, fruity topping that not only looks stunning but adds a burst of sweet-tart cherry flavor.
How to Make Cherry Cheesecake Bars
Step 1: Prepare Your Pan and Preheat
Begin by preheating your oven to 325°F (163°C) and lining a 9×13-inch baking pan with parchment paper, leaving an overhang on both sides. This little trick makes lifting out the bars later a total breeze, and cleanup is effortless.
Step 2: Make the Graham Cracker Crust
In a medium bowl, stir together the graham cracker crumbs, 1/4 cup of sugar, and melted butter until the mixture resembles wet sand. Pour it into your prepared pan and press it firmly and evenly across the bottom. If you like a firmer, crunchier base, you can pre-bake the crust for 8 minutes before adding the filling.
Step 3: Prepare the Cheesecake Filling
Grab a large bowl and beat the softened cream cheese until it’s absolutely smooth—no lumps allowed! Add in the remaining 1/2 cup of sugar and continue to beat until the mixture is light and fluffy. Beat in the eggs one at a time, then gently mix in the vanilla extract and flour just until combined. This method guarantees a silky-smooth cheesecake layer.
Step 4: Assemble and Bake
Pour the creamy filling over the prepared crust, smoothing it into an even layer. Pop the pan into your preheated oven and bake for 30 to 35 minutes, or until the center is set and the edges are just turning golden. The bars should have a subtle jiggle in the center—don’t overbake!
Step 5: Cool, Chill, and Top with Cherries
Let the pan cool completely on a wire rack. Once cooled, refrigerate for at least 2 hours so the bars firm up and slice neatly. After chilling, spread the cherry pie filling evenly over the cheesecake, then lift everything out using the parchment overhang. Slice into bars and get ready to wow your taste buds!
How to Serve Cherry Cheesecake Bars
Garnishes
A dollop of freshly whipped cream or a sprinkle of white chocolate curls can make Cherry Cheesecake Bars look even more inviting. For a fancy touch, add a mint leaf or a dusting of powdered sugar just before serving.
Side Dishes
Pair these bars with a fresh fruit salad, a scoop of vanilla ice cream, or a handful of salty nuts for a delightful contrast. They also shine alongside a cup of coffee or a fruity herbal tea for a well-rounded dessert experience.
Creative Ways to Present
Stack the bars on a tiered dessert stand for parties, or serve each one in a cupcake liner for easy grab-and-go treats at potlucks. For a playful twist, cut the bars into bite-sized squares and skewer them with toothpicks for a cheesecake bar “sampler” platter.
Make Ahead and Storage
Storing Leftovers
Keep any leftover Cherry Cheesecake Bars in an airtight container in the refrigerator. They’ll stay fresh and delicious for up to five days, making them a great make-ahead option for gatherings or weekday indulgence.
Freezing
To freeze, arrange the bars (preferably without the cherry topping) in a single layer on a baking sheet until firm, then wrap them individually and store in a freezer-safe container. Add the cherry topping after thawing for the best texture and flavor.
Reheating
While Cherry Cheesecake Bars are best enjoyed chilled, if you prefer a softer bite, let them sit at room temperature for about 15 minutes before serving. There’s no need to reheat in the oven or microwave—just slice, serve, and enjoy!
FAQs
Can I use homemade cherry topping instead of canned?
Absolutely! If you have fresh or frozen cherries, you can make your own easy cherry compote. Just cook cherries with a bit of sugar and cornstarch until thickened, then let it cool before spreading over the bars.
How do I prevent cracks in the cheesecake layer?
Be sure not to overmix the batter, especially after adding the eggs. Also, avoid overbaking—the bars should still have a slight jiggle in the center when you take them out of the oven.
Can I make these gluten-free?
Yes! Simply use gluten-free graham crackers for the crust and ensure your cherry pie filling and other ingredients are gluten-free. The rest of the recipe remains the same.
Can I substitute the cherry pie filling with other fruits?
Definitely. Blueberry, strawberry, or even raspberry pie filling work beautifully in these bars, offering new flavors and colors while keeping the process just as easy.
Why do the bars need to chill before slicing?
Chilling allows the cheesecake layer to set completely, making it much easier to slice cleanly and helping the flavors meld together for the perfect bite every time.
Final Thoughts
If you’re looking for a dessert that’s just as fun to make as it is to eat, you can’t go wrong with Cherry Cheesecake Bars. Each layer brings something special, and the final result is pure joy in bar form. Give them a try—you’ll love sharing (and sneaking seconds!) with friends and family.
Print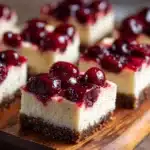
Cherry Cheesecake Bars Recipe
- Total Time: 2 hours 50 minutes
- Yield: 12 bars 1x
- Diet: Non-Vegetarian
Description
These Cherry Cheesecake Bars feature a buttery graham cracker crust topped with a creamy, smooth cheesecake filling and a sweet cherry pie topping. Perfect as a classic American dessert, they are easy to make and ideal for any occasion.
Ingredients
Crust
- 1 1/2 cups graham cracker crumbs
- 1/4 cup granulated sugar
- 1/2 cup unsalted butter, melted
Cheesecake Filling
- 16 ounces cream cheese, softened
- 1/2 cup granulated sugar
- 2 large eggs
- 1 teaspoon vanilla extract
- 1 tablespoon all-purpose flour
Topping
- 1 can (21 ounces) cherry pie filling
Instructions
- Prepare the Oven and Pan: Preheat the oven to 325°F (163°C) and line a 9×13-inch baking pan with parchment paper, leaving an overhang for easy removal of the bars.
- Make the Crust: In a medium bowl, combine graham cracker crumbs, 1/4 cup granulated sugar, and melted butter. Mix until the crumbs are evenly moistened. Press the mixture firmly and evenly into the bottom of the prepared pan to form the crust layer.
- Prepare the Filling: In a large bowl, beat the softened cream cheese until smooth. Gradually add 1/2 cup sugar and continue beating until the mixture is fluffy. Add the eggs one at a time, beating well after each addition. Stir in the vanilla extract and all-purpose flour, mixing just until combined to avoid overmixing.
- Assemble and Bake: Pour the cheesecake filling evenly over the graham cracker crust in the pan. Use a spatula to smooth the top. Bake in the preheated oven for 30 to 35 minutes until the center is set and the edges turn a light golden color.
- Cool and Chill: Remove the pan from the oven and allow the cheesecake bars to cool completely on a wire rack. Once cooled, refrigerate for at least 2 hours to set properly.
- Add Cherry Topping and Serve: After chilling, spread the cherry pie filling evenly over the bars. Use the parchment paper overhang to lift the bars from the pan and place on a cutting board. Slice into 12 bars and serve chilled.
Notes
- You can substitute the cherry pie filling with blueberry or strawberry pie filling for a different fruit flavor.
- For a firmer crust, pre-bake the crust for 8 minutes before adding the cheesecake filling.
- Use full-fat cream cheese for the creamiest texture and best flavor.
- Make sure cream cheese is softened to room temperature to avoid lumps in the filling.
- Prep Time: 15 minutes
- Cook Time: 35 minutes
- Category: Dessert
- Method: Baking
- Cuisine: American
Nutrition
- Serving Size: 1 bar
- Calories: 310
- Sugar: 22g
- Sodium: 220mg
- Fat: 20g
- Saturated Fat: 11g
- Unsaturated Fat: 7g
- Trans Fat: 0g
- Carbohydrates: 29g
- Fiber: 1g
- Protein: 4g
- Cholesterol: 65mg