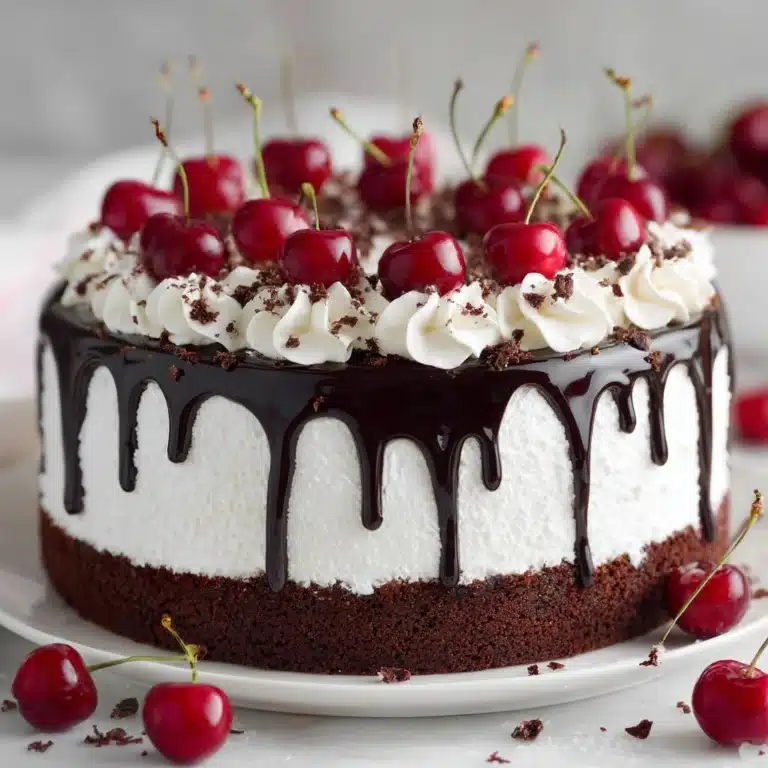
Cherry Dump Cake Recipe
If you’re looking for a dessert that’s as easy as it is irresistibly delicious, the Cherry Dump Cake Recipe is your new best friend. Imagine a luscious layer of sweet cherry pie filling topped with a buttery, crisp cake crumb that bakes together in one pan to create a perfect harmony of textures and flavors. It’s a foolproof crowd-pleaser that brings out the best of comforting fruit desserts without any fuss, making it ideal for family dinners, potlucks, or those moments when you just need a little homemade sweetness in your life.

Ingredients You’ll Need
The beauty of this Cherry Dump Cake Recipe lies in its simplicity and minimal ingredients, each playing a crucial role in building that classic flavor and inviting texture. From the vibrant cherry pie filling to the buttery crumble topping, every component is essential.
- Cherry pie filling (2 cans, 540 mL each): Provides juicy sweetness and a vibrant, beautiful base that is bursting with fruity flavor.
- Yellow or white cake mix (1 box, 15.25 oz): Acts as the crumbly, golden topping that crisps up perfectly when baked.
- Melted butter (1/2 cup): Adds richness and helps the dry cake mix bind into that irresistible crumbly topping.
How to Make Cherry Dump Cake Recipe
Step 1: Preheat and Prepare Your Dish
Start by warming your oven to 350°F (175°C). This temperature is just right to bake the cherry filling and topping to a bubbling, golden perfection. Don’t forget to spray your 9×13-inch baking dish with non-stick cooking spray to ensure the cake releases easily after baking.
Step 2: Layer the Cherry Filling
Open your two cans of cherry pie filling and evenly spread them across the bottom of your prepared baking dish. This fruity layer is what gives the cake its signature sweet and tart flavor, so make sure it’s distributed nicely.
Step 3: Mix the Crumb Topping
In a large bowl, combine the melted butter with the dry cake mix. Using your hands or a pastry blender, mix until the mixture turns into coarse crumbs—the texture should be chunky but crumbly, not smooth.
Step 4: Sprinkle the Crumbs Over the Filling
Generously sprinkle the buttery cake crumble evenly over the cherry filling. This topping will bake into a beautifully golden crust that contrasts perfectly with the juicy cherries below.
Step 5: Bake Until Golden and Bubbling
Place the baking dish in the oven and bake for 50 to 55 minutes. You’ll know it’s done when the topping is golden brown and you see the filling bubbling around the edges, signaling all that sweet goodness is heated through and ready to enjoy.
Step 6: Cool and Serve
Let your Cherry Dump Cake Recipe cool slightly before serving to allow the flavors to settle and make it easier to cut. This is the perfect moment to add any finishing touches like a scoop of vanilla ice cream or a dollop of whipped cream.
How to Serve Cherry Dump Cake Recipe

Garnishes
A scoop of vanilla ice cream melting on top pairs beautifully with the warm, tart cherries and buttery crust. Fresh whipped cream adds a light, airy contrast that complements the richness. For an extra flair, sprinkle some toasted almonds or a sprinkle of cinnamon sugar.
Side Dishes
This cake pairs wonderfully with a cup of hot coffee or a cold glass of milk. For gatherings, consider serving some fresh fruit salad alongside for a refreshing complement to the decadence of the cherry dessert.
Creative Ways to Present
Try serving this dessert in individual ramekins for an elegant touch, or layer some of the cherry cake with whipped cream in clear parfait glasses to highlight the beautiful colors and textures. You can also warm portions and drizzle with caramel or chocolate sauce for a playful twist.
Make Ahead and Storage
Storing Leftovers
Cover any leftover cherry dump cake tightly and store it in the refrigerator for up to 4 days. The flavors deepen as it rests, making it even more delightful the next day.
Freezing
If you want to keep this treat longer, freeze the baked cake in an airtight container for up to 3 months. Let it thaw overnight in the fridge before reheating to maintain its texture and taste.
Reheating
Reheat slices gently in the microwave for 20 to 30 seconds or in a low oven (around 300°F) for 10 to 15 minutes until warmed through. Adding a little ice cream or whipped cream after reheating elevates the experience every time.
FAQs
Can I use fresh cherries instead of canned pie filling?
Absolutely! Fresh cherries can be used, but you’ll want to macerate them with sugar and possibly add a thickener like cornstarch to mimic the consistency of canned pie filling for the best results.
Is it possible to make this recipe gluten-free?
Yes! Just swap out the regular cake mix for a gluten-free cake mix, making sure the other ingredients are also gluten-free. The results are just as delicious.
How do I make the topping crispier?
Using chilled melted butter can help create a crisper topping. Also, baking uncovered allows moisture to escape and crisp up the crumb mixture beautifully.
Can I use a different fruit filling?
Definitely. This Cherry Dump Cake Recipe is versatile. Feel free to experiment with apple, blueberry, or peach pie filling to switch things up.
Why is it called a “dump” cake?
The term comes from the simplicity of the method—”dumping” the filling in the baking dish, then layering with cake mix and butter. No mixing bowls or complicated steps required, making it a perfect go-to dessert.
Final Thoughts
There’s something wonderfully satisfying about a recipe that tastes like it took hours but actually demands just a few simple steps. The Cherry Dump Cake Recipe is that magical kind of dessert—full of flavor, texture, and warmth that makes every bite feel like a hug. Give it a try and I promise it will become a beloved staple in your dessert rotation, bringing joy to every table it graces.
Print
Cherry Dump Cake Recipe
- Total Time: 1 hour
- Yield: 12 servings 1x
Description
A delightfully easy Cherry Dump Cake combining luscious cherry pie filling and buttery cake mix crumbs baked to golden perfection. This simple, fuss-free dessert is perfect for quick preparation and serves as a comforting treat for any occasion.
Ingredients
Ingredients
- 2 cans (540 mL each) cherry pie filling
- 1 (15.25 oz) box of yellow or white cake mix
- 1/2 cup melted butter
Instructions
- Preheat Oven: Preheat your oven to 350°F (175°C) to ensure it reaches the proper baking temperature before assembling the cake.
- Prepare Baking Dish: Spray a 9×13-inch baking dish with non-stick cooking spray to prevent the cake from sticking and allow for easy serving.
- Add Cherry Filling: Spread the two cans of cherry pie filling evenly across the bottom of the prepared baking dish, creating a fruit base layer.
- Mix Crumbs: In a large bowl, combine the melted butter with the dry cake mix. Mix thoroughly using your hands or a pastry blender until the mixture forms coarse crumbs resembling chunky sand.
- Top the Filling: Evenly sprinkle the crumb mixture over the cherry pie filling, covering it completely to create a crisp, buttery topping.
- Bake: Place the baking dish in the preheated oven and bake for 50 to 55 minutes, or until the top turns golden brown and the cherry filling bubbles around the edges, indicating it’s fully heated through.
- Cool and Serve: Allow the cake to cool slightly before serving to let the filling set. Optionally, serve warm with vanilla ice cream or whipped cream for an extra indulgent touch.
Notes
- Use a quality cherry pie filling for the best flavor.
- For a slightly different taste, try using white cake mix instead of yellow.
- The crumb topping can be adjusted by adding chopped nuts or cinnamon for added texture and warmth.
- Ensure the cake cools slightly before serving to avoid burning from the hot filling.
- Optional toppings like vanilla ice cream or whipped cream complement the warm cherry dessert beautifully.
- Prep Time: 10 minutes
- Cook Time: 50 minutes
- Category: Dessert
- Method: Baking
- Cuisine: American