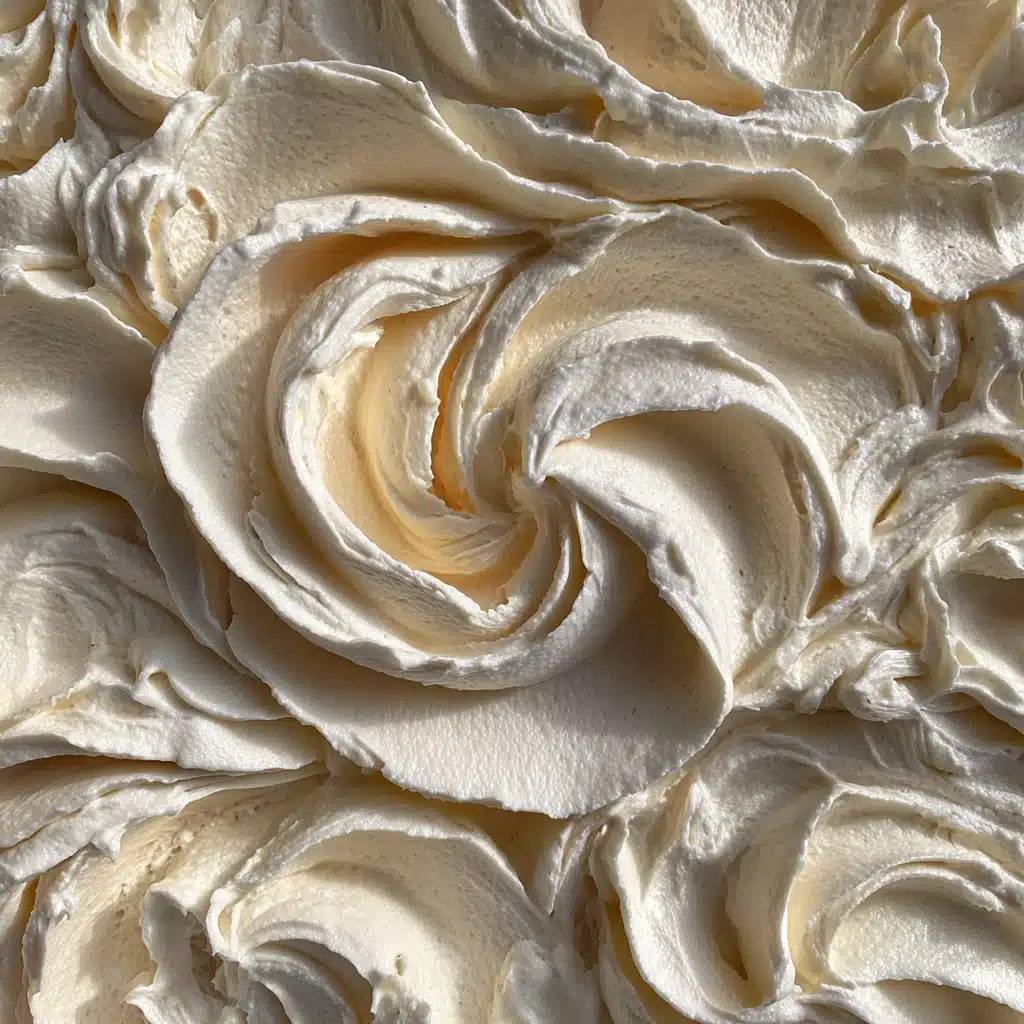
Classic Vanilla Ice Cream Recipe
There’s just something magical about Classic Vanilla Ice Cream—its creamy richness, unforgettable aroma, and that satisfyingly smooth texture you can only get from the real thing. Whether you’re enjoying it a la mode, sandwiched between cookies, or simply in a bowl straight from the freezer, this recipe gives you all the elegance of a French-style custard base right at home. Not only is it timeless, but it’s also a blank canvas for all sorts of dessert adventures. Ready to fall in love with ice cream all over again?
Ingredients You’ll Need
The beauty of this Classic Vanilla Ice Cream is in its simplicity: every ingredient serves a purpose, ensuring luxurious creaminess, perfect sweetness, and authentic vanilla flavor. Quality matters here, so pick the freshest you can find for a dessert that truly sings.
- 2 cups heavy cream: The backbone of that rich, silky-smooth texture we crave in ice cream.
- 1 cup whole milk: Keeps the base creamy but not overly heavy, balancing out the richness of the cream.
- ¾ cup granulated sugar: Perfectly sweetens the mix and helps give that scoopable texture.
- 1 tablespoon pure vanilla extract: Choose a high-quality vanilla for deep flavor; you can also try vanilla bean for a visual and aromatic treat.
- Pinch of salt: Just enough to brighten all the flavors and cut through the sweetness.
- 5 large egg yolks: These create that luscious custard base, zhuzhing up both flavor and body.
How to Make Classic Vanilla Ice Cream
Step 1: Heat the Cream and Milk
Start by combining the heavy cream, whole milk, half the sugar, and a pinch of salt in a medium saucepan. Set it over medium heat and stir occasionally—think gentle encouragement rather than constant supervision. You want it steaming hot (tiny wisps, not bubbles!), as this helps dissolve the sugar and infuse the liquid with luscious, creamy vibes.
Step 2: Whisk Egg Yolks and Sugar
While the milk and cream are getting cozy, whisk the egg yolks with the remaining sugar in a separate bowl. You’re looking for a pale, slightly thick texture—it’ll make your Classic Vanilla Ice Cream especially velvety. This step is where your arm earns its keep!
Step 3: Temper the Eggs
Here’s the secret to a custard that’s smooth, not scrambled: tempering. Slowly pour about half a cup of that hot cream mixture into the egg yolks, whisking constantly. This gently warms the eggs so they don’t curdle when added to the hot pot. Once tempered, gradually pour the yolk mixture back into the saucepan, stirring all the while.
Step 4: Cook the Custard
Set the saucepan over medium-low heat and stir continuously. You’ll notice the mixture thickening; it’s done when it coats the back of a spoon, usually in about 5–7 minutes. Keep your eyes peeled and don’t let it boil—low and slow is the mantra here for a Classic Vanilla Ice Cream base that’s rich and smooth.
Step 5: Add the Vanilla and Strain
Take the saucepan off the heat, then stir in the pure vanilla extract or those glorious seeds if you went the vanilla bean route. For extra silkiness, pour the custard through a fine mesh strainer into a clean bowl, catching any stray cooked bits and ensuring your ice cream is supremely smooth.
Step 6: Chill the Custard
Let your custard cool to room temperature (no shortcuts!), cover it, then stash it in the fridge for at least 4 hours or, even better, overnight. This rest deepens the flavor and sets you up for churning success.
Step 7: Churn and Freeze
Once the custard is properly chilly, pour it into your ice cream maker and churn according to the manufacturer’s instructions. The transformation from liquid to soft-serve magic never gets old! Scoop into a freezer-safe container and freeze for at least 2 hours, or until beautifully scoopable.
How to Serve Classic Vanilla Ice Cream

Garnishes
Dress up your scoops with a drizzle of homemade chocolate sauce, caramel, or a handful of toasted nuts. Fresh berries or a dollop of whipped cream take Classic Vanilla Ice Cream to another level—simple, yet impressive for guests (or just for you!).
Side Dishes
Pair Classic Vanilla Ice Cream with warm brownies, apple pie, or a soft chocolate chip cookie. Its understated elegance makes it the perfect dessert companion, balancing out rich or spiced treats with cool, sweet creaminess.
Creative Ways to Present
Go beyond the bowl by sandwiching swirls between cookies, stacking with fresh fruit in parfait glasses, or even blending into a milkshake. Take Classic Vanilla Ice Cream from classic to show-stopping with colorful sprinkles or a scoop atop a piping hot coffee for an affogato.
Make Ahead and Storage
Storing Leftovers
Store any leftover Classic Vanilla Ice Cream in a well-sealed, airtight container in your freezer. Press a piece of parchment or plastic wrap gently onto the surface before sealing to prevent pesky ice crystals from forming. It’ll taste just as dreamy for up to two weeks!
Freezing
Once the ice cream is churned, transfer it quickly to a freezer-safe container and level the top for even freezing. Let Classic Vanilla Ice Cream firm up for at least two hours before scooping; if frozen solid, let it rest at room temperature for a few minutes to restore that scoopable softness.
Reheating
While ice cream isn’t typically “reheated,” briefly letting it sit at room temperature softens it for easy scooping. For perfect Classic Vanilla Ice Cream every time, simply pull out your container five to ten minutes before serving. No microwave required!
FAQs
Can I make Classic Vanilla Ice Cream without an ice cream maker?
Absolutely! Pour the chilled custard into a freezer-safe dish and freeze, whisking thoroughly every 30–45 minutes for about 3 hours. This breaks up ice crystals and gives you a scoopable texture, though it may not be quite as creamy as churned.
What’s the best type Dessert
Pure vanilla extract delivers lovely fragrance and flavor, but if you really want to wow, try steeping a scraped vanilla bean directly in the cream mixture for deeper flavor and beautiful flecks throughout your Classic Vanilla Ice Cream.
Why do I need to strain the custard?
Straining ensures the creamiest possible result by removing any bits of cooked egg, guaranteeing your Classic Vanilla Ice Cream is luxuriously smooth every single time.
Is it safe to use raw egg yolks?
In this recipe, the egg yolks are gently cooked into a custard base, making them safe to eat for most people. For extra peace of mind, use pasteurized eggs if you’re concerned about food safety.
Can I add mix-ins to this ice cream?
Definitely! Once your Classic Vanilla Ice Cream is just about finished churning, toss in mini chocolate chips, chopped fruit, toasted nuts, or swirls of caramel for endless delicious customizations.
Final Thoughts
There’s a reason Classic Vanilla Ice Cream is always in style—it’s simple, indulgent, and versatile enough for any occasion or craving. Give this recipe a try; you’ll be amazed at how easily homemade can beat even the fanciest pints from the store. Here’s to many happy, creamy scoops ahead!
Print
Classic Vanilla Ice Cream Recipe
- Total Time: 6 hours
- Yield: 1 quart (about 8 servings) 1x
- Diet: Vegetarian
Description
Indulge in the creamy goodness of this classic vanilla ice cream. Made with simple ingredients, this homemade treat is perfect for cooling off on a hot summer day.
Ingredients
For the Ice Cream:
- 2 cups heavy cream
- 1 cup whole milk
- ¾ cup granulated sugar
- 1 tablespoon pure vanilla extract
- pinch of salt
- 5 large egg yolks
Instructions
- Prepare the Base: Combine cream, milk, half the sugar, and salt in a saucepan. Heat until steaming.
- Whisk the Eggs: Whisk egg yolks with remaining sugar until pale.
- Temper the Eggs: Slowly add hot cream to yolks, then return to saucepan.
- Cook the Custard: Heat mixture until thickened, then stir in vanilla.
- Chill and Churn: Strain custard, chill, churn in ice cream maker, and freeze.
Notes
- For a richer flavor, consider using a split vanilla bean for steeping.
- Customize with mix-ins like chocolate chips or nuts for variation.
- Prep Time: 20 minutes
- Cook Time: 10 minutes
- Category: Dessert
- Method: Churned
- Cuisine: American
Nutrition
- Serving Size: ½ cup
- Calories: 270
- Sugar: 21g
- Sodium: 40mg
- Fat: 20g
- Saturated Fat: 12g
- Unsaturated Fat: 7g
- Trans Fat: 0g
- Carbohydrates: 22g
- Fiber: 0g
- Protein: 4g
- Cholesterol: 160mg