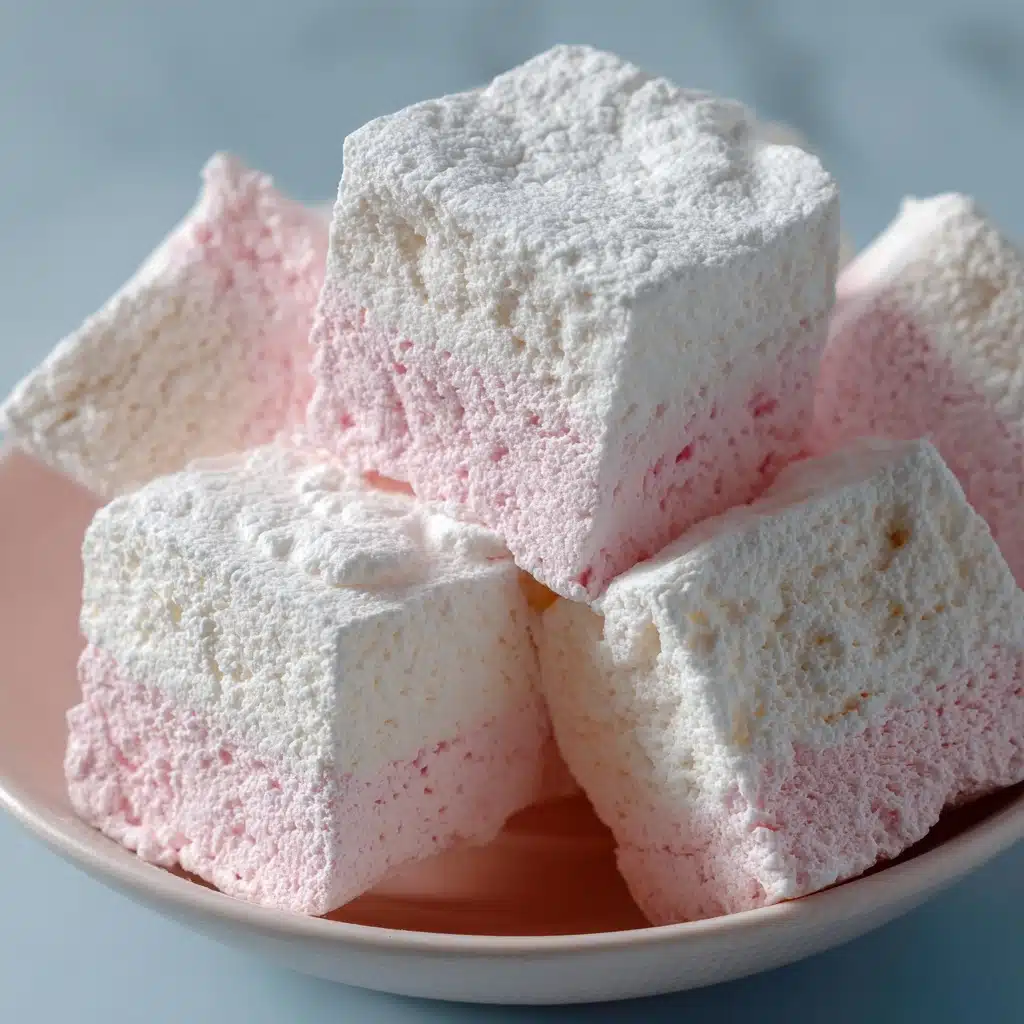
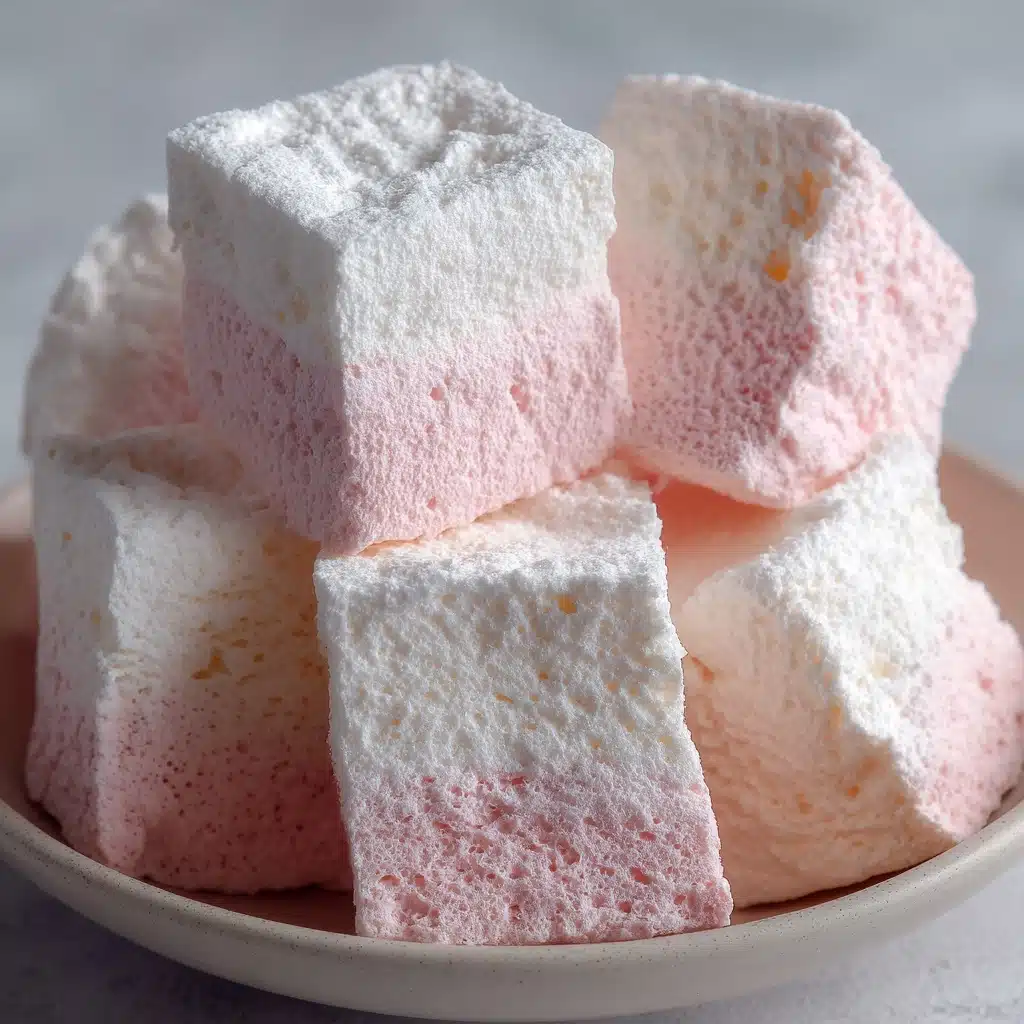
Coconut Ice Recipe
If you’re craving something irresistibly sweet, beautifully nostalgic, and a breeze to whip up, look no further than Coconut Ice. This beloved treat, with its iconic pink-and-white layers, has graced dessert tables for generations in both British and Australian homes. It’s the perfect combination of creamy, chewy coconut and sweet vanilla, all set into glorious squares that melt in your mouth. Whether you’re preparing a party platter, gifting homemade candy, or just treating yourself to a taste of childhood, Coconut Ice hits all the right notes with minimal fuss and maximum delight.
Ingredients You’ll Need
-
Dry Ingredients
- 2 cups powdered sugar
- 2 cups desiccated coconut (unsweetened)
Wet Ingredients
- 1 (14-ounce) can sweetened condensed milk
- 1/2 teaspoon vanilla extract
- a few drops pink food coloring (optional)
How to Make Coconut Ice
Step 1: Prepare Your Pan
Begin by lining an 8×8-inch square pan with parchment paper, letting the excess hang over the edges for easy removal later. This little step means you can pop the set Coconut Ice out of the pan in one neat slab—no sticking or crumbling to worry about!
Step 2: Mix the Dry Ingredients
In a large mixing bowl, combine the powdered sugar and desiccated coconut. Stir them together thoroughly so the coconut is evenly coated in sugar—this will help prevent any clumps and ensure a uniform texture throughout your Coconut Ice.
Step 3: Add the Wet Ingredients
Pour in the sweetened condensed milk and add the vanilla extract. Stir everything together with a sturdy spoon or spatula. The mixture will quickly turn into a thick, sticky dough—don’t worry, that’s exactly what you want! Take your time to make sure every bit of coconut is coated and the mixture is evenly combined.
Step 4: Divide and Color
Scoop half of the mixture into a separate bowl. To one half, add a few drops of pink food coloring and mix until the color is even and vibrant. Feel free to adjust the amount to reach your desired shade—whether you love a blush pink or a bold magenta, Coconut Ice can match your mood!
Step 5: Press and Layer
Using damp hands or the back of a spoon, press the uncolored (white) half firmly and evenly into the bottom of your prepared pan. Next, gently press the pink half on top, smoothing the surface as you go for clean, defined layers. Take a moment to admire those classic stripes—so satisfying!
Step 6: Chill and Set
Transfer the pan to the refrigerator and let your Coconut Ice chill for at least 2 hours, or until it’s firm to the touch. This step is key for easy slicing and that signature fudgy bite.
Step 7: Slice and Enjoy
Once set, lift the slab out using the parchment paper overhang. Place it on a cutting board and use a sharp knife to cut into small squares. Each piece is a bite-sized burst of coconutty sweetness—perfect for sharing or savoring all to yourself!
How to Serve Coconut Ice
Garnishes
Elevate your Coconut Ice by sprinkling extra shredded coconut or a touch of edible glitter over the top before chilling. Not only does it add visual flair, but it also gives a hint of texture and a touch of whimsy—perfect for special occasions or gifting!
Side Dishes
While Coconut Ice is a star on its own, it pairs beautifully with a fresh fruit platter or a pot of strong black tea to balance its sweetness. You might also serve it alongside other classic sweets like shortbread or chocolate truffles for a truly decadent dessert spread.
Creative Ways to Present
Think outside the box: serve Coconut Ice in mini cupcake liners for a polished look, layer the squares in a clear glass jar for a homemade gift, or cut them into fun shapes using cookie cutters. For parties, stack the pieces into a tower or mix and match with other colorful candies to create a festive centerpiece.
Make Ahead and Storage
Storing Leftovers
Coconut Ice keeps beautifully—just pop the squares into an airtight container and store them at room temperature for up to a week. If your kitchen runs warm, the fridge will keep them fresh for up to two weeks. The flavors mellow and meld over time, making each bite even more delicious.
Freezing
For longer storage, Coconut Ice can be frozen! Arrange the pieces in a single layer with parchment between each layer to prevent sticking, seal tightly, and freeze for up to three months. Thaw at room temperature for an hour or so before serving, and you’ll have a sweet treat ready whenever a craving strikes.
Reheating
No need for reheating here—Coconut Ice is meant to be enjoyed chilled or at room temperature. If frozen, simply allow the squares to thaw naturally on the counter. They’ll be as creamy and dreamy as the day you made them.
FAQs
Can I use sweetened coconut instead of unsweetened?
You can, but keep in mind that sweetened coconut will make the final treat much sweeter. If you love a sugary bite, go for it, but if you prefer a more balanced flavor, unsweetened is your best bet for Coconut Ice.
What if I don’t have pink food coloring?
No worries! Coconut Ice is just as tasty with only the white layer. You can also experiment with other colors or leave it natural for a rustic look—either way, it will be delicious.
Is Coconut Ice gluten-free?
Yes, Coconut Ice is naturally gluten-free, making it a fantastic option for those with gluten sensitivities. Just double-check your ingredients for any hidden gluten if you have dietary restrictions.
Can I make this vegan?
Traditional Coconut Ice relies on sweetened condensed milk, but there are vegan versions available in many stores. Swap in a plant-based condensed milk and you’re good to go—just keep an eye on the consistency!
How can I prevent the layers from mixing?
Press each layer down gently but firmly, and chill the white layer briefly before adding the pink if you’re worried about blending. Using damp hands and working patiently will help you get those sharp, beautiful layers every time.
Final Thoughts
There’s something truly magical about making Coconut Ice—simple ingredients, no baking required, and a result that’s as stunning as it is scrumptious. Don’t hesitate to try this classic treat; it’s a joyful little recipe that always brings smiles and sweet memories. Give it a go and let Coconut Ice brighten your next celebration, snack time, or just-because moment!
Print
Coconut Ice Recipe
- Total Time: 2 hours 15 minutes
- Yield: 25 pieces 1x
- Diet: Vegetarian
Description
Coconut Ice is a traditional British and Australian no-bake dessert featuring a sweet, layered coconut treat that is both colorful and delicious. This easy homemade candy combines desiccated coconut, powdered sugar, and sweetened condensed milk to create a sticky, rich confection with a vibrant pink layer, perfect for celebrations or as a delightful snack.
Ingredients
Dry Ingredients
- 2 cups powdered sugar
- 2 cups desiccated coconut (unsweetened)
Wet Ingredients
- 1 (14-ounce) can sweetened condensed milk
- 1/2 teaspoon vanilla extract
- a few drops pink food coloring (optional)
Instructions
- Prepare the Pan: Line an 8×8-inch square pan with parchment paper to prevent sticking and to make removal easy after the mixture sets.
- Mix Dry Ingredients: In a large bowl, combine the powdered sugar and desiccated coconut thoroughly to evenly distribute the coconut throughout the sugar.
- Add Wet Ingredients: Pour in the sweetened condensed milk and vanilla extract into the dry mixture. Stir well until you achieve a thick, sticky dough consistency.
- Divide Mixture: Split the dough evenly into two portions. This enables you to create the two distinct layers traditionally found in coconut ice.
- Form White Layer: Using damp hands or the back of a spoon, press one half of the dough firmly and evenly into the bottom of the prepared pan to form the white coconut layer.
- Color Pink Layer: Add a few drops of pink food coloring to the remaining half of the dough and mix until the color is even and vibrant.
- Form Pink Layer: Gently press the pink dough on top of the white layer, smoothing the surface for an even layered appearance.
- Chill: Refrigerate the layered mixture for at least 2 hours or until firm to set the candy properly.
- Cut and Serve: Once set, lift the coconut ice from the pan using the parchment paper and cut it into approximately 25 square pieces to serve.
Notes
- Store in an airtight container at room temperature for up to 1 week or refrigerate for up to 2 weeks to maintain freshness.
- For extra flair, sprinkle shredded coconut or edible glitter on top before chilling to add texture and festive decoration.
- If you prefer a less sweet version, reduce the powdered sugar slightly; however, this may affect the texture.
- This recipe is gluten-free and vegetarian-friendly, making it suitable for many dietary preferences.
- Prep Time: 15 minutes
- Cook Time: 0 minutes
- Category: Dessert, Candy
- Method: No-Bake
- Cuisine: British, Australian
Nutrition
- Serving Size: 1 piece
- Calories: 130
- Sugar: 18 g
- Sodium: 25 mg
- Fat: 5 g
- Saturated Fat: 4 g
- Unsaturated Fat: 1 g
- Trans Fat: 0 g
- Carbohydrates: 21 g
- Fiber: 1 g
- Protein: 1 g
- Cholesterol: 5 mg