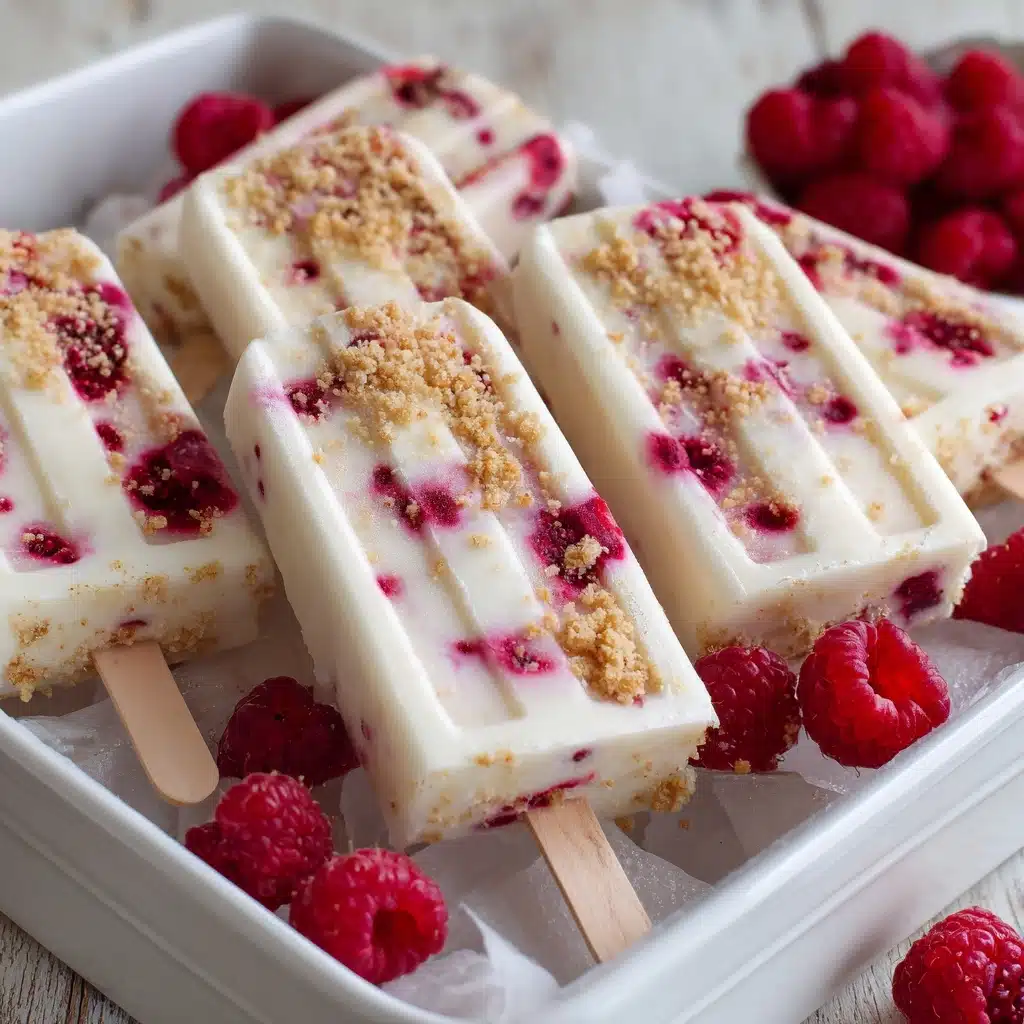
Creamy Ice Cream Bars Recipe
If you’re looking for a no-churn frozen treat that tastes like pure summer bliss, these Creamy Ice Cream Bars are about to become your kitchen’s new superstar. They’re cool and velvety with just the right amount of sweetness – and you don’t even need an ice cream maker! Whether you’re dipping them in rich chocolate or swirling in your favorite fruit puree, every bite of these Creamy Ice Cream Bars is a comforting, decadent escape. Prepare to wow family, friends, and maybe even yourself with this homemade twist on a nostalgic dessert classic.
Ingredients You’ll Need
This recipe comes together with simple, powerhouse ingredients that each play an important part in delivering the dreamy texture, flavor, and eye-catching look of Creamy Ice Cream Bars. Here’s what you need and why each matters:
- Heavy cream: The base for that ultra-creamy, scoopable texture – whip it to ensure your ice cream bars are extra light and airy.
- Sweetened condensed milk: Adds sweetness and gives the bars a lush, smooth consistency without churning.
- Vanilla extract: Brings a classic, mellow flavor that lets your mix-ins shine.
- Salt: Just a pinch enhances all the sweet and creamy elements – don’t skip this tiny but mighty ingredient!
- Chocolate chips or fruit puree (optional mix-ins): Perfect for bursts of flavor, color, and texture; feel free to get creative here.
- Melted chocolate (optional for dipping): For an extra-luxe finish, nothing beats a crispy chocolate shell.
- Coconut oil (if dipping in chocolate): Keeps the chocolate coating glossy and snappy after freezing.
- Popsicle sticks: Essential for turning these treats into grab-and-enjoy bars.
- Silicone or paper molds: These give the bars shape and make removal a total breeze once they’re frozen.
How to Make Creamy Ice Cream Bars
Step 1: Whip the Cream
Start by pouring your cold heavy cream into a large mixing bowl. Use a hand mixer to whip it until you see stiff peaks forming. This step is key: the whipped cream traps air, ensuring your Creamy Ice Cream Bars are incredibly light and silky instead of icy.
Step 2: Mix the Base
In a separate bowl, combine the sweetened condensed milk, vanilla extract, and salt. Whisk until everything is evenly blended and smooth – this is what will give your bars that dreamy sweetness and boost the vanilla flavor.
Step 3: Combine and Fold
Gently fold your whipped cream into the condensed milk mixture, using a spatula. Be patient here; fold slowly to keep all that lovely air in your base. The mixture should look pillowy and soft, with no streaks remaining.
Step 4: Add Mix-Ins
Now’s your chance to get creative! If you like, stir in chocolate chips, a fruit puree, or other favorite add-ins at this stage. Make sure they’re distributed evenly so you get flavor in every bite of your Creamy Ice Cream Bars.
Step 5: Fill and Freeze
Spoon the finished mixture into your molds, taking care to smooth the tops. Insert popsicle sticks into the center of each. Transfer the molds to the freezer and let the bars set for at least 6 hours or (even better) overnight, until they’re solid and easily release from the molds.
Step 6: Dip in Chocolate (Optional)
If you’re indulging in a chocolate coating, mix your melted chocolate with coconut oil. Dip each frozen bar quickly, let the excess drip off, and place it back on a lined tray. Return the bars to the freezer for another 10 minutes to set the shell. Now you have truly decadent Creamy Ice Cream Bars ready to enjoy!
How to Serve Creamy Ice Cream Bars

Garnishes
Dress up your Creamy Ice Cream Bars with fun toppings like crushed nuts, sprinkles, shredded coconut, or even a drizzle of caramel or fruit sauce while the chocolate is still setting. This not only adds color and sparkle but also another layer of texture.
Side Dishes
For a cool dessert platter, pair your bars with fresh berries, a simple fruit salad, or a handful of crisp wafer cookies. They also shine alongside a warm mug of coffee or a frothy iced latte for an irresistible hot-and-cold treat combo.
Creative Ways to Present
Try serving your Creamy Ice Cream Bars on a bed of crushed cookies or with vibrant slices of fruit for a party-ready vibe. If you’re making multiple flavors, display them in a mix-and-match lineup for a DIY dessert bar at your next gathering – let everyone pick their favorite combo!
Make Ahead and Storage
Storing Leftovers
Once your Creamy Ice Cream Bars are fully frozen, transfer them from the molds to an airtight container. Separate layers with parchment paper to prevent sticking, and keep in the freezer for up to 2 weeks for the best flavor and texture.
Freezing
These bars hold up beautifully in the freezer. Just make sure they’re well-sealed and kept away from strong-smelling foods to avoid absorbing unwanted flavors. No need to thaw before serving – straight from the freezer is how these bars shine!
Reheating
There’s no real need to “reheat” Creamy Ice Cream Bars, but if they’re too hard straight from the freezer, just let them sit at room temperature for 2 to 3 minutes. They’ll soften up perfectly while staying cool and creamy inside.
FAQs
Can I make Creamy Ice Cream Bars without a hand mixer?
Absolutely! You can use a stand mixer or even whip the heavy cream by hand with a sturdy whisk – just be prepared for a good arm workout and make sure to reach stiff peaks for the right texture.
What are some fun mix-in ideas besides chocolate chips or fruit?
The possibilities are endless! Try crushed cookies, brownie chunks, a peanut butter swirl, toasted coconut, or a spoonful of caramel sauce. Each adds its own twist and makes your Creamy Ice Cream Bars feel extra special.
How do I know when the bars are fully frozen?
After at least 6 hours (or overnight), the bars should feel completely firm to the touch and easily release from the molds. If they’re still sticky or soft, give them extra time in the freezer to set up properly.
Is it possible to make these bars dairy-free?
Yes, you can substitute coconut cream for the heavy cream and use a sweetened coconut or oat milk condensed milk. The results will be different in flavor but still rich and satisfying!
How do I prevent the chocolate shell from cracking or falling off?
Make sure your bars are truly frozen solid before dipping, and work swiftly when coating each bar. The coconut oil in the chocolate helps the shell stay smooth and neat as it sets.
Final Thoughts
I can’t recommend these Creamy Ice Cream Bars enough for anyone looking for an easy, crowd-pleasing, and totally irresistible frozen dessert. They truly capture everything that’s great about summer snacking (with a homemade twist), and they’re endlessly customizable to your cravings. Dive in and make them your own – you might just start a new sweet tradition!
Print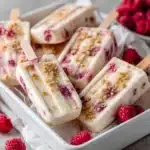
Creamy Ice Cream Bars Recipe
- Total Time: 6 hours 15 minutes
- Yield: 8 bars 1x
- Diet: Vegetarian
Description
Indulge in these creamy ice cream bars that are easy to make at home. With a rich, velvety texture and customizable mix-ins, these frozen treats are perfect for a refreshing dessert on a hot day.
Ingredients
Ice Cream Base:
- 2 cups heavy cream
- 1 cup sweetened condensed milk
- 1 teaspoon vanilla extract
- 1/2 teaspoon salt
Optional Mix-Ins:
- 1/2 cup chocolate chips or fruit puree
For Dipping (Optional):
- 1 cup melted chocolate
- 1 tablespoon coconut oil
- popsicle sticks
- silicone or paper molds
Instructions
- Whip the Cream: In a large bowl, whip the heavy cream until stiff peaks form.
- Mix the Base: In a separate bowl, combine sweetened condensed milk, vanilla extract, and salt. Fold in the whipped cream gently until fully combined and fluffy.
- Add Mix-Ins: Stir in chocolate chips, fruit puree, or other mix-ins if desired.
- Freeze: Spoon the mixture into molds, insert popsicle sticks, and freeze for at least 6 hours or overnight until solid.
- Dip in Chocolate: For a chocolate coating, mix melted chocolate with coconut oil, dip the frozen bars, and return to the freezer to set for 10 minutes.
Notes
- For flavor variety, try almond extract, crushed cookies, peanut butter swirls, or fresh berries.
- Store ice cream bars in an airtight container for up to 2 weeks.
- Prep Time: 15 minutes
- Cook Time: 0 minutes
- Category: Dessert
- Method: Freezing
- Cuisine: American
Nutrition
- Serving Size: 1 bar
- Calories: 290
- Sugar: 18g
- Sodium: 90mg
- Fat: 22g
- Saturated Fat: 14g
- Unsaturated Fat: 6g
- Trans Fat: 0g
- Carbohydrates: 20g
- Fiber: 0g
- Protein: 3g
- Cholesterol: 75mg