Grilled Cheese Skewers Recipe
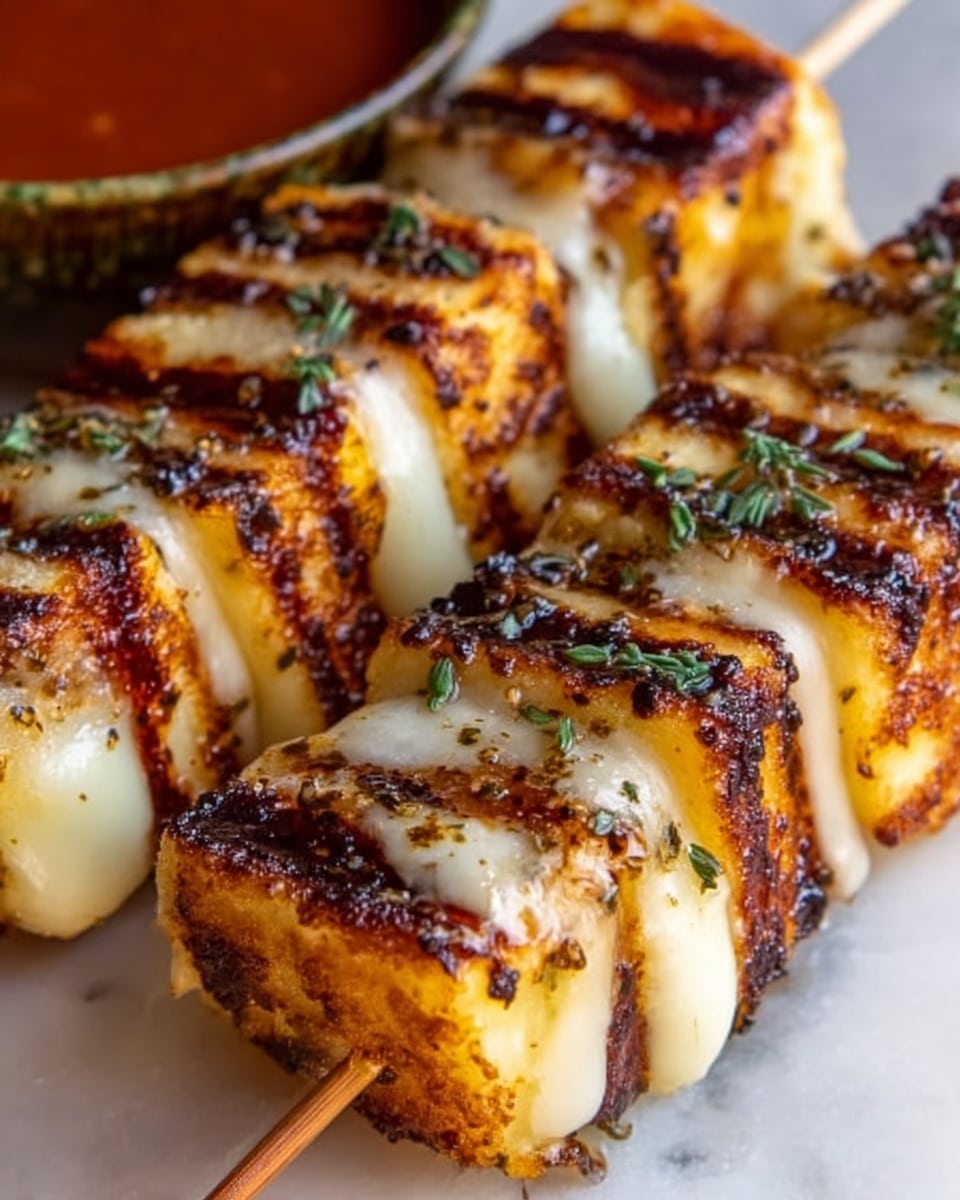
If you’re craving a fun, portable twist on the classic comfort food, this Grilled Cheese Skewers Recipe is going to steal your heart. Imagine the gooey, melty cheese hugged between perfectly toasted bread, all threaded onto handy skewers that make snacking or party appetizers a breeze. It’s simple to make, irresistibly delicious, and brings back those cozy, nostalgic vibes with every bite. Whether you’re serving this up for a casual snack or a cheerful gathering, these grilled cheese skewers deliver warmth and flavor in every mouthful.
Ingredients You’ll Need
Getting ready to make this Grilled Cheese Skewers Recipe? The ingredients are delightfully straightforward but absolutely essential for that perfect harmony of texture, taste, and color. The bread gives you a crispy base, the cheese melts into silken goodness, and the butter adds that golden richness that brings it all together.
- Bread slices: Choose your favorite, like white, whole wheat, or sourdough for distinct flavors and sturdy texture.
- Cheese slices: American, cheddar, or any good melting cheese works beautifully; this is where the gooey magic happens.
- Unsalted butter: Softened for easy spreading and essential for that crispy, golden crust.
- Olive oil (optional): Adds extra depth and helps achieve a lovely sear when grilling.
- Garlic powder (optional): Sprinkled on buttered bread for a subtle, savory punch.
- Salt: Just a pinch to enhance all the flavors perfectly.
- Wooden skewers: Soaked beforehand to prevent burning, these keep your grilled cheese sandwich bites neat and easy to eat.
How to Make Grilled Cheese Skewers Recipe
Step 1: Prepare the bread and cheese
Start by cutting your bread into quarters, creating little square pieces that are perfect bite-sized morsels. Slice your cheese so it fits nicely on those small bread pieces; if you prefer, pre-sliced cheese saves time and works just as well. This prep ensures every skewer is balanced and easy to assemble.
Step 2: Assemble the skewers
This part is fun and satisfying. Take a piece of bread, top it with a slice of cheese, and then carefully sandwich it with another piece of bread. Slide this mini sandwich onto your wooden skewer, and repeat until you’ve made all your little stacks. The skewers keep everything neatly together and make grilling a breeze.
Step 3: Butter the bread
Brush each side of your bread sandwiches generously with softened unsalted butter. This step is key for that mouthwatering golden-brown crust. If you love a hint of extra flavor, sprinkle some garlic powder over the buttered bread, adding a delicious aroma and savory kick.
Step 4: Grill the skewers
Heat a large skillet or griddle over medium heat, and if you’re using olive oil, add it now for a touch of fruity richness. Place your skewers in the pan carefully, letting them cook for about 3-4 minutes per side. You’ll know they’re ready when the bread is crisped to a perfect golden brown and the cheese inside has melted irresistibly.
Step 5: Serve and enjoy
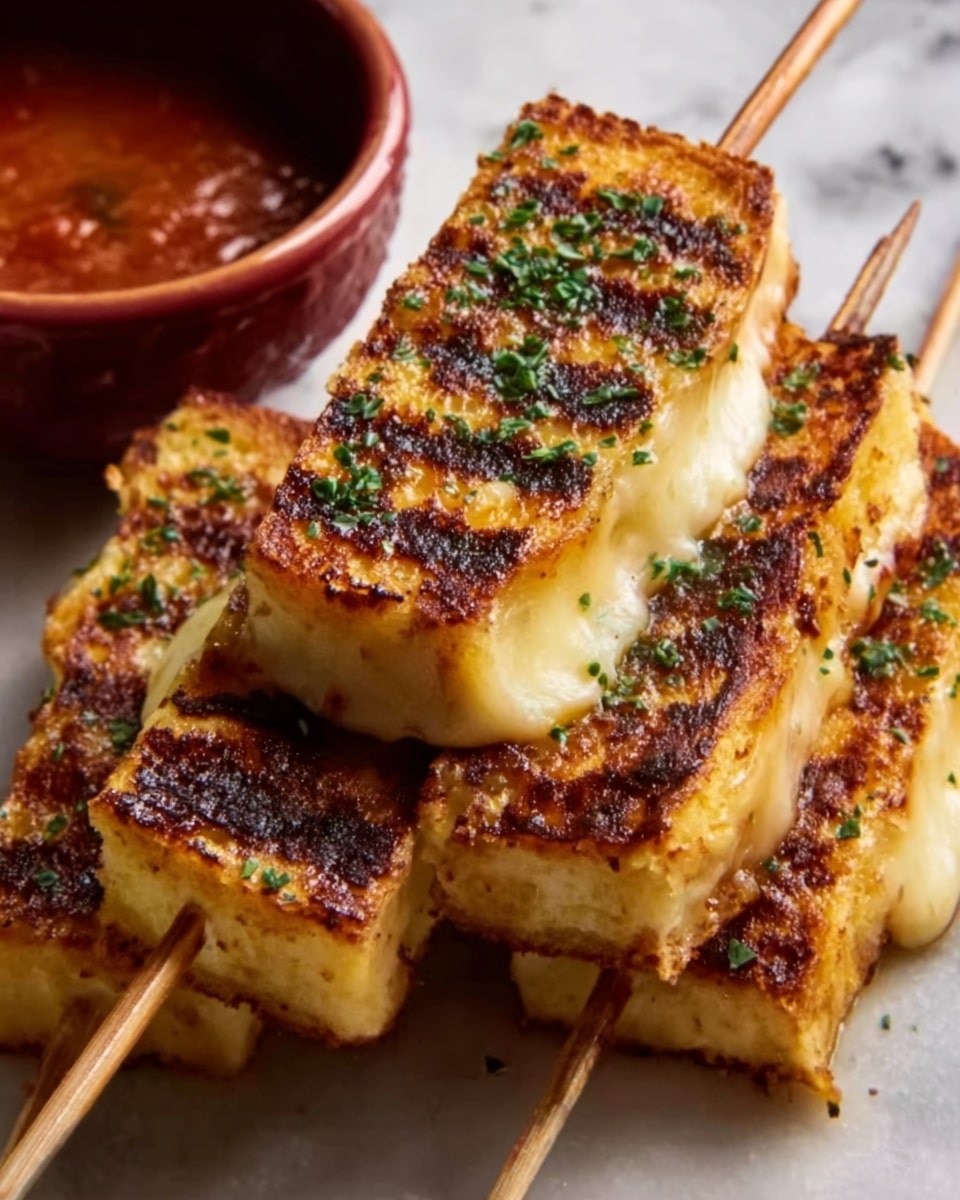
Remove the skewers from the heat and serve immediately while they’re warm and melty. These are especially wonderful paired with your favorite dipping sauces—think marinara, ranch, or even a cozy bowl of tomato soup. Every bite is a delicious celebration of comfort food elevated into a fun, shareable treat.
How to Serve Grilled Cheese Skewers Recipe
Garnishes
Elevate your skewers by sprinkling fresh herbs like chopped parsley or basil right before serving to add a pop of color and freshness. A light dusting of smoked paprika also gives a subtly smoky finish that pairs beautifully with the golden bread and melted cheese.
Side Dishes
Grilled cheese skewers are stellar on their own, but pairing them with a crisp green salad or a tangy coleslaw balances the richness perfectly. For heartier options, a warm tomato soup or a bowl of creamy butternut squash soup turns this into a full meal everyone will adore.
Creative Ways to Present
For parties, arrange the skewers standing up in a sturdy glass or lay them out on a wooden board lined with parchment paper for rustic charm. You can also serve each skewer with a small dipping cup of sauce on the side to create an interactive and colorful appetizer display that invites everyone to dig in.
Make Ahead and Storage
Storing Leftovers
If you have any leftover grilled cheese skewers, wrap them tightly in foil or store them in an airtight container in the fridge. They keep well for up to 2 days, though they’re always best enjoyed fresh and warm.
Freezing
You can freeze assembled and buttered skewers (but not grilled) by wrapping them individually in plastic wrap and placing them in a freezer-safe bag. They’ll keep for about 1 month. When ready to use, thaw overnight in the fridge before grilling as usual.
Reheating
To reheat leftovers or thawed skewers, heat them gently in a skillet over medium-low heat or in a toaster oven. This helps regain their crispiness without making the bread soggy, while warming the cheese back to its melty perfection.
FAQs
Can I use different types of bread for the Grilled Cheese Skewers Recipe?
Absolutely! You can experiment with anything from classic white to hearty whole wheat, sourdough, or even rye. Each bread choice brings its own unique texture and flavor, so feel free to use what you love or have on hand.
What’s the best cheese for grilling on skewers?
Cheeses that melt well like American, cheddar, mozzarella, or Monterey Jack work best. They melt evenly and create that luscious stretch of gooey cheese everyone craves in a grilled cheese skewers recipe.
How do I prevent the skewers from burning on the grill?
Soak your wooden skewers in water for at least 15 minutes before assembling to help prevent them from catching fire while grilling. This simple step makes a big difference in keeping everything safe and delicious.
Can I make the skewers vegetarian or vegan?
Definitely! For a vegetarian version, just stick with cheese and bread varieties that fit your diet. For vegan options, use plant-based cheese and vegan butter substitutes to recreate the melty goodness with no dairy involved.
Are these skewers good for parties or just as a snack?
These skewers are fantastic for both! Their bite-sized format makes them perfect for finger food at parties, but they’re also great as a cozy snack or light meal whenever you need something quick, tasty, and fun.
Final Thoughts
This Grilled Cheese Skewers Recipe is a true crowd-pleaser that’s as fun to make as it is to eat. It brings a nostalgic favorite into a new, playful form that’s perfect for sharing with friends and family. So grab your ingredients, fire up the skillet, and get ready to enjoy some melty, crispy, cheesy happiness on a stick. You’re going to love it!
Print
Grilled Cheese Skewers Recipe
- Total Time: 20 minutes
- Yield: 4 servings 1x
- Diet: Vegetarian
Description
These Grilled Cheese Skewers offer a fun and bite-sized twist on the classic grilled cheese sandwich. Perfect as an appetizer or snack, the skewers feature crispy, buttery bread with melted cheese in between, grilled to golden perfection in a skillet. Easy to assemble and quick to cook, they make a delightful addition to any gathering.
Ingredients
Bread and Cheese
- 8 slices of bread (white, whole wheat, or sourdough)
- 8 slices of cheese (American, cheddar, or your favorite melting cheese)
For Grilling
- 4 tablespoons unsalted butter, softened
- 1 tablespoon olive oil (optional, for grilling)
- 1 teaspoon garlic powder (optional, for extra flavor)
- Salt, to taste
- Wooden skewers (soaked in water for 15 minutes to prevent burning)
Instructions
- Prepare the bread and cheese: Cut the bread into quarters to create small square pieces. Slice the cheese to fit each piece of bread or use pre-sliced cheese as preferred.
- Assemble the skewers: Take one piece of bread, place a slice of cheese on top, then add another piece of bread on top to make a mini sandwich. Slide the sandwich onto a soaked wooden skewer. Repeat this process for all remaining pieces of bread and cheese.
- Butter the bread: Brush each side of the bread sandwiches with softened butter, ensuring an even coating. For added flavor, sprinkle garlic powder over the buttered bread. Season with a pinch of salt if desired.
- Grill the skewers: Heat a large skillet or griddle over medium heat and add olive oil if using. Place the skewers in the pan carefully and cook for about 3 to 4 minutes on each side, or until the bread turns golden brown and the cheese inside melts completely.
- Serve: Remove the skewers from the pan once crispy and gooey. Serve immediately with your favorite dipping sauces like marinara, ranch, or tomato soup for a delicious snack or appetizer.
Notes
- Soak wooden skewers in water for at least 15 minutes before grilling to prevent them from burning.
- You can customize the cheese type to your preference; sharp cheddar or a mild American cheese work especially well.
- If you prefer a crispier texture, you can grill the skewers a little longer but watch carefully to avoid burning.
- For added flavor, you can sprinkle herbs such as oregano or parsley on the buttered bread before grilling.
- To make it vegetarian-friendly, ensure the bread and cheese are suitable for vegetarians.
- Prep Time: 10 minutes
- Cook Time: 10 minutes
- Category: Appetizer
- Method: Frying
- Cuisine: American
