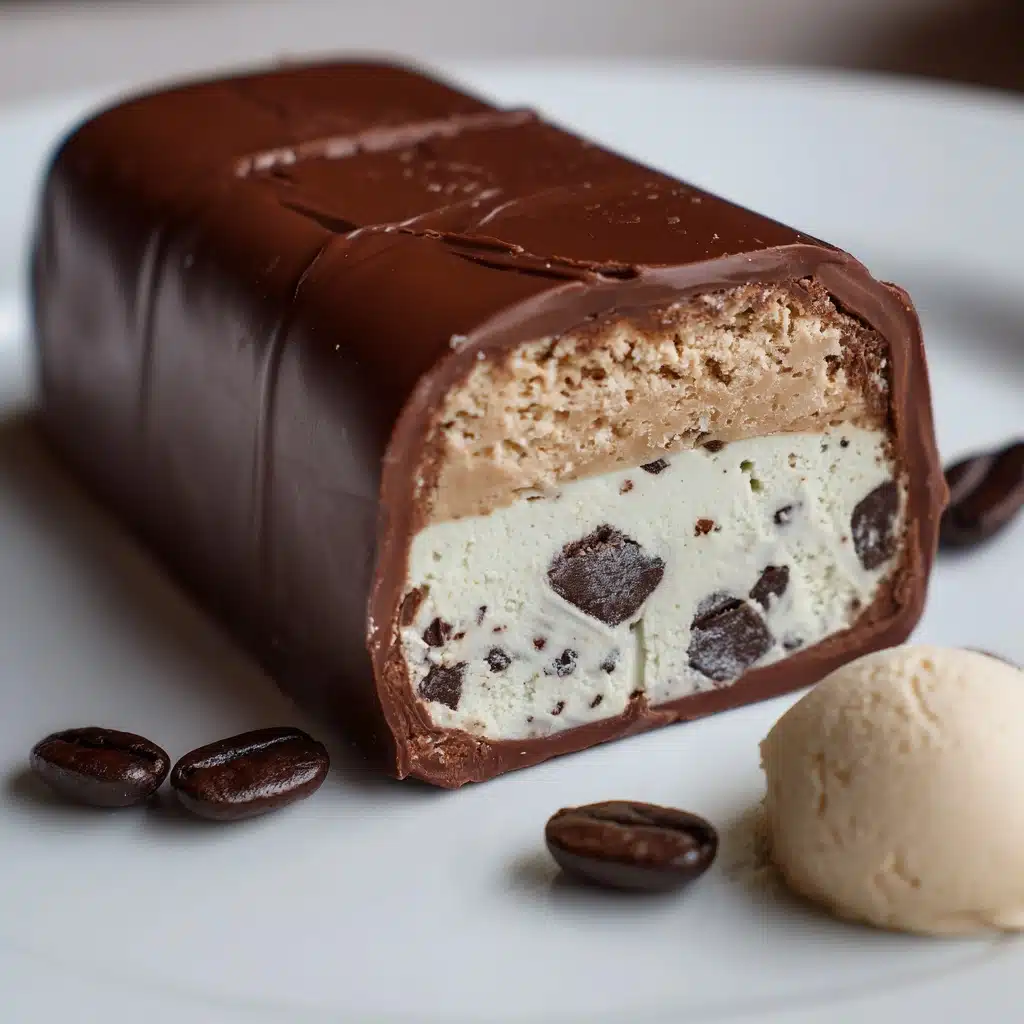
Homemade Coffee Ice Cream Recipe
If you’re a coffee lover, this Homemade Coffee Ice Cream Recipe is about to become your new obsession. Imagine the bold, aromatic flavor of espresso swirled into a luxuriously creamy custard base, frozen to scoopable perfection. Every spoonful is a dreamy balance of rich coffee flavor and sweet, silky smoothness, making it the ultimate treat for dessert enthusiasts and caffeine aficionados alike. Whether you’re enjoying it on a sunny afternoon or as a late-night indulgence, this recipe turns simple ingredients into a gourmet experience right in your own kitchen.
Ingredients You’ll Need
With just a handful of classic ingredients, you’ll create a Homemade Coffee Ice Cream Recipe that’s both elegant and easy. Each component brings something special to the table, ensuring a scoop that’s full-bodied, creamy, and irresistibly flavorful.
- Heavy Cream: Gives the ice cream its ultra-rich, velvety texture.
- Whole Milk: Balances out the richness for a perfectly creamy base.
- Granulated Sugar: Sweetens the ice cream and helps achieve that smooth, scoopable consistency.
- Instant Espresso Powder or Instant Coffee Granules: Delivers a strong, authentic coffee punch without bitterness.
- Salt: Just a pinch to enhance and deepen all the flavors.
- Egg Yolks: The key to a luscious, custard-style ice cream.
- Vanilla Extract: Adds warmth and rounds out the coffee flavor beautifully.
How to Make Homemade Coffee Ice Cream Recipe
Step 1: Warm the Base
Start by adding the whole milk, granulated sugar, instant espresso powder (or coffee granules), and salt to a medium saucepan. Gently warm the mixture over medium heat, stirring often, until the sugar and coffee fully dissolve. The aroma at this stage is incredible—just don’t let it boil, as you want everything to meld slowly and evenly.
Step 2: Temper the Egg Yolks
In a separate bowl, whisk the egg yolks until smooth. Slowly pour about 1/2 cup of the warm milk mixture into the yolks, whisking constantly. This gentle process is called tempering, and it keeps the eggs from scrambling when they meet the heat. Once combined, gradually whisk the egg yolk mixture back into the saucepan.
Step 3: Cook the Custard
Return the saucepan to medium-low heat and stir the mixture continuously with a wooden spoon or spatula. You’re looking for the custard to thicken just enough to coat the back of your spoon—this usually happens around 170–175°F (77–80°C). Be patient and keep stirring to avoid curdling; the result will be a smooth, silky base.
Step 4: Add Vanilla & Strain
Once thickened, remove the pan from the heat and stir in the vanilla extract. For the smoothest Homemade Coffee Ice Cream Recipe, pour the custard through a fine mesh sieve into a clean bowl. This step catches any stray bits and ensures your ice cream is perfectly creamy. Stir in the heavy cream, then let the mixture cool slightly before covering and transferring it to the fridge to chill for at least 4 hours, or overnight if you can wait.
Step 5: Churn and Freeze
When the custard is thoroughly chilled, pour it into your ice cream maker and churn according to the manufacturer’s instructions (usually around 20–25 minutes). The transformation is always so satisfying! Once it reaches a soft-serve consistency, transfer the ice cream to an airtight container. Freeze for at least 2 hours, or until firm enough to scoop.
How to Serve Homemade Coffee Ice Cream Recipe

Garnishes
Dress up each scoop with a few chocolate-covered espresso beans, a sprinkle of cocoa powder, or a drizzle of caramel sauce. These little touches not only look beautiful but also amplify the rich, coffee-forward flavor of your homemade creation.
Side Dishes
This Homemade Coffee Ice Cream Recipe pairs like a dream with buttery shortbread cookies, crisp biscotti, or a slice of flourless chocolate cake. Serve it alongside fresh berries or a shot of espresso for an Italian-inspired affogato twist.
Creative Ways to Present
Try scooping your ice cream into espresso cups for a playful presentation, or sandwich it between chocolate chip cookies for the ultimate coffee ice cream sandwich. For dinner parties, serve it in elegant glassware with a sprig of mint or a shard of dark chocolate for an impressive finish.
Make Ahead and Storage
Storing Leftovers
Keep any leftover ice cream in an airtight container in the coldest part of your freezer. It’s best enjoyed within two weeks, though it usually disappears much faster in my house! To prevent ice crystals, press a piece of parchment paper directly onto the ice cream’s surface before sealing.
Freezing
This Homemade Coffee Ice Cream Recipe freezes beautifully. For optimal texture, let the churned ice cream firm up for at least 2 hours before serving. If making in advance, take it out of the freezer a few minutes before scooping to soften slightly.
Reheating
While you won’t be reheating this ice cream, if it becomes too hard in the freezer, simply let it rest on the counter for 5 to 10 minutes. This brings it back to that perfect, creamy consistency without any melting drama.
FAQs
Can I make this Homemade Coffee Ice Cream Recipe without an ice cream maker?
Yes! After chilling the custard, you can pour it into a shallow dish and freeze, stirring vigorously every 30 minutes until creamy and scoopable. The texture won’t be quite as smooth, but it’ll still taste fabulous.
What kind of coffee should I use?
Instant espresso powder offers the boldest, most authentic flavor, but instant coffee granules work well too. For an even deeper flavor, you can use a combination and adjust to your taste.
Is it possible to make this recipe dairy-free?
Absolutely! Swap out the heavy cream and whole milk for full-fat coconut milk or another rich, non-dairy alternative. The texture will change a bit, but you’ll still get a delicious, creamy coffee treat.
How can I make the ice cream even more coffee-forward?
Add an extra half tablespoon of espresso powder to the base or swirl in a tablespoon of coffee liqueur before churning. Topping with chocolate-covered espresso beans also amplifies the coffee experience.
Can I add mix-ins to this Homemade Coffee Ice Cream Recipe?
Definitely! After churning, gently fold in mini chocolate chips, caramel ribbons, or crushed cookies for a fun twist. Just be sure not to overload the ice cream, so it stays creamy and easy to scoop.
Final Thoughts
There’s truly nothing like a scoop of this Homemade Coffee Ice Cream Recipe—especially when you’ve made it yourself. The process is simple, the flavor is out of this world, and every bite is a little celebration of all things coffee. Give it a try and treat yourself (and your friends) to a homemade dessert that’s guaranteed to impress!
Print
Homemade Coffee Ice Cream Recipe
- Total Time: 6 hours 35 minutes
- Yield: 1 quart 1x
- Diet: Vegetarian
Description
This Homemade Coffee Ice Cream Recipe delivers a rich and creamy dessert with robust espresso flavor made from scratch using a custard base. Perfect for coffee lovers craving a smooth, indulgent treat with the convenience of an ice cream maker.
Ingredients
Custard Base Ingredients
- 2 cups heavy cream
- 1 cup whole milk
- 3/4 cup granulated sugar
- 1 1/2 tablespoons instant espresso powder or instant coffee granules
- 1/8 teaspoon salt
- 5 large egg yolks
- 1 teaspoon vanilla extract
Instructions
- Warm the Milk Mixture: In a medium saucepan, combine the milk, sugar, espresso powder, and salt. Warm over medium heat, stirring until the sugar and coffee dissolve completely. Avoid boiling the mixture to keep the flavors balanced.
- Temper the Egg Yolks: In a separate bowl, whisk the egg yolks thoroughly. Slowly pour about 1/2 cup of the warm milk mixture into the yolks while whisking constantly to temper them and prevent curdling.
- Combine and Thicken: Gradually add the tempered egg yolk mixture back into the saucepan, whisking continuously. Cook over medium-low heat, stirring constantly with a wooden spoon or spatula, until the custard thickens to coat the back of the spoon (about 170–175°F or 77–80°C). Do not allow it to boil.
- Finish the Custard: Remove the pan from heat and stir in the vanilla extract. Pour the custard through a fine mesh sieve into a clean bowl to remove any cooked egg bits for a silky texture.
- Add the Cream and Chill: Stir in the heavy cream. Let the mixture cool slightly at room temperature, then cover and refrigerate for at least 4 hours or overnight until fully chilled to ensure proper texture and flavor melding.
- Churn the Ice Cream: Once chilled, pour the mixture into an ice cream maker and churn according to the manufacturer’s instructions, typically 20–25 minutes, until it reaches a soft-serve consistency.
- Freeze to Set: Transfer the churned ice cream to an airtight container and freeze for at least 2 hours to firm up before serving. Enjoy your delicious homemade coffee ice cream!
Notes
- For an extra kick, add a tablespoon of coffee liqueur to the custard before churning.
- You can fold in mini chocolate chips, crushed chocolate-covered espresso beans, or caramel ribbons after churning for added texture and flavor.
- Prep Time: 25 minutes
- Cook Time: 10 minutes
- Category: Dessert
- Method: Ice Cream Maker
- Cuisine: American
Nutrition
- Serving Size: 1/2 cup
- Calories: 260
- Sugar: 21g
- Sodium: 60mg
- Fat: 18g
- Saturated Fat: 11g
- Unsaturated Fat: 6g
- Trans Fat: 0g
- Carbohydrates: 22g
- Fiber: 0g
- Protein: 4g
- Cholesterol: 135mg