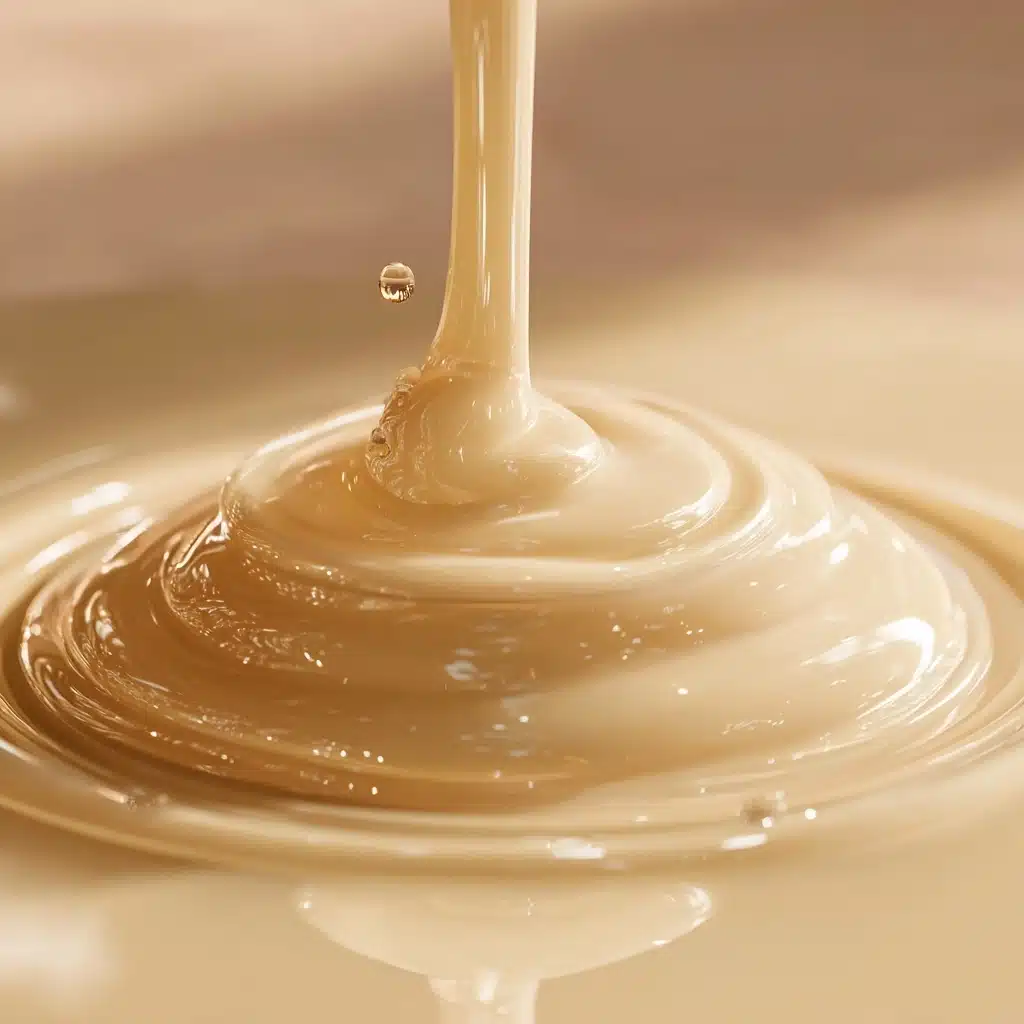
Homemade Condensed Milk Recipe
If you’ve ever found yourself reaching for a can of condensed milk and realized you’re out, this Homemade Condensed Milk recipe is a total game changer. Not only is it incredibly easy and quick to whip up, but it also delivers that lusciously sweet, creamy texture you love, with the added bonus of knowing exactly what’s in it. Plus, making your own means you can tailor it to your tastes or dietary needs—think dairy-free or vanilla-infused versions. Homemade Condensed Milk is a staple that will instantly upgrade your desserts, coffees, and so much more!

Ingredients You’ll Need
You truly need just a few kitchen staples to create something magical. Each ingredient plays a unique role, ensuring your Homemade Condensed Milk comes out just right—rich, silky, and perfectly sweet.
- Whole Milk: The foundation of this recipe, whole milk creates that classic creamy consistency and rich flavor.
- Granulated Sugar: Essential for sweetness and the syrupy texture that defines condensed milk.
- Unsalted Butter: Adds a lovely, subtle richness and helps the mixture achieve its velvety finish.
- Vanilla Extract (optional): For a hint of warmth and aromatic depth—totally optional, but highly recommended if you love a little extra flavor.
How to Make Homemade Condensed Milk
Step 1: Combine Milk and Sugar
Grab a medium saucepan and pour in the whole milk and granulated sugar. Place the pan over medium heat and stir constantly to help the sugar dissolve smoothly into the milk. This is your base, so patience here pays off in the final result!
Step 2: Simmer and Reduce
Once the sugar is fully dissolved, lower the heat to a gentle simmer. Let the mixture bubble away softly, stirring every so often. Over the next 30 to 40 minutes, you’ll see the liquid reduce by about half, thickening and turning a beautiful creamy color. Keep an eye on it to prevent boiling—it should never bubble vigorously.
Step 3: Add Butter and Vanilla
When your mixture has thickened up nicely, remove the saucepan from the heat. Stir in the butter and, if you’re using it, the vanilla extract. The butter will melt right in, making your Homemade Condensed Milk extra silky and giving it a gorgeous sheen.
Step 4: Cool and Store
Allow your condensed milk to cool completely before transferring it to an airtight container. As it cools, it will thicken even more, becoming the spoonable, drizzle-worthy treat you expect. Store it in the fridge and give it a good stir before each use, since a little separation is totally normal.
How to Serve Homemade Condensed Milk
Garnishes
Dress up your Homemade Condensed Milk by swirling in a little extra vanilla or a sprinkle of cinnamon on top before serving. A touch of grated nutmeg or a drizzle of honey can also bring out its natural sweetness and make it extra special.
Side Dishes
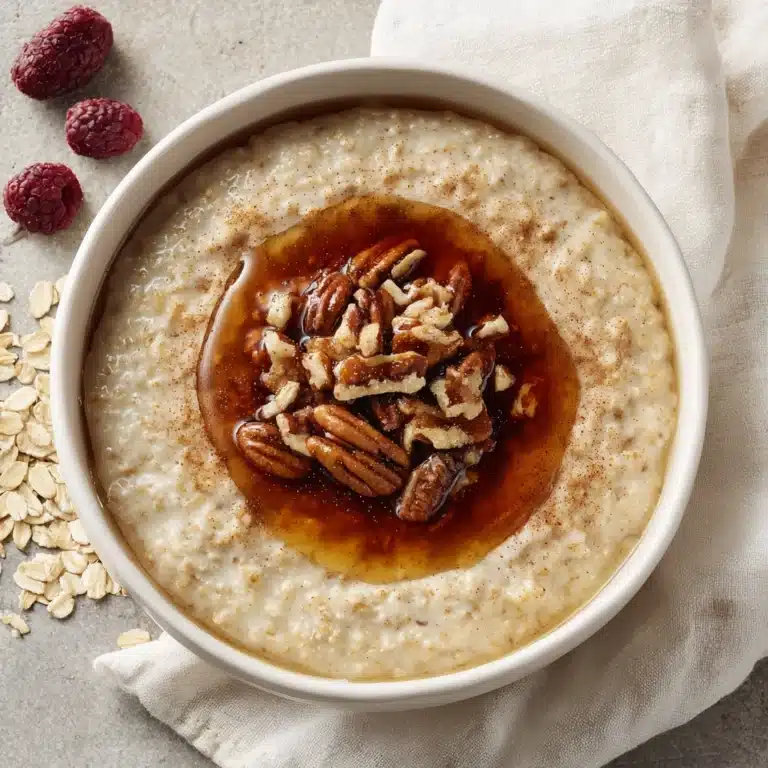
This sweet treat pairs perfectly with fresh fruit, pancakes, or even a warm slice of banana bread. Try it as a decadent coffee creamer, or pour it over oatmeal for a breakfast that feels like dessert.
Creative Ways to Present
For an extra wow factor, serve your Homemade Condensed Milk in cute mason jars or tiny pouring pitchers alongside dessert platters. It makes a lovely gift when bottled up and tied with a ribbon, or use it as a DIY topping bar for friends to drizzle over brownies or ice cream.
Make Ahead and Storage
Storing Leftovers
After cooling, keep your Homemade Condensed Milk in an airtight container in the refrigerator. It will stay fresh and delicious for up to a week—just be sure to stir it before use, as separation is natural.
Freezing
If you want to make a bigger batch, Homemade Condensed Milk freezes beautifully! Pour it into a freezer-safe container, leaving a little space at the top, and freeze for up to three months. Thaw in the fridge overnight and stir well before using.
Reheating
To restore your Homemade Condensed Milk to silky perfection, gently warm it in a saucepan over low heat or pop it in the microwave for a few seconds. Stir until smooth and glossy—then enjoy as usual!
FAQs
Can I use low-fat milk instead of whole milk?
Whole milk is best for achieving the rich, creamy texture that makes Homemade Condensed Milk so special. While you can use low-fat milk, the final result will be thinner and less luxurious, but still sweet and usable in a pinch.
Is there a dairy-free version?
Absolutely! Swap the whole milk for canned coconut milk to create a luscious dairy-free Homemade Condensed Milk. The coconut flavor adds a delicious twist, making it perfect for vegan desserts and coffee drinks.
What if my condensed milk is too thick or too thin?
If your Homemade Condensed Milk turns out thicker than you’d like, simply whisk in a splash of milk until you reach the desired consistency. If it’s too thin, return it to the stove and simmer a little longer, stirring constantly until thickened.
How do I use Homemade Condensed Milk?
This kitchen staple is magic in so many recipes! Use it in baking, for making fudge or tres leches cake, or as a sweetener for coffee, tea, and even cocktails. It’s also divine drizzled over fruit or pancakes.
Can I double or triple the recipe?
Yes! Homemade Condensed Milk scales up beautifully. Just use a larger saucepan and be sure to stir frequently so the sugar dissolves evenly and the milk reduces without scorching.
Final Thoughts
Once you try making Homemade Condensed Milk from scratch, you’ll never want to go back to the canned stuff. It’s quick, versatile, and tastes worlds better, with a freshness and creaminess that store-bought versions just can’t touch. Give it a try—you’ll be amazed at how simple and delicious it is!
Print
Homemade Condensed Milk Recipe
- Total Time: 40 minutes
- Yield: Approximately 3/4 cup 1x
- Diet: Vegetarian
Description
This homemade condensed milk recipe offers a simple and delicious way to make sweetened condensed milk from scratch using basic pantry ingredients. It’s perfect for baking, coffee, or desserts, delivering creamy sweetness with a homemade touch.
Ingredients
Ingredients
- 1 cup whole milk
- 1 cup granulated sugar
- 2 tablespoons unsalted butter
- 1/2 teaspoon vanilla extract (optional)
Instructions
- Combine Milk and Sugar: In a medium saucepan over medium heat, combine the milk and sugar. Stir constantly until the sugar is fully dissolved to ensure a smooth mixture without graininess.
- Simmer the Mixture: Reduce the heat to low and allow the mixture to simmer gently, stirring occasionally. Do not let it boil. Continue this process for 30 to 40 minutes until the liquid reduces by about half and thickens slightly.
- Remove from Heat and Add Butter and Vanilla: Once the mixture has thickened and turned creamy in color, remove the saucepan from the heat. Stir in the unsalted butter and vanilla extract if using, which enhances flavor and adds richness.
- Cool and Store: Let the condensed milk cool at room temperature; it will thicken further as it cools. Transfer the cooled mixture to an airtight container and store it in the refrigerator for up to 1 week. Stir before each use as some separation may occur.
Notes
- For a dairy-free version, substitute whole milk with canned coconut milk.
- This recipe yields approximately 3/4 cup of condensed milk.
- Stir before each use, as some separation may occur during storage.
- Prep Time: 5 minutes
- Cook Time: 35 minutes
- Category: Basics
- Method: Stovetop
- Cuisine: Universal
Nutrition
- Serving Size: 2 tablespoons
- Calories: 130
- Sugar: 22g
- Sodium: 20mg
- Fat: 4g
- Saturated Fat: 2.5g
- Unsaturated Fat: 1g
- Trans Fat: 0g
- Carbohydrates: 23g
- Fiber: 0g
- Protein: 1g
- Cholesterol: 10mg