Lemon Berry Tart Recipe
If you’re dreaming of a dessert bursting with bright sunshine flavor and jeweled with fresh berries, this Lemon Berry Tart Recipe is your golden ticket. It brings together a tender, buttery crust, a silky, velvety lemon custard, and a crown of mixed berries that dance on your palate with every bite. Perfect for summer gatherings, afternoon teas, or any time you want to impress with a stunning yet approachable treat, this Lemon Berry Tart Recipe truly captures the joy of fresh, vibrant flavors in a single, show-stopping dessert.

Ingredients You’ll Need
Every ingredient in this Lemon Berry Tart Recipe is thoughtfully chosen to contribute to its irresistible balance of textures and flavors. From the buttery crust to the creamy lemon filling and fresh berries, each element plays a crucial role in making this tart a masterpiece.
- All-purpose flour: The backbone of the crust, giving it structure and a tender crumb.
- Granulated sugar: Adds subtle sweetness that enhances without overpowering the natural lemon zing.
- Salt: Just a pinch to lift all the other flavors and create balance.
- Cold unsalted butter, cubed: Essential for that rich, flaky texture in the crust you’ll fall in love with.
- Large egg yolk: Brings richness and helps bind the crust beautifully.
- Ice water: Keeps the dough tender and workable—make sure it’s icy cold!
- Whole milk: Creates a creamy, luscious base for the lemon custard filling.
- Large egg yolks (for filling): Give the custard its velvety texture and lovely golden hue.
- Cornstarch: Thickens the lemon filling perfectly, giving it that smooth sliceable quality.
- Lemon zest: Packs an aromatic punch that wakes up your senses.
- Unsalted butter (for filling): Adds a glossy finish and silky mouthfeel to the custard.
- Vanilla extract: Just a whisper of warmth to balance the citrus.
- Fresh lemon juice: The star of the show—adds bright, tangy zing!
- Fresh berries (strawberries, raspberries, blueberries, blackberries): Use a vibrant mix for sweetness, texture, and beauty.
How to Make Lemon Berry Tart Recipe
Step 1: Make and Chill the Crust Dough
Begin by mixing the flour, granulated sugar, and salt until combined. Cut in the cold, cubed butter until the texture resembles coarse sand—this step is key for that flaky crust. Whisk the egg yolk with ice water and stir it into the flour mixture just until the dough comes together in chunks. It’s okay if it doesn’t form a perfect ball yet. Shape into a disk, wrap tightly, and chill for at least one hour to let the dough relax and firm up.
Step 2: Roll Out and Prepare the Crust
After chilling, roll the dough on a floured surface into a 12 to 13-inch circle. Gently transfer to a greased 8-inch tart pan, pressing it evenly into the edges. Trim any excess dough or fold it under for a neat rim. Freeze the crust for 30 minutes before baking; this helps prevent shrinking and keeps the shape crisp.
Step 3: Blind Bake the Tart Shell
Line the chilled crust with greased foil or parchment paper and fill with pie weights or dried beans to avoid puffing up. Bake at 400 degrees Fahrenheit for 18 to 20 minutes until the edges set. Remove the weights carefully and bake for an additional 5 to 8 minutes to dry and lightly brown the shell. Let it cool completely before the next step.
Step 4: Prepare the Lemon Custard Filling
Gently warm milk in a saucepan until bubbles appear at the edges but do not boil. In a bowl, whisk the egg yolks with sugar, cornstarch, and lemon zest until thick and creamy. Slowly pour the warm milk into the egg mixture, whisking constantly to avoid curdling. Return the combined mixture to the pan and cook over medium heat, stirring relentlessly until thickened, about 3 to 4 minutes. Remove from heat and stir in butter, fresh lemon juice, and vanilla extract for a beautifully glossy finish. Cover with plastic wrap pressed directly on the surface and chill until completely cool, about 1 to 2 hours.
Step 5: Assemble and Decorate Your Lemon Berry Tart Recipe
Once both the crust and filling are thoroughly cooled, stir the custard until smooth and spread it evenly into the tart shell. Now the best part: pile your vibrant fresh berries on top in whatever pattern you like—neat rows, random clusters, or a riot of color. Chill the tart until you’re ready to serve, then prepare to wow your guests.
How to Serve Lemon Berry Tart Recipe

Garnishes
To add a final flourish that’s as beautiful as it is tasty, dust the tart with a light sprinkle of powdered sugar. Fresh lemon zest scattered on top will elevate the citrus aroma. For a pop of green and freshness, tuck in a few sprigs of mint or even some edible flowers if you have them—it’s almost too pretty to eat!
Side Dishes
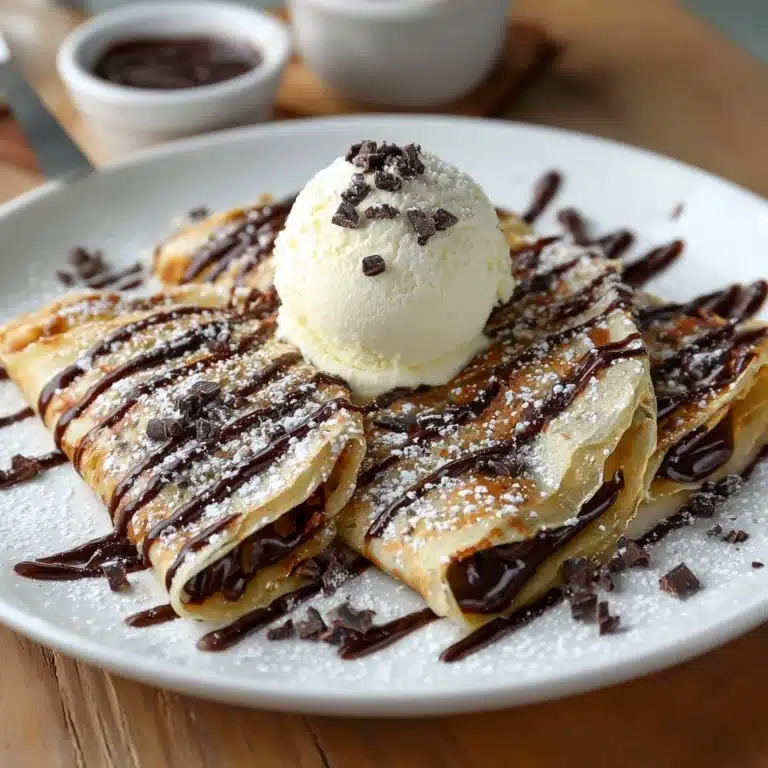
This tart shines on its own, but why not pair it with a dollop of freshly whipped cream or a scoop of vanilla bean ice cream for extra indulgence? It also complements a fresh fruit salad or even a glass of sparkling lemonade or chilled white wine for a perfect brunch or celebratory treat.
Creative Ways to Present
If you’re serving this tart at a party or gathering, consider slicing it into small, bite-sized squares for a delightful finger food option. Display it elevated on a cake stand to make it the centerpiece of your dessert table. For an artistic twist, arrange the berries in color blocks or stripes to make the tart a feast for the eyes as well as the appetite.
Make Ahead and Storage
Storing Leftovers
If you have any leftover tart (so lucky!), simply cover it tightly with plastic wrap or store in an airtight container in the refrigerator. While this Lemon Berry Tart Recipe is best enjoyed the day it’s made for maximum crispness, it stays delicious for up to three days. The crust may soften slightly, but the flavors remain bright and wonderful.
Freezing
You can freeze the baked, unfilled tart shell (wrapped well) for up to one month in the freezer. It’s best to prepare the lemon custard and fresh berries fresh on the day you plan to serve, as the filling doesn’t freeze well and fresh berries lose their texture when frozen.
Reheating
There is no need to reheat the tart, as it is meant to be enjoyed chilled. If you want to crisp up the crust after storing, just heat the empty shell briefly in a hot oven for a few minutes before filling it. Once assembled and topped with berries, serve cold right from the fridge for the best experience.
FAQs
Can I use bottled lemon juice instead of fresh?
For this Lemon Berry Tart Recipe, fresh lemon juice really makes a difference in brightness and flavor. Bottled juice tends to lack the vibrant citrus notes that fresh lemon juice brings, so whenever possible, squeeze fresh lemons for the best results.
What kinds of berries work best?
A mix of strawberries, raspberries, blueberries, and blackberries gives a wonderful range of sweet and tart flavors along with varied textures and gorgeous colors. Use whatever is freshest and ripest to make your tart shine.
How far in advance can I prepare the tart?
You can prepare the crust and lemon custard filling up to three days ahead. The tart is best assembled and topped with fresh berries within two hours of serving to keep the crust crisp and the berries bright.
Can I make this without a tart pan?
Absolutely! If you don’t have a tart pan, a shallow 9-inch pie pan works just fine. Your filling layer will be slightly thinner, but the dessert will still be delicious and beautiful.
What if my custard is lumpy?
No worries! If lumps appear, simply strain the custard through a fine-mesh sieve before chilling. This little step ensures a silky smooth lemon custard that’s irresistible in every bite.
Final Thoughts
This Lemon Berry Tart Recipe is one of those desserts that brighten up any occasion with its joyful flavors and stunning presentation. It’s approachable enough for weeknight baking but impressive enough to serve at your next gathering. I can’t wait for you to make it and discover how the bright lemon custard paired with fresh berries can bring so much happiness to your table. Happy baking and even happier eating!
Print
Lemon Berry Tart Recipe
- Total Time: 4 hours (including chilling and freezing time)
- Yield: 8 servings 1x
- Diet: Vegetarian
Description
This Lemon Berry Tart features a buttery homemade crust filled with velvety lemon custard and topped with a colorful mix of fresh berries. It offers a perfect balance of tangy citrus custard and sweet, juicy berries, making it ideal for summer gatherings or special occasions. With a crisp, flaky crust and a luscious filling, this tart is both visually stunning and delicious.
Ingredients
For the crust:
- 1 ⅓ cup all-purpose flour
- 2 tablespoons granulated sugar (25 grams)
- ¼ teaspoon salt
- ½ cup cold unsalted butter, cubed
- 1 large egg yolk
- 2–3 tablespoons ice water
For the filling:
- 2 cups whole milk
- 5 large egg yolks
- ½ cup granulated sugar
- ¼ cup cornstarch
- Zest of 1 lemon
- ¼ cup unsalted butter, cubed
- ½ teaspoon vanilla extract
- 1 tablespoon fresh lemon juice
For topping:
- 2–3 cups fresh berries (such as strawberries, raspberries, blueberries, and blackberries)
Instructions
- Prepare the Crust Dough: In a large bowl or food processor, combine flour, sugar, and salt. Add cubed butter and cut it in using a pastry blender or pulse until the mixture is coarse and sandy.
- Bring Dough Together: Whisk the egg yolk with 2 tablespoons ice water. Add to the flour mixture and use a spoon or your hands (or a few pulses) to form large chunks. Add more ice water ½ tablespoon at a time if necessary until just combined. Be careful not to overwork or make the dough too wet.
- Chill the Dough: Turn the dough out onto the counter and form into a disk. Wrap tightly in plastic wrap and chill in the refrigerator for 1 hour or up to 3 days.
- Roll Out and Line Tart Pan: On a floured surface, roll the chilled dough to a 12–13-inch circle. Transfer it to a greased 8-inch tart pan, gently pressing it into place and trimming or folding any excess dough. Freeze the tart shell for 30 minutes while preheating the oven to 400°F.
- Blind Bake the Crust: Line the tart shell with greased foil or parchment paper and fill with pie weights, dry rice, or beans. Bake for 18–20 minutes. Remove the weights and lining, then bake for another 5–8 minutes until dry and lightly golden. Let the crust cool completely.
- Prepare the Lemon Custard: Warm the milk in a medium saucepan over medium heat just until bubbles form around the edges, without boiling.
- Make Egg Mixture: In a bowl, whisk egg yolks with sugar, cornstarch, and lemon zest until very thick. Gradually whisk the warm milk into the egg mixture in a thin stream to temper the eggs, stirring constantly.
- Cook the Custard: Return the mixture to the saucepan and cook over medium heat, stirring constantly with a rubber spatula until thickened, about 3–4 minutes.
- Finish the Custard: Remove from heat and stir in butter, fresh lemon juice, and vanilla extract. Pour into a bowl, cover with plastic wrap pressed directly on the surface to prevent a skin, and chill for 1–2 hours until completely cool.
- Assemble the Tart: Once the crust and custard are cool, stir the custard until smooth and spread evenly into the tart shell.
- Add Berries and Serve: Top the custard with the fresh berries. Serve immediately or refrigerate for up to 2 hours. Best enjoyed the day it is assembled, although it keeps refrigerated for a few days.
Notes
- If you have a tart pan with a removable bottom, use it for easy release.
- The crust dough can be made ahead and stored refrigerated for up to 3 days or frozen for 1 month.
- The baked, unfilled tart shell can be kept covered at room temperature for 3 days.
- The lemon custard filling can be prepared in advance and refrigerated for up to 1 week.
- If you don’t have a tart pan, a shallow 9-inch pie pan will work; the filling layer will just be thinner.
- For best results, assemble the tart shortly before serving to keep the crust crisp.
- Prep Time: 30 minutes
- Cook Time: 30 minutes
- Category: Desserts
- Method: Baking
- Cuisine: French