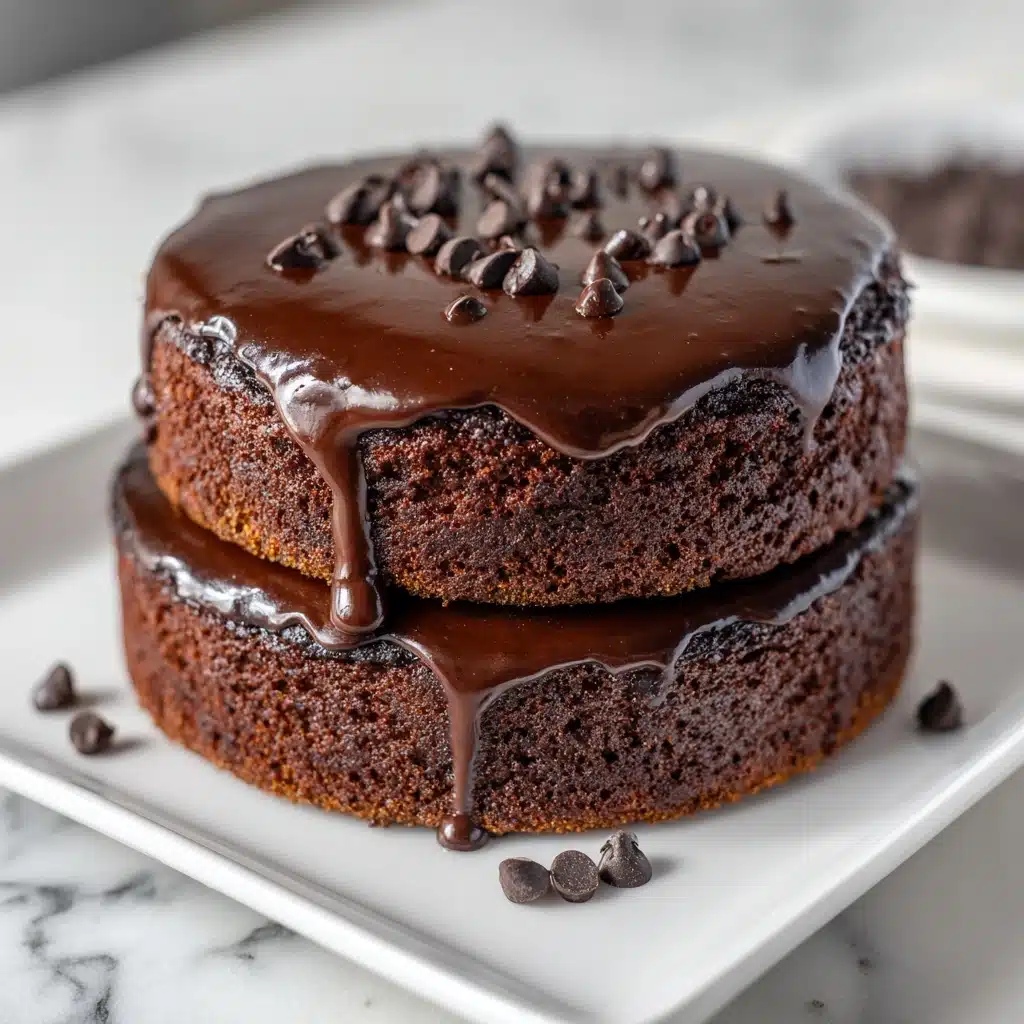
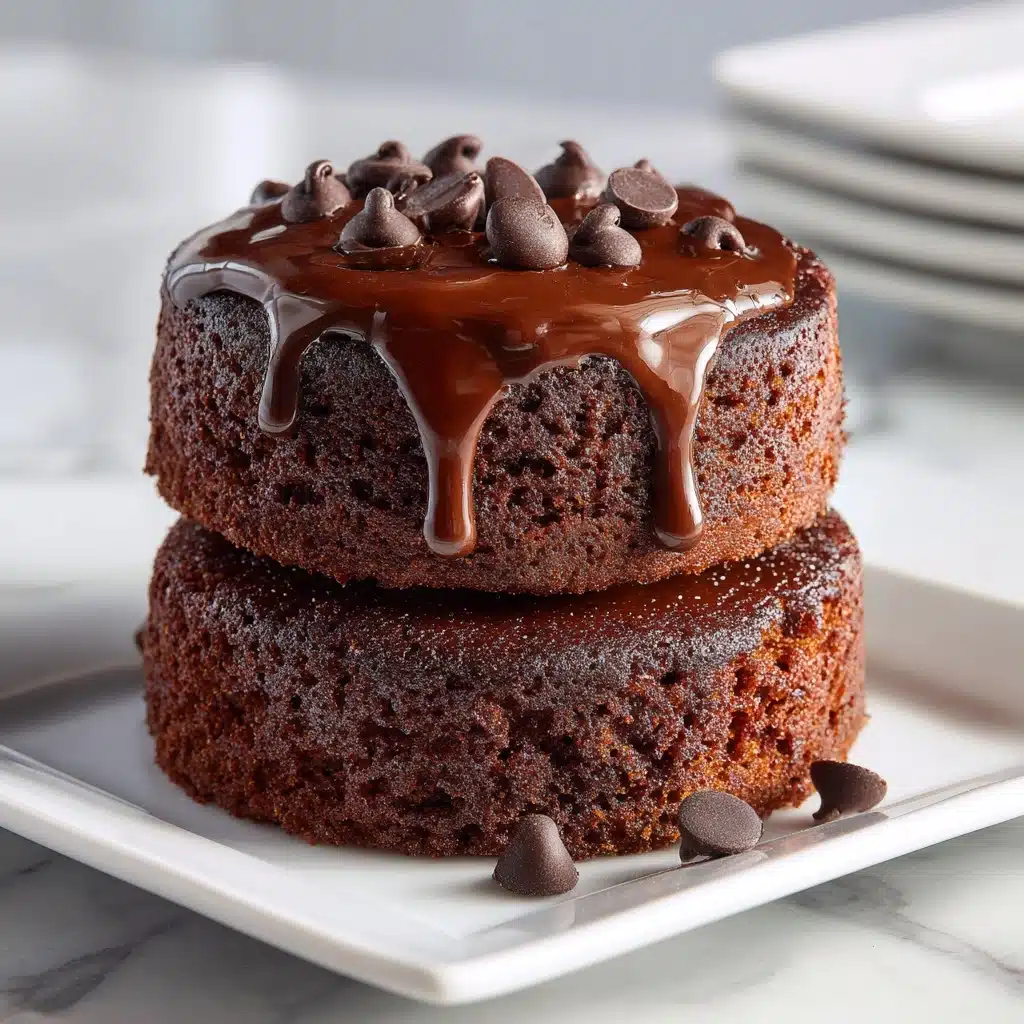
Mini Chocolate Fudge Cakes Recipe
Get ready to fall in love: Mini Chocolate Fudge Cakes are what happens when you take everything irresistible about a decadent dessert and make it perfectly portioned for sharing (or savoring solo!). These dreamy little cakes have crisp edges and a melty, fudgy center that practically begs for a dollop of whipped cream or a handful of fresh berries. With simple pantry staples and a quick bake time, you’ll be treating your friends and family (or just yourself!) to homemade magic in under half an hour.
Ingredients You’ll Need
This recipe is built on trustworthy, straightforward ingredients that each play a special part in creating the rich, luxurious texture of Mini Chocolate Fudge Cakes. There are no complicated steps—just essential components blending together for gooey perfection.
- Unsalted butter: Gives the cakes their signature tenderness and helps the chocolate melt like a dream.
- Semisweet chocolate (chopped): The star of the show—quality chocolate equals a deeper, richer cake flavor.
- Granulated sugar: Not only sweetens, but also helps achieve that shiny, crinkle-top finish.
- Salt: Just a pinch to enhance and balance all those deep chocolate notes.
- Large eggs and egg yolks: The secret to ultra-moist, fudgy centers and a perfect rise.
- Vanilla extract: Adds warmth and rounding depth, complementing the chocolate beautifully.
- All-purpose flour: Just enough to bind the batter, creating a cake that’s luscious rather than dense.
- Cocoa powder (for dusting): Prevents sticking and boosts the chocolate kick on the outside.
- Optional whipped cream or berries: For a refreshing, creamy finish that takes each cake over the top!
How to Make Mini Chocolate Fudge Cakes
Step 1: Prep the Ramekins
Begin by preheating your oven to 375°F. Generously grease six 6-ounce ramekins with butter, then add a sprinkle of cocoa powder, gently tapping to coat the inside and dump out the excess. This adds a layer of flavor and guarantees the cakes will pop right out with those gorgeous edges intact.
Step 2: Melt the Butter and Chocolate
Place the butter and chopped chocolate in a heatproof bowl, then set it over a pot of barely simmering water. Stir constantly until the mixture is lusciously smooth and glossy. This gentle melting process keeps the chocolate from burning and locks in that rich flavor Mini Chocolate Fudge Cakes are famous for.
Step 3: Mix in Sugar, Salt, Eggs, and Vanilla
Take the bowl off the heat, then whisk in the sugar and salt. Crack in the eggs and extra yolks, whisking until the mixture is thick, glossy, and has a bit of sheen. Add the vanilla extract and give it one last loving whisk. Don’t skip this step; it makes sure every bite is packed with flavor!
Step 4: Fold in the Flour
Sprinkle the flour over your chocolate mixture, and gently fold with a spatula. Take care not to overmix; stopping just as the flour disappears keeps your cakes feather-light and fudgy in the middle—one of the joys of Mini Chocolate Fudge Cakes.
Step 5: Bake
Evenly divide the batter among the prepared ramekins, filling each about three-quarters full. Pop them in the oven and bake for 10 to 12 minutes. You’re looking for edges that are set and centers that remain soft—this is what gives the cakes that signature molten center!
Step 6: Cool Briefly and Unmold
Give the cakes a brief rest—2 to 3 minutes—out of the oven, then run a small knife around the edge of each ramekin. Carefully invert each cake onto a plate. That moment when you lift the ramekin and see the glossy, delicate cake released is pure joy.
Step 7: Serve Warm
This is the moment you’ve been waiting for. Top your Mini Chocolate Fudge Cakes with a swirl of whipped cream or a scatter of berries, and dive in while still warm for absolute chocolate bliss.
How to Serve Mini Chocolate Fudge Cakes
Garnishes
The crowning touch for Mini Chocolate Fudge Cakes is all about contrast. A snowy puff of whipped cream melts dreamily into the hot cake, while fresh berries add a pop of tartness and color. If you’re feeling fancy, a light dusting of powdered sugar or even a drizzle of chocolate sauce sends them over the top.
Side Dishes
While these cakes are stellar on their own, you can elevate your dessert plate with sides like vanilla ice cream, a spoonful of tangy crème fraîche, or even a little salted caramel sauce. The key is to choose accompaniments that bring balance to the fudgy, chocolatey richness.
Creative Ways to Present
Dress up your Mini Chocolate Fudge Cakes for special occasions by serving them in vintage teacups or on elegant individual plates. For a playful twist, scatter edible flowers or crushed pistachios over the top, or set out little bowls so guests can personalize with their favorite toppings.
Make Ahead and Storage
Storing Leftovers
If you have leftover Mini Chocolate Fudge Cakes (lucky you!), simply let them cool completely, then wrap each cake in plastic wrap or store in an airtight container. Pop them in the fridge, where they’ll stay fresh and delicious for up to three days.
Freezing
You can absolutely freeze your cakes for later enjoyment. Wrap each cooled cake tightly in plastic and foil, then freeze for up to two months. When that chocolate craving hits, you’ll be a quick reheat away from pure bliss.
Reheating
For the dreamiest texture, zap chilled or frozen cakes in the microwave for 20–30 seconds (from the fridge) or 45–60 seconds (from frozen) until just heated through. This brings back that melt-in-the-middle magic Mini Chocolate Fudge Cakes are all about. Serve right away for best results.
FAQs
Can I make Mini Chocolate Fudge Cakes ahead of time?
Absolutely! You can prep the batter a few hours in advance and refrigerate it, then bake just before serving. You’ll want to bring the batter to room temperature first for the best rise and texture.
What kind of chocolate works best for these cakes?
High-quality semisweet chocolate is the secret to flavor-packed Mini Chocolate Fudge Cakes. Chop your favorite bar, or grab good chips; just steer clear of baking chocolate that’s too bitter or waxy for maximum deliciousness.
Can I use cupcake pans instead of ramekins?
If you don’t have ramekins, you can use a standard muffin tin with cupcake liners. The cakes may bake a little faster, so start checking at the 8-minute mark for that perfect gooey center.
How do I know when they’re done?
Look for edges that have set and started to pull away from the sides, but centers that wobble just slightly when you jiggle the pan. This gives you that signature molten core fans of Mini Chocolate Fudge Cakes adore.
Can these cakes be made gluten-free?
Yes! Just swap the all-purpose flour for your favorite 1:1 gluten-free blend. The texture will still be fudgy and satisfying, so everyone can indulge.
Final Thoughts
If you’re looking for a showstopping dessert that’s effortless yet unforgettable, you’ll adore whipping up a batch of Mini Chocolate Fudge Cakes. Whether it’s a dinner party finale or a late-night treat, each warm, chocolate-filled bite is pure happiness. Give these little cakes a try—you’ll be hooked after your first molten spoonful!
Print
Mini Chocolate Fudge Cakes Recipe
- Total Time: 27 minutes
- Yield: 6 cakes 1x
- Diet: Vegetarian
Description
Indulge in these decadent Mini Chocolate Fudge Cakes for a rich and satisfying dessert experience. These individual cakes have a molten center and are perfect for any chocolate lover.
Ingredients
Main Ingredients:
- 1/2 cup unsalted butter
- 6 ounces semisweet chocolate, chopped
- 3/4 cup granulated sugar
- 1/4 teaspoon salt
- 2 large eggs
- 2 large egg yolks
- 1 teaspoon vanilla extract
- 1/4 cup all-purpose flour
Additional:
- Cocoa powder for dusting
- Optional whipped cream or berries for serving
Instructions
- Preheat Oven: Preheat the oven to 375°F. Grease and lightly dust six 6-ounce ramekins with cocoa powder.
- Melt Chocolate: In a heatproof bowl over simmering water, melt butter and chocolate until smooth. Remove from heat and whisk in sugar and salt.
- Add Eggs: Whisk in eggs and egg yolks until glossy, then stir in vanilla.
- Combine: Gently fold in flour until just combined. Divide batter among ramekins.
- Bake: Bake for 10–12 minutes until edges are set but centers are still soft.
- Serve: Cool for 2–3 minutes, run a knife around edges, and invert onto plates. Serve warm with whipped cream or berries.
Notes
- For extra richness, add 1 tablespoon espresso powder to the chocolate mixture.
- Best served immediately for a molten center.
- Prep Time: 15 minutes
- Cook Time: 12 minutes
- Category: Dessert
- Method: Baking
- Cuisine: American
Nutrition
- Serving Size: 1 cake
- Calories: 370
- Sugar: 27 g
- Sodium: 90 mg
- Fat: 25 g
- Saturated Fat: 15 g
- Unsaturated Fat: 9 g
- Trans Fat: 0 g
- Carbohydrates: 33 g
- Fiber: 3 g
- Protein: 5 g
- Cholesterol: 145 mg