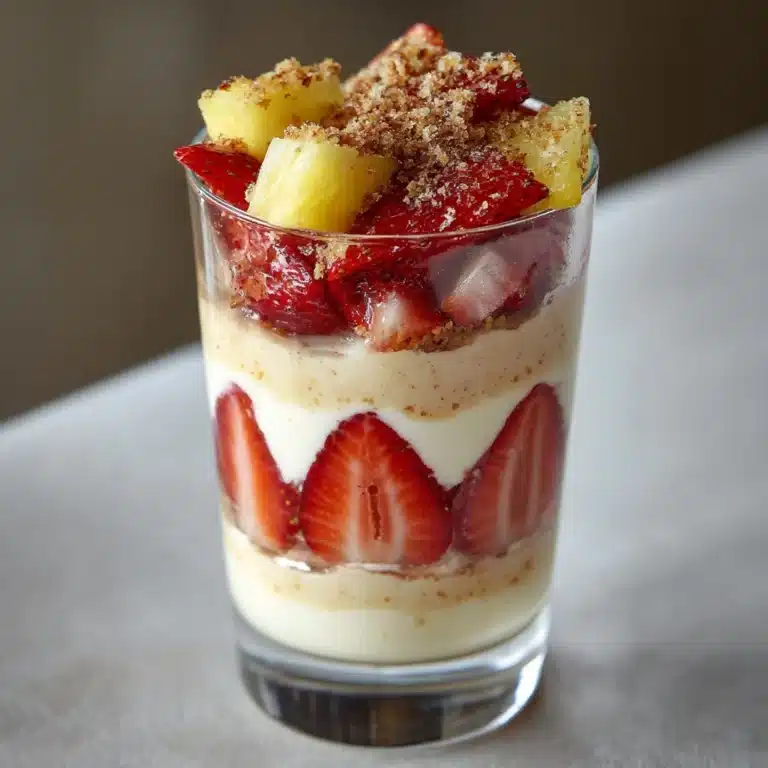
No-Bake Apple Cheesecake Jars Recipe
If you’re searching for a delightful dessert that combines the creamy indulgence of cheesecake with the comforting flavors of cinnamon-spiced apples, look no further than this No-Bake Apple Cheesecake Jars Recipe. It’s a charming and fuss-free way to impress friends and family, layering buttery graham cracker crust, luscious whipped cheesecake filling, and warm apple compote all in cute jars. Whether you’re making it for a cozy night in or a special occasion, these jars deliver all the heartwarming tastes of fall in a portable, elegant presentation that’s as fun to assemble as it is to eat.

Ingredients You’ll Need
The beauty of this No-Bake Apple Cheesecake Jars Recipe is in its simplicity. Each ingredient plays a crucial role—from the crunch of the graham cracker crust to the fluffy cheesecake cream and tender apples. Together, they create a perfect balance of texture, flavor, and color that will brighten up any dessert table.
- Graham cracker crumbs: These provide the buttery, crunchy base that holds the dessert together and adds a lovely toasty note.
- Granulated sugar: Just enough sweetness to enhance the crust without overwhelming it.
- Unsalted butter, melted: Binds the crust crumbs perfectly and enriches the flavor.
- Cream cheese, softened: The star of the cheesecake layer, giving it that dreamy, creamy texture.
- Heavy cream, chilled: Whipped to stiff peaks, it lightens the cheesecake filling for an airy finish.
- Powdered sugar: Adds gentle sweetness and helps stabilize the whipped cream mixture.
- Vanilla extract: Infuses the cream cheese layer with a warm, inviting aroma.
- Medium apples, peeled, cored, and diced: The fresh fruit component—choose crisp, tart apples for the best flavor contrast.
- Unsalted butter (for cooking apples): Creates a luscious caramel base for the apple topping.
- Brown sugar: Sweetens and deepens the flavor of the sautéed apples.
- Ground cinnamon: The classic spice that brings cozy warmth to the apple mixture.
- Lemon juice: Adds brightness and balances the sweetness in the topping.
- Whipped cream: Optional but highly recommended for garnish and added luxury.
- Crushed graham crackers: Sprinkled on top for extra crunch and beauty.
- Caramel sauce: Drizzled as a finishing touch for irresistible sweetness.
How to Make No-Bake Apple Cheesecake Jars Recipe
Step 1: Prepare the Crust
Start by mixing your graham cracker crumbs with granulated sugar and melted butter. This combination forms the rich, crunchy foundation of your cheesecake jars. Press the mixture firmly into the bottom of each jar or serving glass. Pressing tightly will help the crust hold together when you add the delicate cheesecake layers.
Step 2: Make the Cheesecake Layer
Next, beat the softened cream cheese until it’s completely smooth and creamy. In a separate chilled bowl, whip the heavy cream until it forms stiff peaks—a sign it’s ready to create that fluffy texture. Gently fold the whipped cream, powdered sugar, and vanilla extract into the cream cheese mixture. This all-in-one cheesecake filling will be light yet decadent, perfectly balancing richness with airy softness.
Step 3: Prepare the Apple Topping
Melt butter in a skillet and add your brown sugar, cinnamon, and diced apples. Cook gently for 5 to 7 minutes until the apples soften and caramelize beautifully. Stir in the lemon juice at the end to brighten the flavors and stop the cooking. Allow this spiced apple compote to cool before assembling your jars.
Step 4: Assemble the Jars
Layer the cheesecake filling over the graham cracker crust in each jar. Spoon a generous amount of the apple topping over the cheesecake layer. For extra flair and depth, you can repeat the layers if your jar space allows. This layering creates a visually stunning effect, teasing you with every dessert spoonful.
Step 5: Garnish and Chill
Top each assembled jar with whipped cream, a sprinkle of crushed graham crackers, and a drizzle of caramel sauce for that elegant finishing touch. Place the jars in the refrigerator to chill for at least one hour, allowing the flavors to meld and the texture to set just right.
How to Serve No-Bake Apple Cheesecake Jars Recipe

Garnishes
Whipped cream is your best friend here—it adds a creamy cloud to contrast the apple and crust layers. A light dusting of extra cinnamon or a few graham cracker crumbs sprinkled on top bring texture and a finishing flourish. And of course, a drizzle of warm caramel sauce creates those irresistible sweet ribbons that will have everyone reaching for seconds.
Side Dishes
This dessert shines confidently on its own, but if you want to round out your spread, consider light and fresh accompaniments like a crisp green salad or a simple fruit salad to balance the richness. A cup of spiced chai or vanilla latte pairs beautifully, making this a wonderful treat for afternoon tea or brunch.
Creative Ways to Present
Serving these cheesecake jars in clear glass containers shows off the gorgeous layers and is perfect for gatherings. Try mini mason jars, elegant ramekins, or even stemless wine glasses for a sophisticated touch. You could also personalize each jar with a cute label or tag for parties, giving guests a delightful individual dessert experience.
Make Ahead and Storage
Storing Leftovers
After enjoying your No-Bake Apple Cheesecake Jars Recipe, store any leftovers in the refrigerator with airtight lids or plastic wrap. These jars keep well for up to 3 days, allowing the flavors to deepen further, making them even more delicious the next day.
Freezing
If you want to save time for future cravings, you can freeze these cheesecake jars before adding the whipped cream and caramel garnish. Cover tightly with plastic wrap and a lid, then freeze for up to one month. Thaw in the refrigerator overnight before serving and add fresh toppings then for the best texture.
Reheating
This dessert is meant to be enjoyed chilled, so reheating is not recommended as it may alter the delicate texture of the cheesecake and apple layers. Simply bring the jars to room temperature for 10–15 minutes before serving if you prefer it less cold.
FAQs
Can I use different types of apples in this recipe?
Absolutely! While tart apples like Granny Smith work best for balance, you can experiment with Fuji or Honeycrisp for a sweeter touch. Just adjust the sugar in the topping accordingly.
Is this recipe suitable for kids to help with?
Definitely! Kids love assembling the jars and mixing the cheesecake filling. Just supervise the stovetop cooking for the apple topping to keep things safe.
Can I make the cheesecake layer ahead of time?
Yes, you can make the cheesecake filling a day ahead and keep it chilled. Just give it a quick stir before layering to refresh the texture.
What can I substitute for graham cracker crumbs?
You can use crushed digestive biscuits, gingersnaps, or even pretzels for a unique twist. Just keep in mind the flavor profile as it will change the base taste.
Is there a vegan alternative for this recipe?
While this recipe isn’t naturally vegan, you can swap cream cheese with vegan cream cheese and use coconut cream whipped to stiff peaks. Also, make sure your crust is vegan-friendly by checking your butter substitute.
Final Thoughts
This No-Bake Apple Cheesecake Jars Recipe is one of those magical desserts that feels both comforting and festive, yet comes together with ease. It’s a perfect way to share a little homemade love, impress guests with layered flavors and textures, and celebrate the simple joy of apples and cheesecake. So go ahead, try this recipe—it might just become your new fall favorite or a go-to dessert to brighten any season.
Print
No-Bake Apple Cheesecake Jars Recipe
- Total Time: 1 hour 20 minutes
- Yield: 6 servings 1x
Description
Delight in these No-Bake Apple Cheesecake Jars featuring a buttery graham cracker crust, a creamy vanilla-infused cheesecake layer, and a warm cinnamon apple topping. Perfectly portioned and easy to assemble, these jars combine rich textures and cozy fall flavors with a hassle-free, no-bake method, ideal for a quick dessert that impresses.
Ingredients
Crust
- 1 cup graham cracker crumbs
- 2 tablespoons granulated sugar
- 4 tablespoons unsalted butter, melted
Cheesecake Layer
- 8 ounces cream cheese, softened
- 1 cup heavy cream, chilled
- ½ cup powdered sugar
- 1 teaspoon vanilla extract
Apple Topping
- 2 medium apples, peeled, cored, and diced
- 2 tablespoons unsalted butter
- 2 tablespoons brown sugar
- ½ teaspoon ground cinnamon
- 1 teaspoon lemon juice
Garnishes (optional)
- Whipped cream
- Crushed graham crackers
- Caramel sauce
Instructions
- Prepare the Crust: In a bowl, combine graham cracker crumbs, granulated sugar, and melted butter until evenly mixed. Press this mixture firmly into the bottom of your jars or serving glasses to form the crust layer.
- Make the Cheesecake Layer: Beat the softened cream cheese in a bowl until smooth and creamy. In a separate chilled bowl, whip the heavy cream until stiff peaks form. Gently fold the whipped cream, powdered sugar, and vanilla extract into the cream cheese until fully combined, creating a light and fluffy cheesecake filling.
- Prepare the Apple Topping: Melt the butter in a skillet over medium heat. Add in the brown sugar, ground cinnamon, and diced apples. Cook the mixture for 5-7 minutes, stirring occasionally, until the apples are softened but still hold their shape. Remove from heat, stir in lemon juice, and allow the topping to cool to room temperature.
- Assemble the Jars: Spoon a layer of the cheesecake mixture over the graham cracker crust in each jar. Top with a layer of the cooled apple compote. Repeat the layers if desired to fill the jars suitably.
- Garnish and Serve: Add a dollop of whipped cream, sprinkle with crushed graham crackers, and drizzle caramel sauce over the top for extra indulgence. Chill the assembled jars in the refrigerator for at least 1 hour before serving to let the layers set and flavors meld.
Notes
- Use cold heavy cream to ensure it whips properly to stiff peaks.
- The apple topping can be made a day ahead and refrigerated to save time.
- For a stronger cinnamon flavor, sprinkle a little extra cinnamon over the apple layer before assembling.
- This dessert is best served chilled but should be brought to room temperature for about 10 minutes before eating for optimal creaminess.
- Substitute caramel sauce with honey or maple syrup for a different sweet note.
- Prep Time: 20 minutes
- Cook Time: 10 minutes
- Category: Dessert
- Method: Stovetop
- Cuisine: American