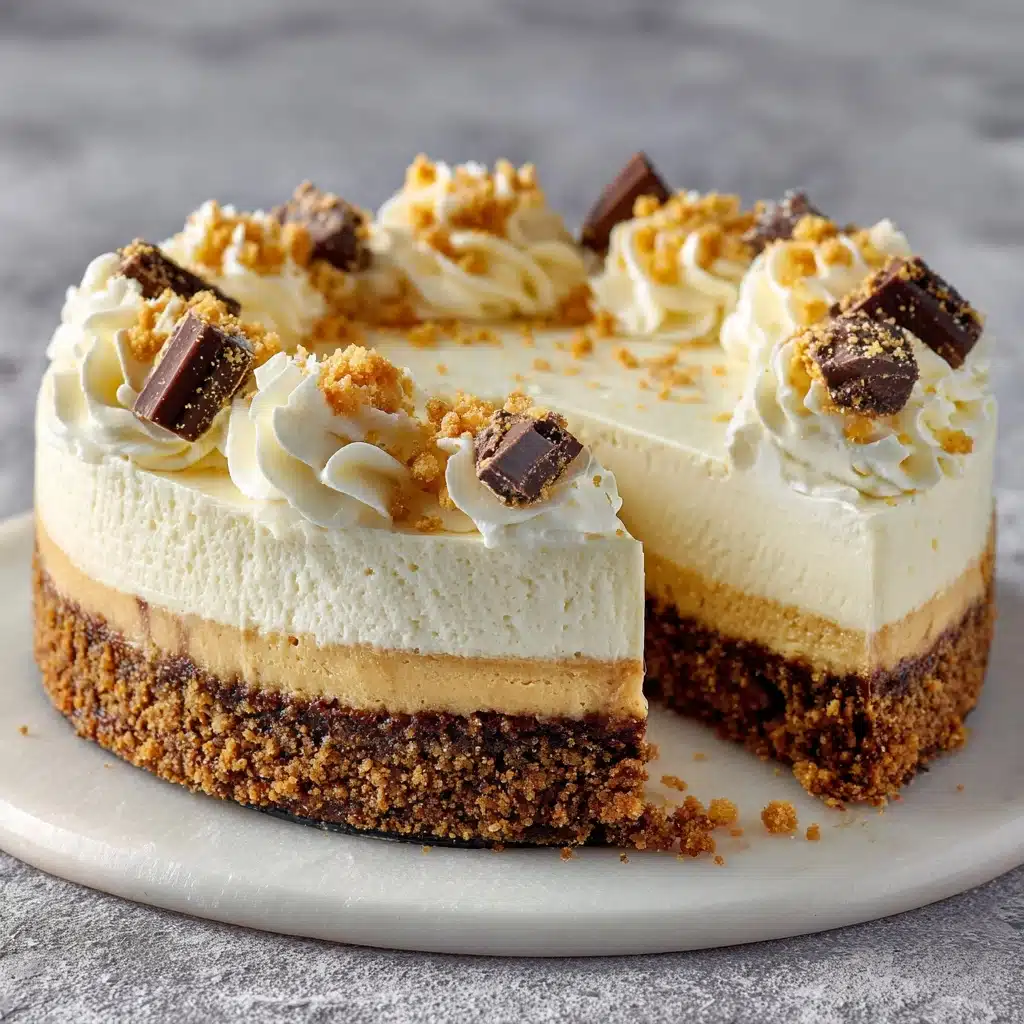
No-Bake Cheesecake Recipe
Treat yourself to a dessert that truly feels like a celebration, even on an ordinary day! This No-Bake Cheesecake delivers an irresistibly creamy, tangy filling atop a sweet, buttery crust with almost no effort and absolutely no oven required. It’s a lifesaver for summer days or anytime you crave cheesecake without the fuss — just a bit of mixing, a little patience while it chills, and you have a showstopping treat. Whether you’re decking it out with fresh berries or swirling on some pie filling, each chilled slice is the ultimate combination of rich flavor and light texture that keeps everyone coming back for seconds.
Ingredients You’ll Need
Ingredients You’ll Need
Simplicity is at the heart of No-Bake Cheesecake, and each ingredient plays a starring role in creating layers of flavor and texture. It’s amazing how just a handful of well-chosen items, when combined, result in such a crowd-pleasing classic!
- Graham cracker crumbs: The crunchy, honey-scented foundation for that perfect cheesecake base.
- Granulated sugar: Adds sweetness to the crust and helps everything bind together.
- Unsalted butter (melted): Acts as the delicious glue that holds your crust perfectly in place.
- Cream cheese (softened): The smooth, tangy backbone of your dreamy cheesecake filling.
- Powdered sugar: Melts beautifully into the cream cheese for silky-smooth sweetness, without any grittiness.
- Vanilla extract: Adds that warm, aromatic note we all crave in cheesecake.
- Lemon juice: Just a splash wakes up the filling and balances the richness; don’t skip it!
- Heavy whipping cream: Whipped to billowy peaks, this lightens the filling for that airy texture that melts in your mouth.
- Fresh berries or pie filling (optional): The finishing touch — a pop of color and freshness that takes things to another level.
How to Make No-Bake Cheesecake
Step 1: Prepare the Crust
Start by mingling the graham cracker crumbs, granulated sugar, and melted butter in a medium bowl. You’ll want to stir until every crumb is glistening and evenly moistened. This aromatic mixture gets pressed firmly into the bottom of a 9-inch springform pan, becoming that sweet, crumbly base everyone loves. Pop it in the fridge to set up, so when you pour the filling in later, the whole slice holds together beautifully.
Step 2: Make the Filling
In a large mixing bowl, beat your softened cream cheese until it’s absolutely lump-free and silky. Now add the powdered sugar (for the perfect level of sweetness), vanilla extract, and a lively zing of lemon juice. Continue beating until everything is perfectly combined and the mixture is plush and thick.
Step 3: Whip the Cream
In a separate bowl, grab your whisk or electric beaters and tackle the heavy cream. Whip until you reach stiff peaks — this is key for giving your No-Bake Cheesecake its signature light, mousse-like texture instead of a dense, heavy filling.
Step 4: Fold and Combine
Gently fold the whipped cream into the cream cheese mixture. Work slowly and lovingly so you don’t lose all that precious air you just whipped in. Once it’s fully incorporated, you’ll have a filling that looks and tastes dreamy — smooth, fluffy, and spoon-licking good.
Step 5: Fill and Chill
Spoon your filling over the chilled crust in your pan, smoothing out the top with a spatula. Cover the pan and let it chill in the refrigerator for at least six hours, but overnight is even better. The waiting can be tough, but it’s the secret to slices that hold together perfectly.
Step 6: Top and Serve
Just before serving, crown your No-Bake Cheesecake with a lush layer of fresh berries or a swirl of your favorite pie filling. That extra pop makes every slice look as gorgeous as it tastes!
How to Serve No-Bake Cheesecake
Garnishes
The right garnish turns your No-Bake Cheesecake into a true showpiece! A tumble of fresh strawberries, blueberries, or raspberries instantly brings freshness and color, while a spoonful of cherry or blueberry pie filling creates that nostalgic diner vibe. For a citrusy twist, try adding a shower of lemon zest or delicate curls of white chocolate — both pair beautifully with the velvety filling.
Side Dishes
If you’re inviting friends over, consider serving this chilled cheesecake with light accompaniments like a bowl of fresh fruit salad or a crisp glass of sparkling wine. Coffee and hot tea are classic pairings that balance the richness of the dessert without overpowering its delicate flavor.
Creative Ways to Present
This No-Bake Cheesecake is as versatile as it is delicious. Slice it into dainty squares for bite-sized dessert platters, or use small jars or glasses for individual parfait-style servings at a party. For family-style fun, drizzle each slice with different sauces or layer it with crushed cookies and fruit in a trifle — you can truly let your imagination (and your sweet tooth) lead the way.
Make Ahead and Storage
Storing Leftovers
Your cheesecake will keep its creamy texture for up to five days in the fridge. Simply cover the springform pan with plastic wrap or transfer individual slices to an airtight container to keep everything perfectly fresh.
Freezing
If you want to stash away a few slices for a future treat, No-Bake Cheesecake actually freezes beautifully. Wrap slices tightly in plastic wrap and foil, then store in a freezer-safe container for up to two months. Defrost overnight in the fridge before serving — the texture remains wonderfully creamy.
Reheating
There’s no need to reheat a No-Bake Cheesecake! In fact, it’s meant to be enjoyed chilled, so just remove from the fridge about 20 minutes before serving to let the flavors shine.
FAQs
Can I use a different type Dessert
Absolutely! While graham crackers are the classic choice, crushed digestive biscuits or even chocolate sandwich cookies (like Oreos) make fantastic alternatives and add their own twist of flavor to your cheesecake’s foundation.
Why does my No-Bake Cheesecake sometimes not set?
Most often, issues with setting are due to not whipping the cream enough or not chilling the dessert long enough. Make sure your whipped cream forms firm peaks, and let the cheesecake chill for the full six hours or overnight for that perfect sliceable texture.
Can I make this No-Bake Cheesecake in advance?
Definitely! In fact, this dessert actually benefits from chilling overnight, so it’s the perfect make-ahead treat for parties or family dinners. Just add your toppings right before serving for the freshest look.
Is there a dairy-free alternative I can use?
You can absolutely experiment with plant-based cream cheese and non-dairy whip to create a vegan or dairy-free option. Taste and adjust sweetness as needed, since these alternatives often differ slightly in flavor and texture.
How do I get perfectly clean slices when serving?
For neat, bakery-worthy slices, rinse a sharp knife with hot water and wipe it dry between each cut. This helps glide cleanly through the creamy filling and ensures every slice of your No-Bake Cheesecake looks picture-perfect.
Final Thoughts
Bring a little extra joy to your dessert table and treat yourself (and your loved ones) with this irresistible No-Bake Cheesecake. It’s the easiest way to impress without the stress, delivering luxurious flavor and texture every time — I can’t wait for you to give it a try!
Print
No-Bake Cheesecake Recipe
- Total Time: 6 hours 20 minutes (includes chilling)
- Yield: 12 slices 1x
- Diet: Non-Vegetarian
Description
Indulge in the creamy goodness of this easy no-bake cheesecake recipe. With a buttery graham cracker crust and a luscious cream cheese filling, topped with fresh berries or pie filling, this dessert is a delightful treat for any occasion.
Ingredients
Graham Cracker Crust:
- 1 1/2 cups graham cracker crumbs
- 1/4 cup granulated sugar
- 1/2 cup unsalted butter, melted
Cream Cheese Filling:
- 16 oz cream cheese, softened
- 1 cup powdered sugar
- 1 teaspoon vanilla extract
- 1 tablespoon lemon juice
- 1 1/4 cups heavy whipping cream
- Fresh berries or pie filling for topping (optional)
Instructions
- Prepare the Crust: Mix graham cracker crumbs, sugar, and melted butter. Press into a 9-inch springform pan and chill.
- Make the Filling: Beat cream cheese until smooth. Add powdered sugar, vanilla, and lemon juice. Beat until combined.
- Whip the Cream: In a separate bowl, whip heavy cream to stiff peaks. Fold into cream cheese mixture.
- Assemble: Pour filling over crust, smooth the top, and refrigerate for at least 6 hours.
- Serve: Top with berries or pie filling before serving.
Notes
- Enhance the flavor with lemon zest in the filling.
- Try using crushed digestive biscuits or Oreos for the crust.
- Prep Time: 20 minutes
- Cook Time: 0 minutes
- Category: Dessert
- Method: No-Bake
- Cuisine: American
Nutrition
- Serving Size: 1 slice
- Calories: 370
- Sugar: 20g
- Sodium: 220mg
- Fat: 28g
- Saturated Fat: 17g
- Unsaturated Fat: 9g
- Trans Fat: 0g
- Carbohydrates: 26g
- Fiber: 0g
- Protein: 5g
- Cholesterol: 90mg