No-Bake Mini Egg Chocolate Cheesecake Recipe
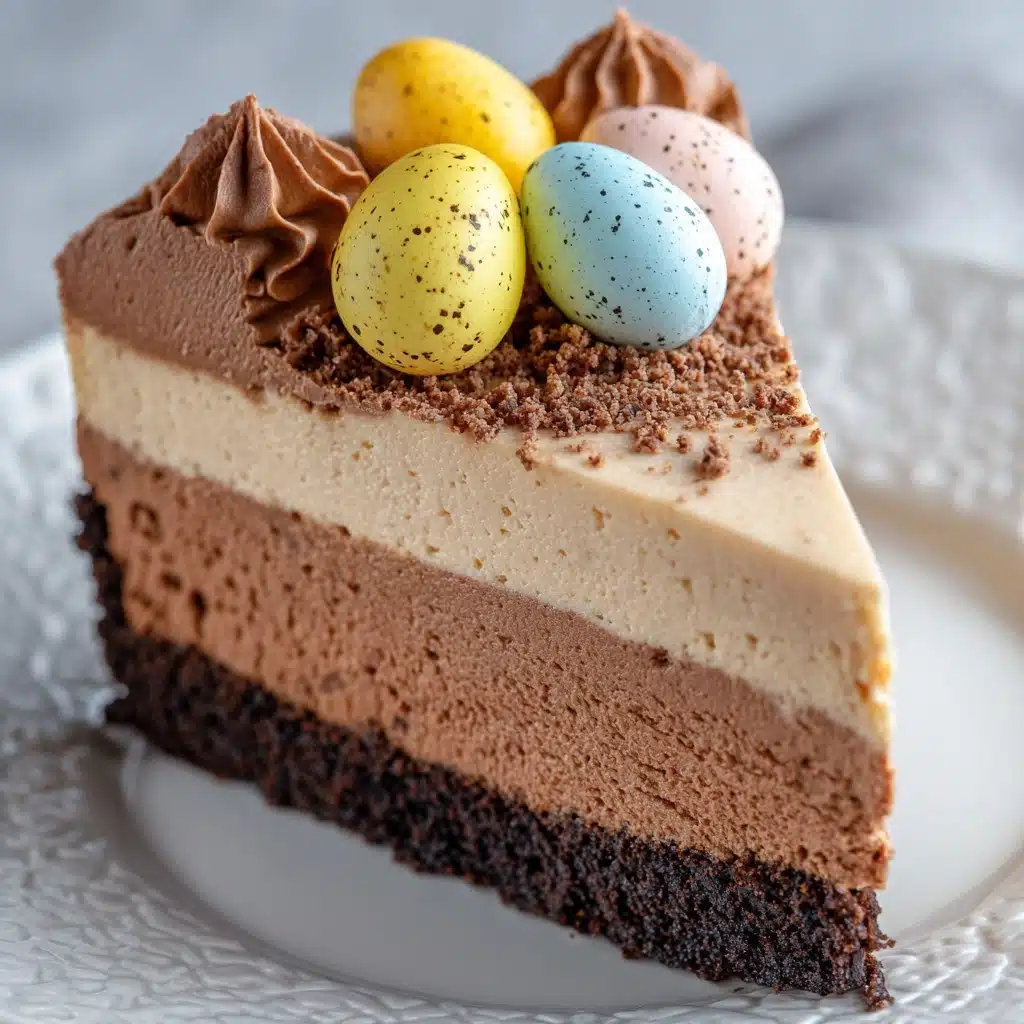
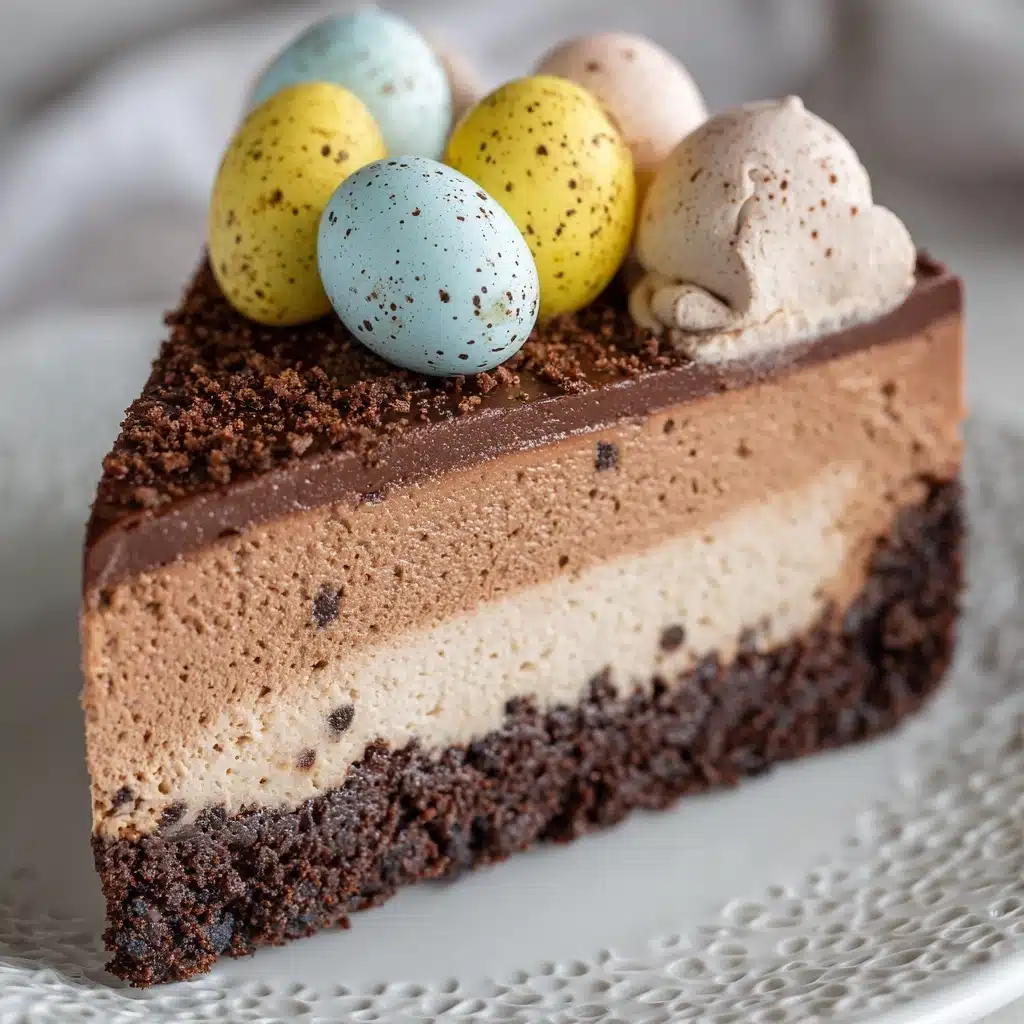
If you’re searching for the ultimate crowd-pleasing treat, look no further than No-Bake Mini Egg Chocolate Cheesecake. Creamy, chocolatey, and dotted with colorful candy eggs, these adorable cheesecakes are as fun to make as they are to eat. Perfect for holidays, parties, or any time you want a sweet, joyful dessert, this recipe comes together with no oven required and guarantees rave reviews from kids and adults alike.
Ingredients You’ll Need
Let’s talk about the magic behind every layer of this No-Bake Mini Egg Chocolate Cheesecake. Each ingredient is simple but brings something special to the table, from luscious creaminess to that irresistible chocolate crunch. Here’s why every component matters:
- Chocolate cookie crumbs: The base of your cheesecake, these provide a deep, chocolatey crunch that holds everything together.
- Unsalted butter: Melted and mixed with the crumbs, butter binds the crust and adds a rich, decadent flavor.
- Cream cheese (softened): The heart of any cheesecake, cream cheese gives that signature tang and creamy texture.
- Powdered sugar: This sweetens the filling without making it grainy, ensuring a velvety smooth bite.
- Vanilla extract: Just a touch rounds out all the flavors with a mellow, aromatic note.
- Heavy cream: Whipped to fluffy peaks, it lightens the filling and adds luxurious richness.
- Milk chocolate chips (melted): Melted chocolate makes the cheesecake extra decadent and full of chocolate flavor.
- Chopped mini chocolate eggs: These colorful candy eggs add crunch, pops of color, and extra chocolate with every bite.
- Extra mini chocolate eggs (for topping): A handful on top makes these cheesecakes festive and irresistible.
- Whipped cream (optional): For those who love an extra cloud of creamy goodness on top!
How to Make No-Bake Mini Egg Chocolate Cheesecake
Step 1: Prepare the Chocolate Cookie Crust
Start by combining your chocolate cookie crumbs and melted butter in a medium bowl. Stir until the mixture looks like damp sand and every crumb is coated in buttery goodness. Divide the mixture among the lined muffin tin cups, using about 1 1/2 tablespoons per cup. Press firmly into the bottom to form a solid, even base, then pop the tin into the fridge so the crusts can set while you whip up the filling.
Step 2: Whip the Cream Cheese Filling
Grab your softened cream cheese and beat it in a large bowl until it’s completely smooth and creamy. Add in the powdered sugar and vanilla extract, then beat again until the mixture is light, fluffy, and smells heavenly. This will be the pillowy base for your No-Bake Mini Egg Chocolate Cheesecake.
Step 3: Whip the Heavy Cream
In a separate bowl, whip the cold heavy cream until you see stiff peaks form. This step is key for a light, mousse-like texture that makes these cheesecakes feel extra special. Don’t rush this part—your arms will thank you when you taste the results!
Step 4: Combine Chocolate and Cream Cheese Mixtures
Pour your melted (but slightly cooled) milk chocolate into the cream cheese mixture and fold it in until fully blended. Next, gently fold in the whipped cream, being careful to keep everything light and airy. Stir in the chopped mini chocolate eggs last, so every bite is studded with colorful chocolate crunch.
Step 5: Assemble and Chill
Spoon the chocolate cheesecake filling evenly over your chilled crusts, smoothing the tops with a spoon or spatula. The muffin tin keeps everything perfectly portioned and oh-so-cute. Place the whole tray in the refrigerator and chill for at least 4 hours, or until the cheesecakes are set and ready to pop out of their liners.
Step 6: Decorate and Serve
When you’re ready to serve, top each mini cheesecake with a swirl of whipped cream (if using) and a generous sprinkle of extra mini chocolate eggs. The result is a platter of No-Bake Mini Egg Chocolate Cheesecake bites that look just as festive as they taste!
How to Serve No-Bake Mini Egg Chocolate Cheesecake
Garnishes
The finishing touches are where you can really make your No-Bake Mini Egg Chocolate Cheesecake shine. Pile on extra mini eggs for a rainbow of color, add a tufty dollop of whipped cream, or even drizzle a little chocolate sauce for a dramatic effect. Crushed cookies or a sprinkle of cocoa powder are also welcome additions if you’re feeling fancy.
Side Dishes
Since these cheesecakes are pretty rich and decadent, they pair nicely with something light and refreshing. Try serving with a platter of fresh berries, a simple fruit salad, or even a crisp glass of cold milk or coffee. The contrast makes every bite of cheesecake feel extra indulgent.
Creative Ways to Present
Mini desserts are always a hit at parties! Arrange your No-Bake Mini Egg Chocolate Cheesecakes on a tiered cake stand or individual dessert plates for a dramatic presentation. You can even nestle them in colorful cupcake wrappers for an extra pop of fun, or present each with a tiny flag or edible flower on top for a special occasion.
Make Ahead and Storage
Storing Leftovers
Got leftovers? Simply cover the cheesecakes in the muffin tin or transfer them to an airtight container. They’ll keep beautifully in the refrigerator for up to 4 days, making them perfect for prepping ahead or enjoying a sweet treat whenever the craving strikes.
Freezing
If you want to save some No-Bake Mini Egg Chocolate Cheesecake for another time, freezing is a great option. Place the cheesecakes (without whipped cream or extra toppings) in a single layer in a freezer-safe container. When you’re ready to enjoy, simply thaw them in the refrigerator overnight and add your garnishes before serving.
Reheating
There’s no need to reheat these cheesecakes since they’re best served chilled! If you’ve frozen them, let them thaw in the fridge until soft and creamy again. That’s all you need for perfect, ready-to-eat No-Bake Mini Egg Chocolate Cheesecake every time.
FAQs
Can I use a different kind of chocolate for the filling?
Absolutely! While milk chocolate chips make a sweet and creamy filling, you can swap in semi-sweet or dark chocolate chips for a deeper, more intense chocolate flavor.
How do I keep my crust from getting soggy?
Make sure to press the cookie crumb and butter mixture firmly into the muffin liners and chill it well before adding the filling. This helps create a sturdy base that holds up beautifully to the creamy cheesecake layer.
Can I make these cheesecakes ahead of time?
Yes, No-Bake Mini Egg Chocolate Cheesecake is perfect for making ahead! They need at least 4 hours to chill and set, but you can prepare them up to two days in advance for stress-free entertaining.
Can I use different candies instead of mini eggs?
Definitely! You can swap in chopped peanut butter eggs, chocolate-covered caramels, or even colorful sprinkles for a different twist, depending on the occasion or your favorite flavors.
What’s the best way to remove the cheesecakes from the muffin tin?
Using paper or silicone liners makes it super easy to lift each mini cheesecake out. If you use silicone molds, just pop them out gently for a perfect, mess-free presentation.
Final Thoughts
There’s just something magical about whipping up a batch of No-Bake Mini Egg Chocolate Cheesecake—maybe it’s the vibrant colors, maybe it’s the creamy chocolate filling, or maybe it’s how everyone lights up when they see them. This is one dessert you’ll want to share (and make again and again). Give it a try and let these little cheesecakes bring some extra joy to your table!
Print
No-Bake Mini Egg Chocolate Cheesecake Recipe
- Total Time: 4 hours 25 minutes
- Yield: 12 mini cheesecakes 1x
- Diet: Vegetarian
Description
Enjoy these delightful No-Bake Mini Egg Chocolate Cheesecakes, perfect for Easter or any chocolate lover’s treat. Featuring a crunchy chocolate cookie crust, creamy chocolate-infused filling, and topped with festive mini chocolate eggs, these bite-sized cheesecakes are easy to make and require no oven time. Chill and serve for a rich, indulgent dessert that combines smooth cream cheese, melted milk chocolate, and a hint of vanilla, all complemented by a buttery cookie base.
Ingredients
Crust
- 1 1/2 cups chocolate cookie crumbs (such as Oreo, without filling)
- 1/4 cup unsalted butter (melted)
Filling
- 16 ounces cream cheese (softened)
- 1/2 cup powdered sugar
- 1 teaspoon vanilla extract
- 1/2 cup heavy cream
- 1 cup milk chocolate chips (melted and cooled slightly)
- 1 cup chopped mini chocolate eggs (plus extra for topping)
Topping (Optional)
- Whipped cream for garnish
- Additional mini chocolate eggs for topping
Instructions
- Prepare the crust: In a medium bowl, combine the chocolate cookie crumbs with the melted unsalted butter. Mix until the texture resembles wet sand. Spoon about 1 1/2 tablespoons of this mixture into each cavity of a 12-cup muffin tin lined with paper liners. Press firmly to form an even, compact crust. Place the crusts in the refrigerator to set while you prepare the filling.
- Make the cream cheese filling: In a large bowl, beat the softened cream cheese until smooth and creamy. Add the powdered sugar and vanilla extract, then beat the mixture until it becomes fluffy and well combined.
- Whip the cream: In a separate bowl, whip the heavy cream until stiff peaks form, creating a light and airy texture for the filling.
- Incorporate the chocolate: Gently fold the melted and slightly cooled milk chocolate into the cream cheese mixture, ensuring it is fully mixed for a rich chocolate flavor.
- Combine the whipped cream: Carefully fold the whipped heavy cream into the chocolate cream cheese mixture until the filling is smooth and well combined.
- Add mini chocolate eggs: Stir the chopped mini chocolate eggs into the filling, distributing them evenly throughout to add texture and bursts of chocolate flavor.
- Assemble and chill: Spoon the filling evenly over the prepared crusts in the muffin tin. Smooth the tops with a spatula for an even, attractive finish. Refrigerate the mini cheesecakes for at least 4 hours, or until the filling is firm and set.
- Serve and garnish: Before serving, optionally top each mini cheesecake with whipped cream and additional mini chocolate eggs to enhance presentation and flavor.
Notes
- You can substitute milk chocolate chips with semi-sweet or dark chocolate chips for a richer, less sweet flavor.
- These mini cheesecakes can be made in silicone molds instead of paper liners for easier removal and a smooth finish.
- For best results, ensure cream cheese is softened to room temperature before mixing to avoid lumps.
- Keep the mini cheesecakes refrigerated until serving to maintain texture and freshness.
- These cheesecakes are perfect for holiday celebrations, especially Easter, but delicious year-round.
- Prep Time: 25 minutes
- Cook Time: 0 minutes
- Category: Dessert
- Method: No-Bake
- Cuisine: American
Nutrition
- Serving Size: 1 mini cheesecake
- Calories: 320
- Sugar: 20g
- Sodium: 160mg
- Fat: 23g
- Saturated Fat: 13g
- Unsaturated Fat: 8g
- Trans Fat: 0g
- Carbohydrates: 25g
- Fiber: 1g
- Protein: 4g
- Cholesterol: 60mg