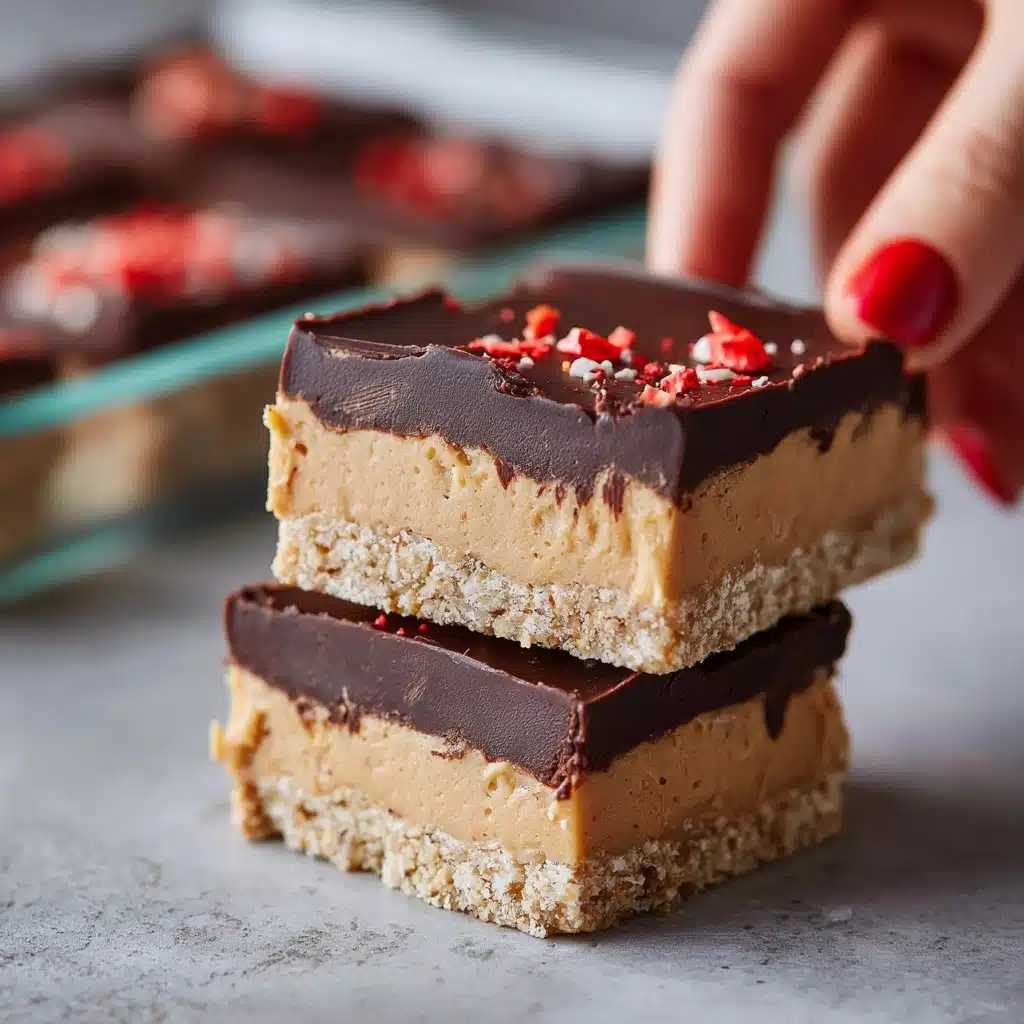
Peanut Butter Bars Recipe
If you’re searching for a sweet treat that’s impossible to resist, look no further than these Peanut Butter Bars. With a dreamy, creamy peanut butter base and a luscious layer of chocolate on top, these bars strike a perfect balance between rich, nutty flavor and satisfying sweetness. Whether you’re making them for a party, packing them into lunchboxes, or sneaking one as a midnight snack (no judgment!), this easy no-bake recipe is sure to become a family favorite. Get ready for a dessert that’s equal parts nostalgia and pure indulgence!
Ingredients You’ll Need
What makes these Peanut Butter Bars so delightful is their simplicity — every ingredient earns its place, contributing to the flavor, texture, or that gorgeous layered look. Here’s what you’ll need, along with a little insider tip for each:
- Unsalted butter, melted: This creates a rich, moist base and binds everything together for the perfect chewy texture.
- Graham cracker crumbs: These add a subtle crunch and a toasty, slightly sweet flavor that pairs perfectly with peanut butter.
- Powdered sugar: For sweetness and smoothness — it blends right in without making the bars gritty.
- Creamy peanut butter: The heart and soul of these bars, giving them their signature flavor and creamy consistency.
- Semisweet chocolate chips: Melting these creates a silky, glossy chocolate topping that sets beautifully in the fridge.
- Creamy peanut butter (for topping): Mixing a little peanut butter into the chocolate keeps the top layer soft enough to bite through without cracking.
How to Make Peanut Butter Bars
Step 1: Mix the Base
In a large mixing bowl, combine the melted butter, graham cracker crumbs, powdered sugar, and 1 cup of creamy peanut butter. Stir everything together until it’s completely smooth and homogenous. You want the mixture to pull together easily and look glossy — that’s when you know it’s perfect for pressing into the pan.
Step 2: Press Into the Pan
Line a 9×13-inch baking dish with parchment paper (or grease it well for easy removal), then firmly press the peanut butter mixture into the bottom. Take your time and use the back of a spoon or a spatula to get it smooth and even; the more compact the base, the better your Peanut Butter Bars will hold their shape.
Step 3: Make the Chocolate Topping
In a microwave-safe bowl, combine the semisweet chocolate chips and 1/4 cup of creamy peanut butter. Microwave in 30-second bursts, stirring between each, until the chocolate is fully melted and the mixture is silky and glossy. This blend gives the chocolate a gorgeous sheen and a hint of peanut flavor that ties both layers together.
Step 4: Spread and Chill
Pour the warm chocolate-peanut butter topping over the pressed base and spread it out evenly with a spatula. Take a moment to swirl the top if you’re feeling fancy, then pop the dish in the fridge for at least 2 hours. This waiting game is worth it — chilling sets the bars and makes them easy to slice into perfect squares.
Step 5: Slice and Serve
Once the bars are completely set, lift them from the pan using the parchment paper and slice into 24 squares. Serve them chilled for a firmer bite, or let them sit at room temperature for a softer, melt-in-your-mouth experience. Either way, they are seriously irresistible!
How to Serve Peanut Butter Bars

Garnishes
A simple sprinkle of flaky sea salt on top before the chocolate sets adds a wonderful contrast to the sweetness and intensifies the chocolate flavor. You can also drizzle melted white chocolate for a pretty finish, or scatter a handful of chopped roasted peanuts for extra crunch and a rustic look.
Side Dishes
Peanut Butter Bars are rich and satisfying on their own, but they pair wonderfully with a scoop of vanilla ice cream or a cold glass of milk. If you’re serving them at a party, consider offering fresh berries or a fruit salad on the side — the bright, tart flavors are a refreshing complement to the bars’ richness.
Creative Ways to Present
For a fun twist, try cutting the bars into bite-sized cubes and serving them in mini cupcake liners — perfect for a dessert platter or a sweet snack table. You can also stack the bars in a mason jar for a charming edible gift, or skewer small squares on sticks for a playful party treat. However you present them, Peanut Butter Bars always steal the show!
Make Ahead and Storage
Storing Leftovers
Store any leftover Peanut Butter Bars in an airtight container in the refrigerator for up to three days. This keeps the chocolate layer firm and the base perfectly chewy, so every bite tastes as fresh as the first.
Freezing
If you want to make a batch ahead of time, these bars freeze beautifully! Simply separate layers with parchment paper, seal in an airtight container, and freeze for up to two months. Thaw in the fridge overnight before serving for best texture.
Reheating
No reheating required — these bars are best enjoyed chilled or at room temperature. If you’ve frozen them, just let them thaw in the fridge or on the counter until they’re soft enough to slice. Avoid microwaving, as it can make the chocolate topping too melty.
FAQs
Can I use crunchy peanut butter instead of creamy?
Absolutely! Crunchy peanut butter adds a wonderful texture and a bit of extra peanutty punch to the bars. Just swap it in for the creamy variety in both the base and the topping for a fun twist.
Do I have to use graham cracker crumbs?
Graham cracker crumbs are classic, but you can substitute crushed digestive biscuits or shortbread cookies if you’re looking for something different. Each will give the bars a slightly unique flavor and texture, so feel free to get creative!
How do I keep the chocolate layer from cracking when I cut the bars?
The secret is letting the bars warm up at room temperature for about 10 minutes before slicing, and using a sharp knife. Adding a bit of peanut butter to the chocolate (as in this recipe) also keeps it softer and less likely to crack.
Can I make Peanut Butter Bars vegan?
Yes! Simply substitute vegan butter, dairy-free chocolate chips, and your favorite plant-based graham crackers. Make sure your powdered sugar is vegan, too. You’ll have delicious vegan Peanut Butter Bars in no time.
What’s the best way to transport these for a party or picnic?
Chill the bars thoroughly so the chocolate is set, then layer them with parchment paper in a sturdy container. Keep them cool until serving time for best results — they hold up well but do soften if left in the sun or heat for too long.
Final Thoughts
If you’re craving an easy, no-bake dessert that’s guaranteed to earn rave reviews, give these Peanut Butter Bars a try. They’re quick to make, travel well, and never fail to delight chocolate and peanut butter lovers alike. Go ahead — treat yourself and your loved ones to a batch soon!
Print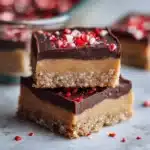
Peanut Butter Bars Recipe
- Total Time: 15 minutes plus 2 hours chilling
- Yield: 24 bars 1x
- Diet: Non-Vegetarian
Description
These delicious no-bake Peanut Butter Bars combine a buttery, crunchy graham cracker crust with rich, creamy peanut butter and a smooth chocolate topping. Perfect as an easy and indulgent dessert or snack, they can be prepared in just 15 minutes and chilled without any oven time required.
Ingredients
Base Mixture
- 1 cup unsalted butter, melted
- 2 cups graham cracker crumbs
- 2 cups powdered sugar
- 1 cup creamy peanut butter
Chocolate Topping
- 1 1/2 cups semisweet chocolate chips
- 1/4 cup creamy peanut butter (for topping)
Instructions
- Mix the Base: In a large mixing bowl, combine the melted butter, graham cracker crumbs, powdered sugar, and 1 cup of creamy peanut butter. Stir thoroughly until the mixture is smooth and fully combined.
- Press into Pan: Firmly press the peanut butter mixture into the bottom of a greased or parchment-lined 9×13-inch baking dish to create an even crust layer.
- Melt Chocolate and Peanut Butter: In a microwave-safe bowl, melt the semisweet chocolate chips together with 1/4 cup creamy peanut butter in 30-second intervals, stirring well after each interval, until the mixture is smooth and fully combined.
- Spread Topping: Pour the melted chocolate-peanut butter mixture evenly over the prepared crust in the baking dish, using a spatula to smooth the surface.
- Chill Until Set: Refrigerate the assembled bars for at least 2 hours, or until the chocolate topping is firm and set.
- Cut and Serve: Once chilled, cut into 24 bars and serve either chilled or at room temperature for the best flavor and texture.
Notes
- Bars can be made up to 3 days in advance and stored in the refrigerator to maintain freshness.
- For added texture and crunch, use crunchy peanut butter instead of creamy.
- Prep Time: 15 minutes
- Cook Time: 0 minutes
- Category: Dessert
- Method: No-Bake
- Cuisine: American
Nutrition
- Serving Size: 1 bar
- Calories: 260
- Sugar: 19g
- Sodium: 120mg
- Fat: 17g
- Saturated Fat: 7g
- Unsaturated Fat: 8g
- Trans Fat: 0g
- Carbohydrates: 24g
- Fiber: 1g
- Protein: 4g
- Cholesterol: 15mg