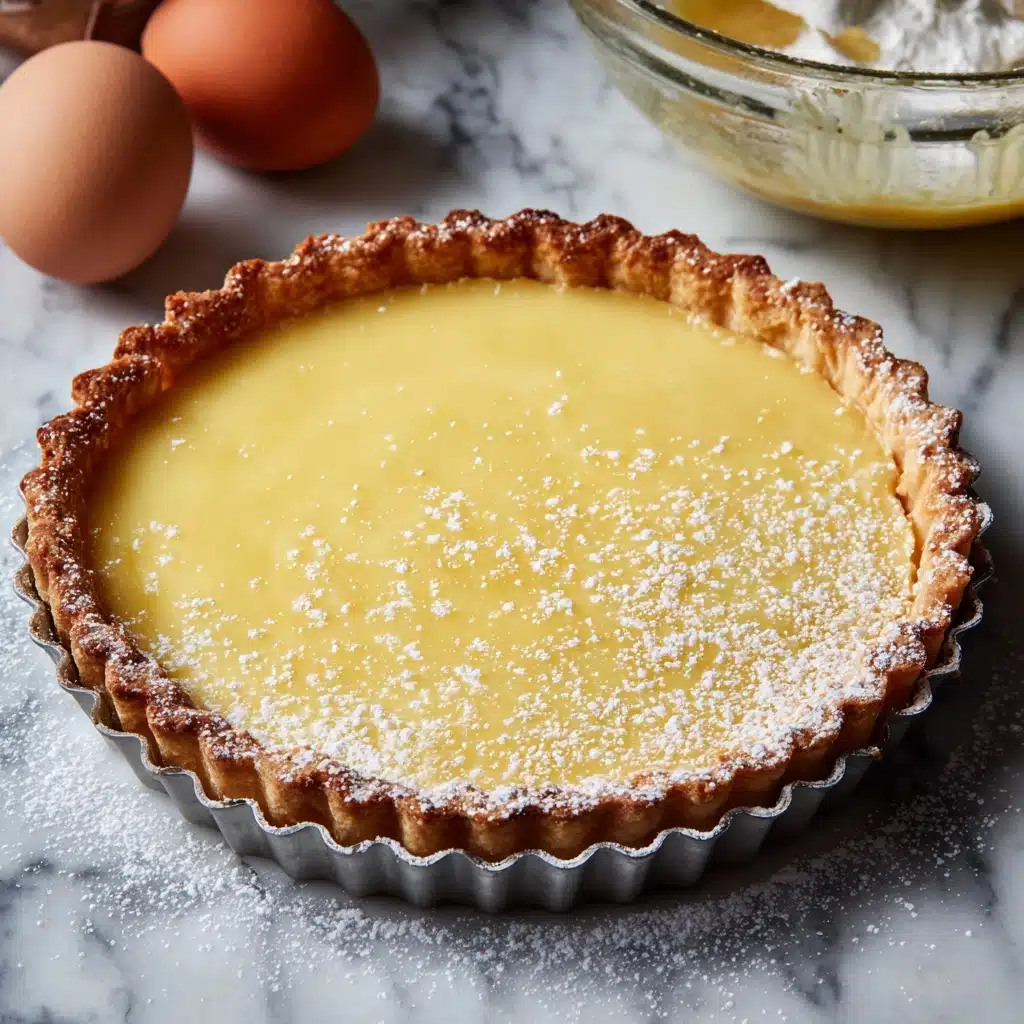
Sweet Tart Crust Recipe
If you’re searching for that perfect, bakery-worthy base for your favorite dessert, look no further! This Sweet Tart Crust recipe is my secret weapon for anything from classic fruit tarts to show-stopping chocolate ganache creations. It’s buttery, tender, and offers just the right amount of sweetness to elevate every filling, all while holding its elegant, crisp shape. Once you discover how truly simple and foolproof it is to make, you’ll never look back—trust me, friends will ask for your “bakery” recipe, and you’ll just smile, knowing it’s your Sweet Tart Crust shining through.
Ingredients You’ll Need
There’s nothing complicated about the ingredients in a Sweet Tart Crust, but each one shines in its own subtle way. The combination of just six staples—flour, sugar, salt, butter, egg yolk, and a splash of ice water—creates a crust that’s light, flaky, and delectably rich.
- All-purpose flour: The structure-building backbone of the crust, giving it sturdiness and that delicate crumb.
- Powdered sugar: Essential for that gentle, melt-in-your-mouth sweetness and a finer texture than granulated sugar provides.
- Salt: Just a pinch deepens flavor and balances the sweetness like a pro.
- Unsalted butter (cold!): The secret to a truly flaky crust—working it in cold keeps layers distinct and tender.
- Large egg yolk: Adds just enough fat for richness and color, and helps bind the dough.
- Ice water: A tablespoon or two is often all you need to bring everything together with minimal fuss.
How to Make Sweet Tart Crust
Step 1: Combine the Dry Ingredients
Start by adding the all-purpose flour, powdered sugar, and salt to your food processor. Give them a few quick pulses just to blend everything, ensuring a uniform base that sets up the rich, smooth taste in the finished Sweet Tart Crust.
Step 2: Cut in the Cold Butter
Add the cold, cubed unsalted butter right on top of your dry blend. Pulse in short bursts until the mix starts to resemble coarse breadcrumbs—this leaves little bits of butter throughout, which melt as the tart bakes and give that dreamy, light texture everyone loves.
Step 3: Work in the Egg Yolk
Next, drop in the egg yolk and pulse just until it disappears into the mixture. Egg yolk adds a touch of richness and that pretty golden hue, making every bite of your Sweet Tart Crust extra special and inviting.
Step 4: Add Ice Water and Finish the Dough
Drizzle in ice water, one tablespoon at a time, pulsing briefly after each addition. You’re looking for a dough that just begins to come together—don’t overdo it! As soon as it starts clumping, stop. Too much water makes the crust tough instead of melt-in-your-mouth tender.
Step 5: Shape, Chill, and Roll
Turn the dough onto a lightly floured surface, gently bring it into a disc with your hands, then wrap it up tight in plastic wrap. Let your Sweet Tart Crust rest in the refrigerator for at least an hour; this allows the flour to hydrate and the butter to firm up, both crucial steps for a flaky final result. When it’s time, roll the dough to fit your 9-inch pan and press it evenly into place.
Step 6: Blind Bake
Prick the bottom of the dough with a fork (to prevent bubbles), line it with parchment, and fill with pie weights or dried beans. Bake at 375°F (190°C) for 15 minutes, remove the weights, then bake 10–12 minutes more until the crust is golden and crisp. Cool the Sweet Tart Crust completely before filling, and enjoy that first whiff of delicious bakery aroma!
How to Serve Sweet Tart Crust
Garnishes
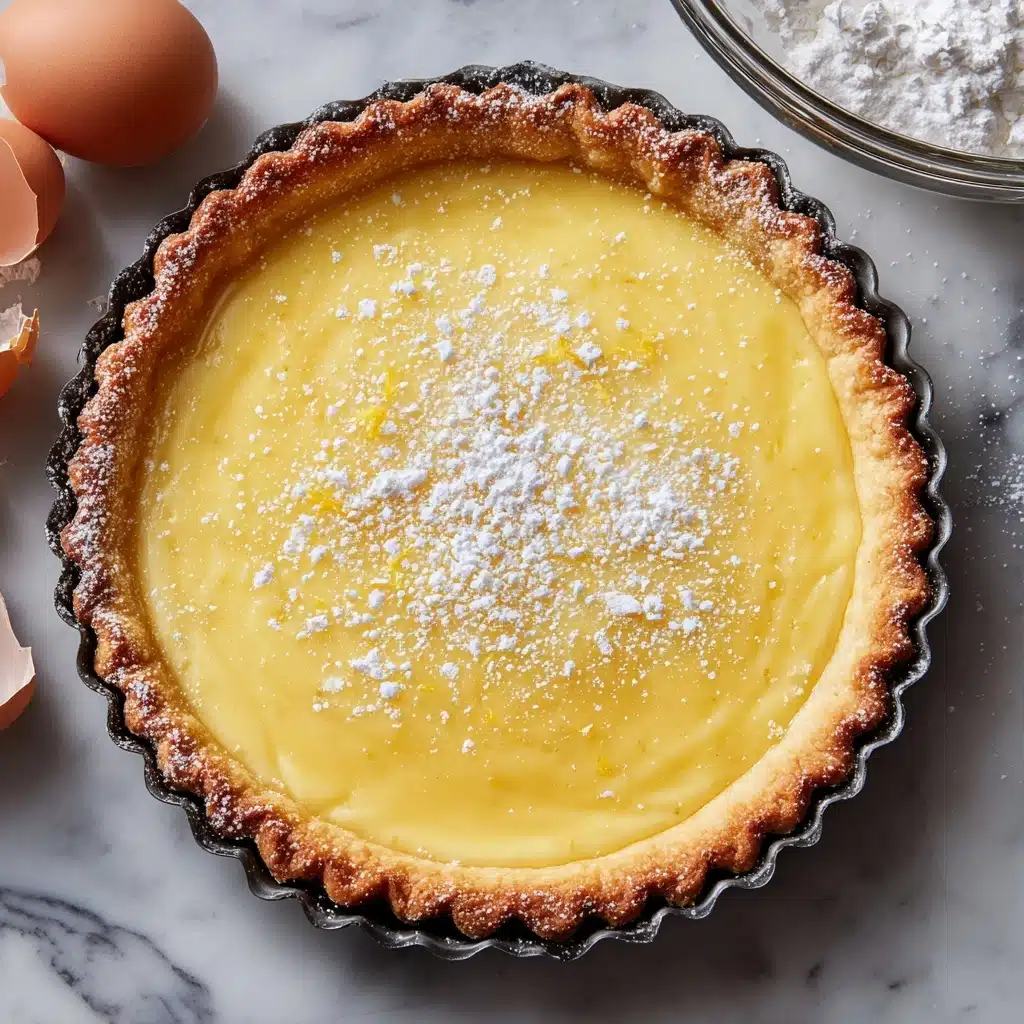
A Sweet Tart Crust is a blank canvas that loves a little dress-up! Once filled, consider brushing a thin layer of melted chocolate inside the crust before adding custards or fruit to keep it crisp. Fresh berries, pretty dustings of powdered sugar, or a few sprigs of mint on top always add that final, inviting touch and make your tart look effortlessly elegant.
Side Dishes
Since you’ll likely be presenting this crust filled and ready to impress, it pairs beautifully with light accompaniments. A scoop of vanilla bean ice cream or a dollop of whipped cream lets the flavors shine. For a fresh counterpoint, serve with a simple fruit salad or a citrusy sorbet.
Creative Ways to Present
Turn your Sweet Tart Crust into show-stopping mini tartlets at your next party or holiday gathering—just use small tart pans for built-in portion control and maximum cuteness. Alternatively, try freeform “rustic” galettes, or experiment with decorative crimped edges and cutout shapes for festive occasions.
Make Ahead and Storage
Storing Leftovers
Have leftover tart crust or an assembled tart you’re not quite ready to finish? Wrap any unfilled Sweet Tart Crust tightly and keep it at room temperature for up to a day. For filled tarts, store them in the refrigerator and enjoy within two to three days to maintain the best flavor and texture.
Freezing
Sweet Tart Crust freezes remarkably well. Simply prepare and blind-bake the crust, cool it completely, then wrap it in plastic wrap and foil. Store in the freezer for up to two months—on tart night, let it thaw at room temperature and fill as desired for instant dessert magic.
Reheating
If your crust has lost a bit of its crispness from the fridge or freezer, pop it in a preheated 350°F (175°C) oven for 5–8 minutes. The gentle heat revives its signature crunch, making it taste freshly baked and ready for your favorite fillings all over again.
FAQs
Why is my Sweet Tart Crust tough instead of tender?
The most common culprit is overworking the dough or adding too much water. Be gentle when mixing and stop as soon as it holds together, and always chill the dough before rolling for the perfect crumbly bite.
Can I make Sweet Tart Crust without a food processor?
Absolutely! Use a pastry blender or your fingertips to rub cold butter into the flour mixture, then proceed by mixing in the egg yolk and ice water until everything holds together.
How can I keep my Sweet Tart Crust from getting soggy with moist fillings?
Brush the cooled crust with a thin layer of melted chocolate before filling, or use an egg wash during the last few minutes of baking. These quick tricks create a barrier that keeps the crust crisp and delightful.
Do I have to use unsalted butter?
Unsalted butter is ideal so you control the salt content, but if you only have salted, reduce the added salt in the recipe by half to balance the flavors in your Sweet Tart Crust.
Can I make this crust gluten free?
You sure can! Swap in your favorite cup-for-cup gluten-free flour blend and proceed as written; just remember to be gentle, as gluten-free doughs can be a touch more delicate to roll out.
Final Thoughts
With just a few simple steps and a little patience, you’ll be amazed at how much homemade Sweet Tart Crust can elevate your desserts. Whether you’re making a classic fruit tart or experimenting with new flavor combinations, you’ll always come back to this trusty recipe. Gather your ingredients, invite a friend, and let’s bake some delicious memories together!
Print
Sweet Tart Crust Recipe
- Total Time: 1 hour 40 minutes (including chill time)
- Yield: 1 9-inch tart crust 1x
- Diet: Vegetarian
Description
A delicious and versatile sweet tart crust recipe that is perfect for a variety of tarts, from fruit to custard. This buttery, tender crust adds a delightful crunch to your favorite tart fillings.
Ingredients
Dry Ingredients:
- 1 1/4 cups all-purpose flour
- 1/2 cup powdered sugar
- 1/4 teaspoon salt
Wet Ingredients:
- 1/2 cup (1 stick) unsalted butter, cold and cut into small cubes
- 1 large egg yolk
- 1–2 tablespoons ice water (as needed)
Instructions
- Prepare the Dough: In a food processor, combine the flour, powdered sugar, and salt. Add the cold butter cubes and pulse until the mixture resembles coarse crumbs.
- Blend the Ingredients: Add the egg yolk and pulse until incorporated. Add ice water, 1 tablespoon at a time, and pulse until the dough just begins to come together.
- Chill the Dough: Turn the dough out onto a lightly floured surface, press into a disc, wrap in plastic wrap, and refrigerate for at least 1 hour.
- Roll and Bake: Preheat the oven to 375°F (190°C). Roll out the dough to fit a 9-inch tart pan, press it evenly, trim excess dough, prick the bottom with a fork, line with parchment paper and weights. Bake, cool, and fill.
Notes
- This crust is perfect for fruit, custard, or chocolate tarts.
- To prevent sogginess, brush the baked crust with a thin layer of melted chocolate before adding moist fillings.
- Prep Time: 15 minutes
- Cook Time: 25 minutes
- Category: Dessert
- Method: Baking
- Cuisine: French
Nutrition
- Serving Size: 1 slice (1/8 of crust)
- Calories: 180
- Sugar: 6g
- Sodium: 55mg
- Fat: 11g
- Saturated Fat: 7g
- Unsaturated Fat: 4g
- Trans Fat: 0g
- Carbohydrates: 18g
- Fiber: 0g
- Protein: 2g
- Cholesterol: 40mg