Sweet Tart Crust Recipe
If you’ve ever dreamed of the perfect Sweet Tart Crust — that golden, buttery base that makes every tart sing — you’re about to discover your new go-to recipe. This tender, melt-in-your-mouth crust is what turns a good tart into an unforgettable one, balancing a delicate sweetness with just enough structure to support luscious fillings. Whether you’re prepping for an elegant brunch or looking to wow at dessert hour, this Sweet Tart Crust does all the heavy lifting so you can get creative with your flavors and fillings.
Ingredients You’ll Need
It’s incredible how a handful of humble ingredients can come together to create baking magic. Each one plays an essential role in bringing out the characteristic taste, delicate crumb, and beautiful color in this Sweet Tart Crust.
- All-purpose flour: The backbone of the crust, flour builds structure while staying tender.
- Powdered sugar: Delivers a gentle sweetness and helps keep the texture crisp yet soft.
- Salt: Just a touch sharpens every other flavor and keeps the sweetness in balance.
- Unsalted butter (cold and cubed): Essential for that irresistibly flaky, melt-in-your-mouth texture — cold butter is key!
- Large egg yolk: Adds richness and helps bind the dough together for that golden finish.
- Cold water: Only as much as needed, just to pull the dough together without overworking it.
How to Make Sweet Tart Crust
Step 1: Blend Your Dry Ingredients
Start by combining the flour, powdered sugar, and salt in your food processor. This quick blend ensures every bite of your Sweet Tart Crust delivers a perfectly even, tender crumb. Think of it as laying down a smooth, flawless canvas for your tart masterpiece.
Step 2: Cut In the Butter
Next, add those chilly cubes of butter right into the dry mix. Pulse just until you see coarse crumbs start to form — it should look a bit like damp sand. Those little bits of butter are magic; they’ll create delicate layers that make your finished Sweet Tart Crust delightfully flaky.
Step 3: Bring the Dough Together
Now toss in the egg yolk and pulse to combine. With the motor running, add cold water, just a tablespoon at a time. The dough should only just start to come together — don’t overmix! This gentle touch keeps the finished crust tender rather than tough.
Step 4: Chill Out
Turn the dough out onto a lightly floured surface and use your hands to shape it into a flat disc. Wrap it up snugly in plastic and pop it in the fridge for at least 30 minutes. Chill time allows the flour to hydrate and the butter to firm up, which means a more flavorful Sweet Tart Crust with fewer cracks.
Step 5: Roll and Fit
Dust your work surface with flour and gently roll your chilled dough into an 11-inch circle. The dough is forgiving but go slowly, turning it as you roll so it doesn’t stick. Carefully transfer it to a 9-inch tart pan, pressing evenly along the bottom and up the sides for a pretty, even shell. Trim away any excess hanging over the edges.
Step 6: Chill Again, Then Bake
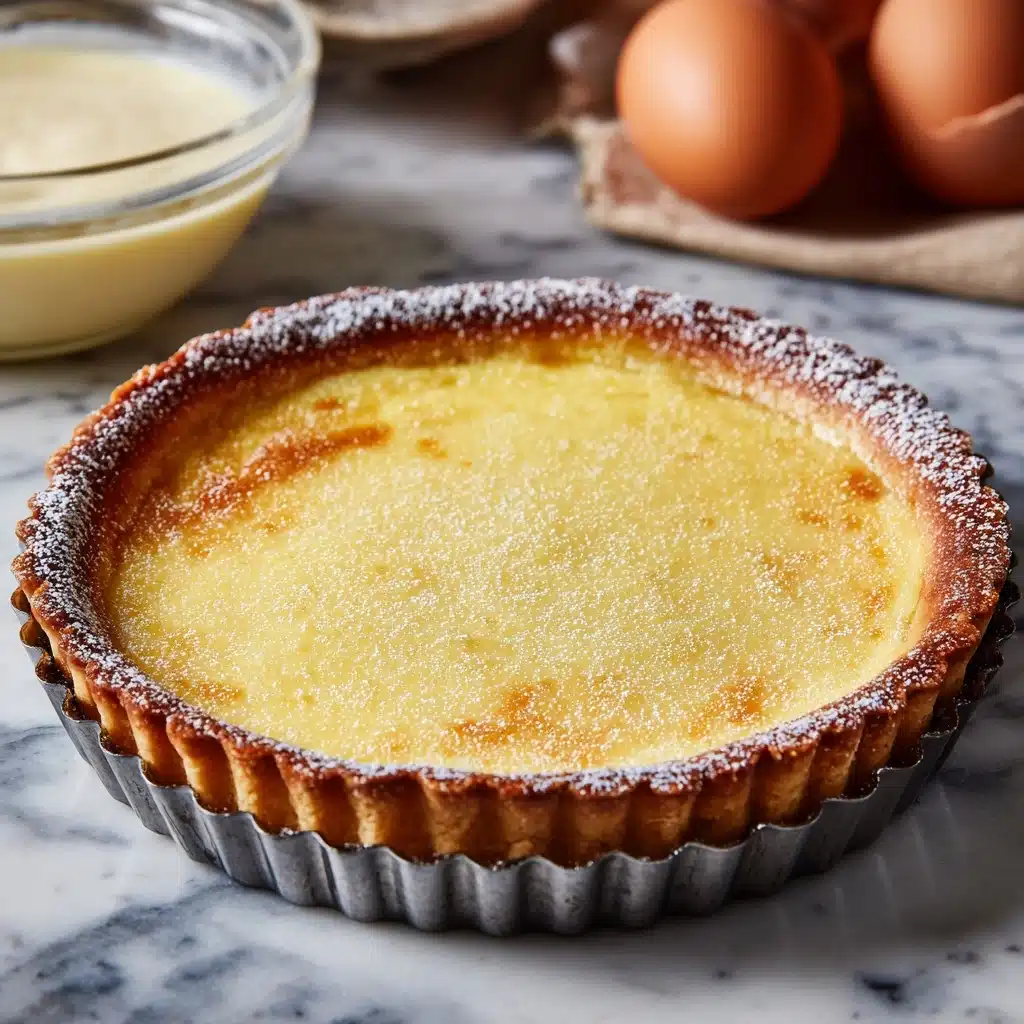
Don’t skip this second chill! Letting your fitted crust rest in the fridge for another 15 minutes helps prevent shrinkage in the oven. Afterward, line it with parchment paper, fill with pie weights or dried beans, and bake for 15 minutes. Remove the weights, bake again until beautifully golden — about 10 to 12 minutes more. Let it cool completely before adding any fillings; this keeps the Sweet Tart Crust crisp and ready for your creations.
How to Serve Sweet Tart Crust

Garnishes
Dress up your Sweet Tart Crust by dusting it with a veil of powdered sugar or topping with almond slivers for crunch. Edible flowers or a brush of melted chocolate around the rim also offer a show-stopping finish.
Side Dishes
Pair your tart with a simple green salad if serving as part of brunch, or a scoop of vanilla ice cream when it’s dessert time. A dollop of lightly sweetened whipped cream is a timeless classic that never disappoints beside a fruit-filled Sweet Tart Crust.
Creative Ways to Present
Mini tarts are always a hit at gatherings, or try using cookie cutters to turn scraps of dough into adorable shapes for extra garnish. Layer berries, citrus curds, or a swipe of melted chocolate inside the prebaked crust for endless Sweet Tart Crust possibilities!
Make Ahead and Storage
Storing Leftovers
If you’re lucky enough to have any Sweet Tart Crust left, keep it covered in the refrigerator for up to 3 days. Just ensure it’s tightly wrapped or stored in a sealed container so it maintains its tender texture and subtle sweetness.
Freezing
This Sweet Tart Crust is a dream for planners — wrap the baked or unbaked crust in plastic, then foil, and freeze for up to a month. When a tart craving strikes, you’re already halfway there!
Reheating
To bring back that just-baked crispness, warm your Sweet Tart Crust in a 300°F oven for 5 to 8 minutes before filling and serving. If the crust is filled, tent loosely with foil and warm gently so everything heats through without overbaking.
FAQs
Can I make Sweet Tart Crust without a food processor?
Absolutely! You can cut the butter in with a pastry blender or even your fingertips; just work quickly to keep everything cold for that signature flaky result.
How do I prevent my tart crust from shrinking?
Chilling the dough twice and not stretching it during fitting are your best bets. This keeps the Sweet Tart Crust tender and perfectly shaped every time.
Can I make this Sweet Tart Crust gluten-free?
Swap the all-purpose flour for a trusted gluten-free baking blend (one with xanthan gum works best). Results are still beautifully crisp and golden.
Why does my crust crack when rolling?
If your dough’s cracking, it may be too cold. Let it soften at room temperature for a few minutes, then roll again. If it’s exceptionally dry, sprinkle on a teaspoon of cold water and knead carefully.
Is blind baking necessary?
For creamy or custard fillings, blind baking is essential; it keeps the Sweet Tart Crust crisp and prevents sogginess when you add your filling later.
Final Thoughts
I can’t wait for you to try this Sweet Tart Crust and make it your own! Whether it becomes the base for a classic fruit tart, a silky lemon filling, or something totally unique, this recipe promises a buttery, golden celebration in every bite. Enjoy the creative journey and don’t forget to share your beautiful tarts with friends and family!
Print
Sweet Tart Crust Recipe
- Total Time: 1 hour 25 minutes
- Yield: 1 9-inch tart crust 1x
- Diet: Vegetarian
Description
This easy-to-make sweet tart crust is perfect for creating delicious fruit tarts, lemon curd tarts, or any pastry cream-filled treats. With a buttery, crumbly texture, this crust bakes up beautifully golden and pairs wonderfully with a variety of fillings.
Ingredients
Dough:
- 1½ cups all-purpose flour
- ½ cup powdered sugar
- ¼ teaspoon salt
- ½ cup unsalted butter, cold and cut into small cubes
- 1 large egg yolk
- 1–2 tablespoons cold water
Instructions
- Mix Dry Ingredients: In a food processor, combine the flour, powdered sugar, and salt.
- Add Butter: Add the cold butter and pulse until the mixture resembles coarse crumbs.
- Blend in Wet Ingredients: Add the egg yolk and pulse again until combined. Add cold water, one tablespoon at a time, and pulse just until the dough begins to come together.
- Shape and Chill: Turn the dough out onto a lightly floured surface, shape it into a flat disc, wrap in plastic wrap, and refrigerate for at least 30 minutes.
- Prepare Crust: Roll out the chilled dough into a circle, transfer to a tart pan, press evenly, trim excess dough, prick the bottom, and chill again. Bake as directed.
Notes
- This crust is delicious with various fillings like fruit tarts or lemon curd.
- For a chocolate twist, substitute ¼ cup of flour with unsweetened cocoa powder.
- The crust can be made ahead and stored in the fridge for up to 3 days or frozen for up to 1 month.
- Prep Time: 15 minutes (plus 45 minutes chilling)
- Cook Time: 25 minutes
- Category: Dessert
- Method: Baking
- Cuisine: French
Nutrition
- Serving Size: 1 slice (1/8 of crust)
- Calories: 210
- Sugar: 6g
- Sodium: 90mg
- Fat: 13g
- Saturated Fat: 8g
- Unsaturated Fat: 4g
- Trans Fat: 0g
- Carbohydrates: 20g
- Fiber: 1g
- Protein: 2g
- Cholesterol: 45mg