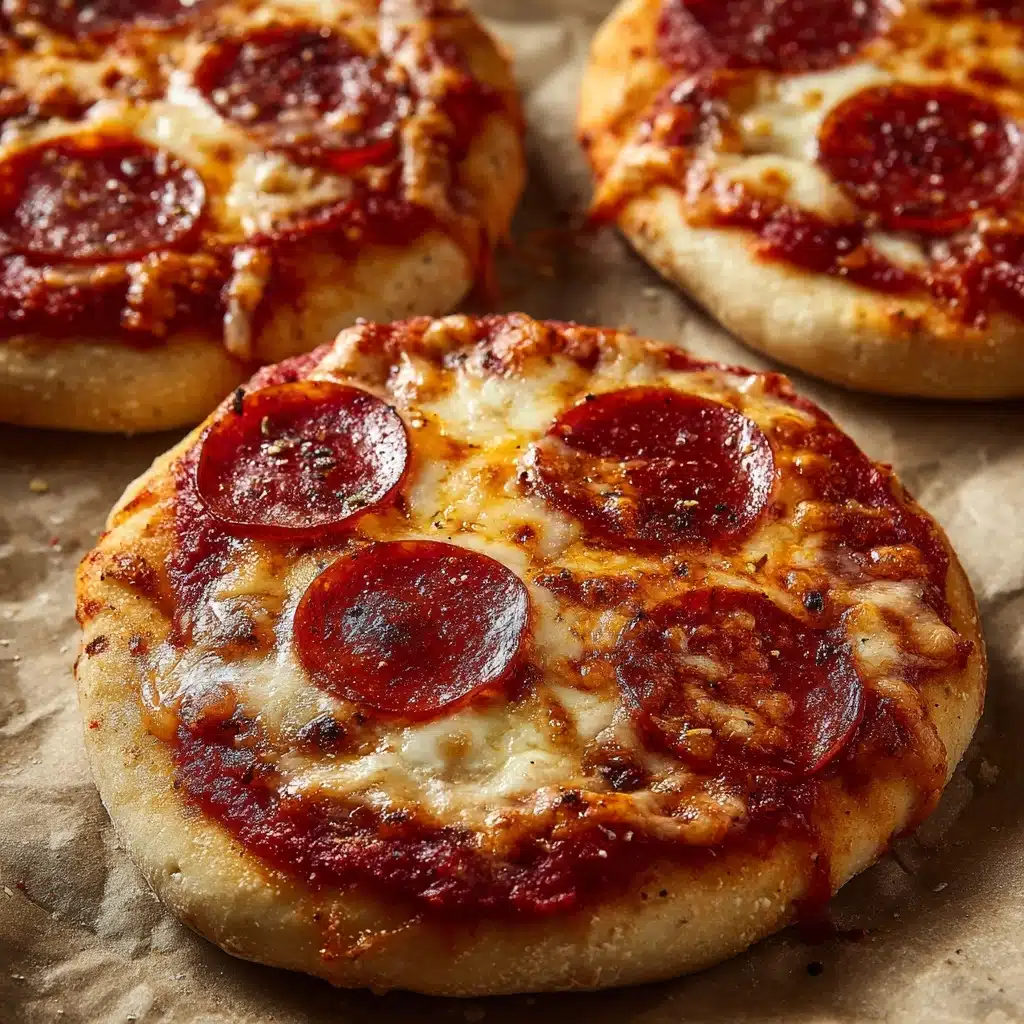
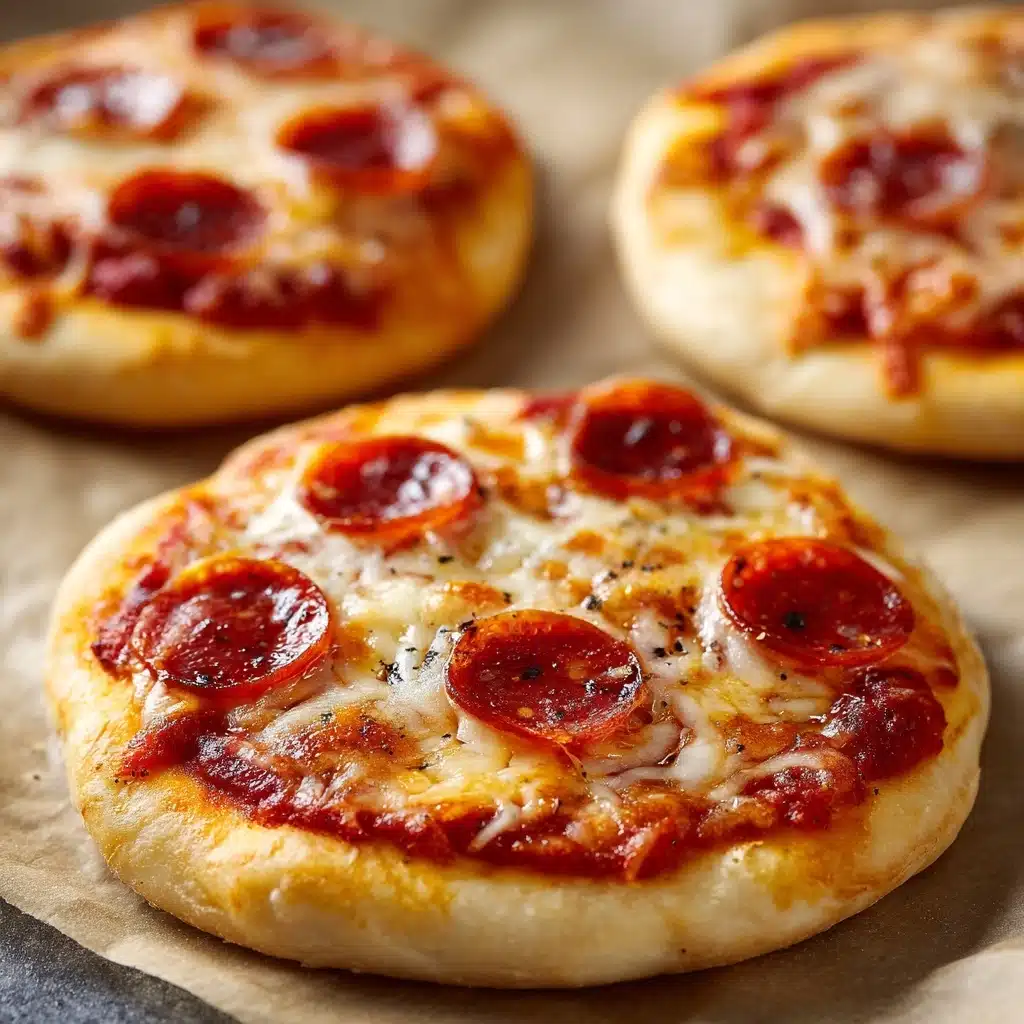
Mini Lunchbox Pizzas Recipe
If you’re hunting for a bite-sized treat that’s both fun to make and absolutely irresistible, look no further than this Mini Lunchbox Pizzas Recipe! These adorable, cheesy pizza cups are the ultimate grab-and-go snack for kids and adults alike. They pack all the classic pizzeria flavors you love into a portable, hand-held package—perfect for school lunches, after-school snacks, or even party platters. With a prep time that whizzes by, you’ll have a batch ready before you can say “pizza night!” Get ready to add a new staple to your family’s snack rotation.
Ingredients You’ll Need
Every ingredient in this Mini Lunchbox Pizzas Recipe is carefully chosen for maximum flavor with minimal fuss. Each one plays a crucial role in delivering the classic pizza taste and the perfect bite-sized texture. Here’s what you’ll need to get these irresistible little pizzas on your table:
- Refrigerated biscuit dough (8-count): These create a fluffy, golden crust that’s easy to mold into muffin tins and delivers that classic pizza base.
- Pizza sauce (1/2 cup): Use your favorite brand or homemade sauce for that signature tangy tomato flavor in every bite.
- Shredded mozzarella cheese (1 cup): Melts beautifully for that gooey, stretchy cheese pull that makes all pizzas magical.
- Mini pepperoni slices or diced pepperoni (1/4 cup): Adds a savory, meaty burst—swap for veggies if you like!
- Dried oregano (1/4 teaspoon): Brings a hint of herby warmth that elevates the pizza flavor.
- Garlic powder (1/4 teaspoon): Just a pinch gives the sauce and crust a subtle garlicky kick.
- Olive oil spray or cooking spray: Keeps everything from sticking and helps the crust turn a lovely golden brown.
- Optional toppings: Try diced bell peppers, mushrooms, or black olives for extra color, flavor, and veggie goodness.
How to Make Mini Lunchbox Pizzas Recipe
Step 1: Prep the Oven and Muffin Tin
Start by preheating your oven to 375°F (190°C). Lightly grease a muffin tin with cooking spray or olive oil spray—this ensures your mini pizzas pop right out without sticking. Prepping your tin at the beginning keeps everything moving smoothly once the assembly starts.
Step 2: Shape the Biscuit Dough
Pop open your can of refrigerated biscuit dough and separate each biscuit. Flatten each biscuit into a round about 3 inches wide—this is the perfect size to fit into a standard muffin cup. Press each dough round into the bottom and slightly up the sides of each muffin cup, forming a little pizza “crust bowl.” This step is fun for kids to help with!
Step 3: Add the Sauce
Spoon about 1 tablespoon of pizza sauce into the center of each biscuit crust. Spread it gently so it covers the bottom, but don’t go all the way to the edge—this keeps the sauce from bubbling over and makes every bite flavorful.
Step 4: Layer on Cheese and Toppings
Sprinkle a generous pinch of shredded mozzarella into each cup, right on top of the sauce. Then add a few mini pepperoni slices or your favorite toppings—this is where you can get creative! The more colorful the toppings, the more appealing these little pizzas look in a lunchbox.
Step 5: Season and Bake
Finish each pizza with a sprinkle of dried oregano and garlic powder. Slide the muffin tin into your preheated oven and bake for 12 to 15 minutes, or until the cheese is melted, bubbly, and just starting to brown, and the crusts are golden. Your kitchen will smell just like your favorite pizzeria!
Step 6: Cool and Serve
Let the mini pizzas cool in the tin for about 5 minutes—this helps them set and makes them easier to remove. Use a butter knife to gently lift them out. Serve them warm for melty cheese perfection, or let them cool completely to pack in lunchboxes.
How to Serve Mini Lunchbox Pizzas Recipe
Garnishes
Elevate your Mini Lunchbox Pizzas Recipe with a sprinkle of fresh chopped basil, a dash of red pepper flakes for spice-lovers, or a dusting of grated Parmesan. These small touches add big flavor and make your mini pizzas look extra special.
Side Dishes
Pair these mini pizzas with crisp carrot sticks, a small salad, or some apple slices for a well-rounded meal. They’re also fantastic alongside a cup of tomato soup or a handful of crunchy pretzels for a snacky lunchbox spread.
Creative Ways to Present
Try stacking a few mini pizzas on a fun platter for parties, or tuck them into colorful lunchboxes with little dipping cups of ranch or marinara. You can even skewer them with toothpicks and serve them as “pizza pops” at your next gathering!
Make Ahead and Storage
Storing Leftovers
Leftover Mini Lunchbox Pizzas Recipe can be stored in an airtight container in the refrigerator for up to three days. They hold up beautifully and are just as tasty chilled as they are warm, making them a perfect make-ahead snack or lunchbox addition.
Freezing
To freeze, arrange the cooled mini pizzas in a single layer on a baking sheet and freeze until solid. Once frozen, transfer them to a zip-top bag or airtight container. They’ll keep for up to two months—simply pop out as many as you need for a quick, homemade snack anytime!
Reheating
For best results, reheat your mini pizzas in the microwave for about 30 seconds or in a toaster oven until warmed through. This keeps the crust tender and the cheese melty. If reheating from frozen, add an extra minute or two to the cook time.
FAQs
Can I use homemade biscuit dough instead of canned?
Absolutely! If you have a favorite homemade biscuit recipe, feel free to use it. Just portion the dough into eight rounds and proceed as directed. It’ll add a lovely homemade touch to your Mini Lunchbox Pizzas Recipe.
What other toppings work well?
Get creative! Try cooked sausage, ham, pineapple, jalapeños, or any veggies your family loves. Just be sure to chop toppings small so they fit nicely in the muffin cups and cook evenly.
Are these good for meal prep?
Definitely. The Mini Lunchbox Pizzas Recipe is tailor-made for meal prep. Make a batch on Sunday, and you’ll have a ready-to-go snack or lunch option for busy weekdays. They’re tasty hot or cold!
Can I make these gluten-free?
Yes! Use your favorite gluten-free biscuit dough or pizza dough. Just check that all your toppings and sauces are gluten-free, too, for a safe, delicious result.
Do these taste good cold?
Surprisingly, yes! They’re delicious right out of the fridge, making them perfect for lunchboxes or picnics. The flavors really shine, and the texture is still soft and satisfying.
Final Thoughts
I can’t recommend this Mini Lunchbox Pizzas Recipe enough—it’s a true crowd-pleaser that brings a smile to every face, little or grown-up. With just a few simple steps and endless ways to customize, you’ll find yourself reaching for this recipe again and again. Give it a try and watch these mini pizzas disappear faster than you can say “seconds, please!”
Print
Mini Lunchbox Pizzas Recipe
- Total Time: 25 minutes
- Yield: 8 mini pizzas 1x
- Diet: Non-Vegetarian
Description
Mini Lunchbox Pizzas are a fun and convenient snack perfect for kids and adults alike. Made with refrigerated biscuit dough as the crust, these bite-sized pizzas are topped with tomato sauce, mozzarella cheese, pepperoni, and a hint of oregano and garlic powder. Quick to prepare and easy to customize with your favorite toppings, they bake up golden and bubbly, making a delicious portable meal or snack that’s ideal for lunchboxes or casual gatherings.
Ingredients
Crust
- 1 can refrigerated biscuit dough (8-count)
Toppings
- 1/2 cup pizza sauce
- 1 cup shredded mozzarella cheese
- 1/4 cup mini pepperoni slices or diced pepperoni
- 1/4 teaspoon dried oregano
- 1/4 teaspoon garlic powder
- Optional toppings: diced bell peppers, mushrooms, or black olives
Other
- Olive oil spray or cooking spray
Instructions
- Preheat and Prepare Muffin Tin: Preheat your oven to 375°F (190°C) and lightly grease a muffin tin with cooking spray to prevent sticking.
- Shape the Crust: Separate the biscuit dough and flatten each biscuit into a 3-inch round. Press each round into the bottom and slightly up the sides of each muffin cup to form a pizza crust.
- Add Sauce: Spoon about 1 tablespoon of pizza sauce into each biscuit crust, spreading slightly to cover the base.
- Layer Cheese and Toppings: Top each with a generous pinch of shredded mozzarella cheese and add a few mini pepperoni slices or your choice of optional toppings like diced bell peppers, mushrooms, or black olives.
- Season: Sprinkle each mini pizza with a pinch of dried oregano and garlic powder to enhance the flavor.
- Bake: Place the muffin tin in the oven and bake for 12–15 minutes or until the cheese is melted and bubbly and the biscuit crusts turn golden brown.
- Cool and Serve: Allow the mini pizzas to cool for about 5 minutes before removing them from the muffin tin. Serve warm or let cool completely to pack in lunchboxes.
Notes
- These mini pizzas can be made ahead and stored in the refrigerator for up to 3 days. Reheat in the microwave or enjoy cold.
- For a healthier option, try using whole wheat biscuit dough.
- Feel free to customize with your favorite pizza toppings to suit different tastes.
- To keep pizzas crisp when packing for lunch, include a small ice pack to maintain freshness.
- Prep Time: 10 minutes
- Cook Time: 15 minutes
- Category: Snack
- Method: Baking
- Cuisine: American
Nutrition
- Serving Size: 1 mini pizza
- Calories: 160
- Sugar: 2g
- Sodium: 400mg
- Fat: 8g
- Saturated Fat: 3g
- Unsaturated Fat: 4g
- Trans Fat: 0g
- Carbohydrates: 16g
- Fiber: 1g
- Protein: 6g
- Cholesterol: 15mg